I flew back Saturday after going to work with Frank Glenn on colts, mostly to learn how to eliminate endshake. In general, it's what you don't know that you don't know that causes the most harm, so having someone that knows what they are doing can be priceless.
- If you don't know an area it's very easy to do something stupid that seems fine. An example from when I picked up a file for the first time a while back: filing by sawing back and forth! Never occurred to me that it was wrong, and it's so stupid most gunsmithing books wouldn't even think to say "don't to that!"
- It's easy to have assumptions you don't think to check that will make things very hard. An example from this trip: I thought a gun had an endshake problem b/c the cylinder would contact the barrel, when in fact the factory had simply filed the barrel unevenly, leaving the right end too high. Didn't occur to me that a fairly pristine gun from the 50s would have a factory issue. Trust nothing (or "check everything") otherwise you'll get really confused.
- There's one real book on colt DAs and it's missing a bunch of stuff, unfortunately. (Dfaris stop writing fiction and do an update!)
In any case, the regime was simple: I flew out 4 colts with alleged endshake problems, my dad drove down two that weren't working, and I spent three days getting through them with Frank. I also learned how to curve the sear on a trigger using a torch so that you can eliminate stacking.
What we have to work with
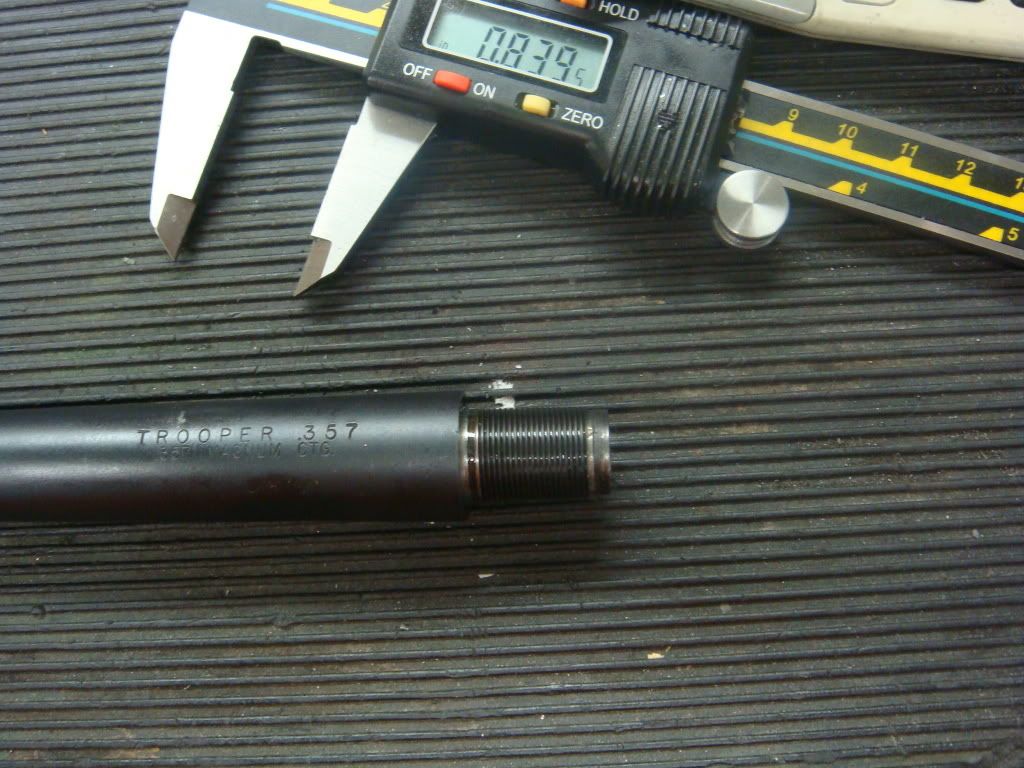
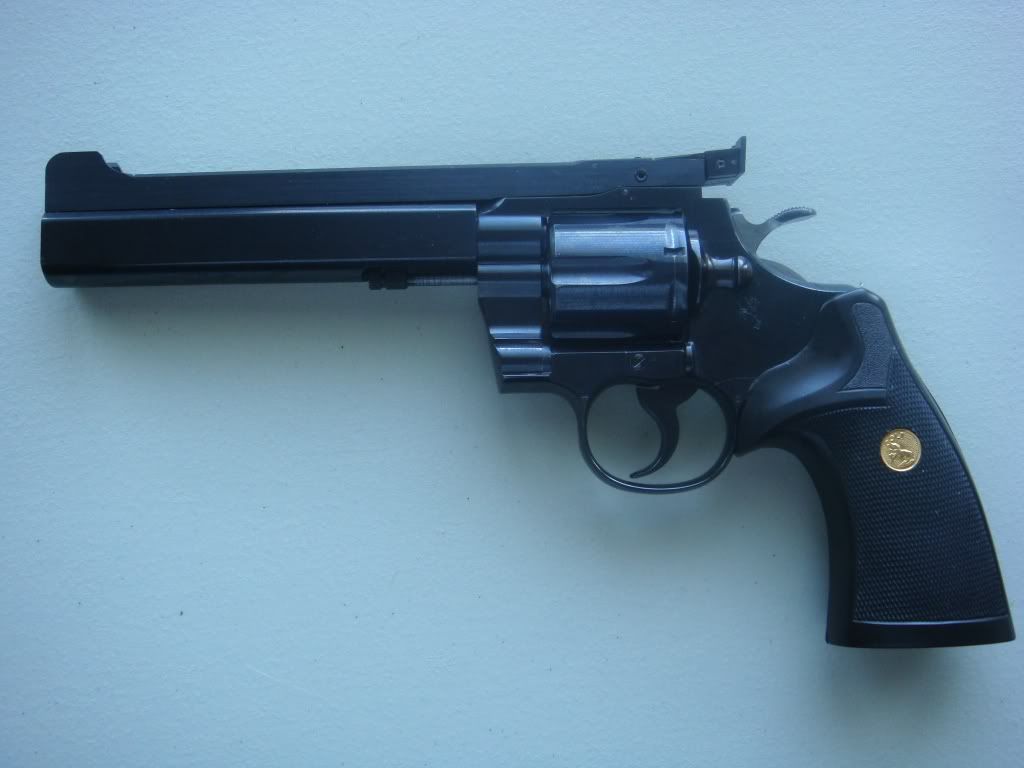
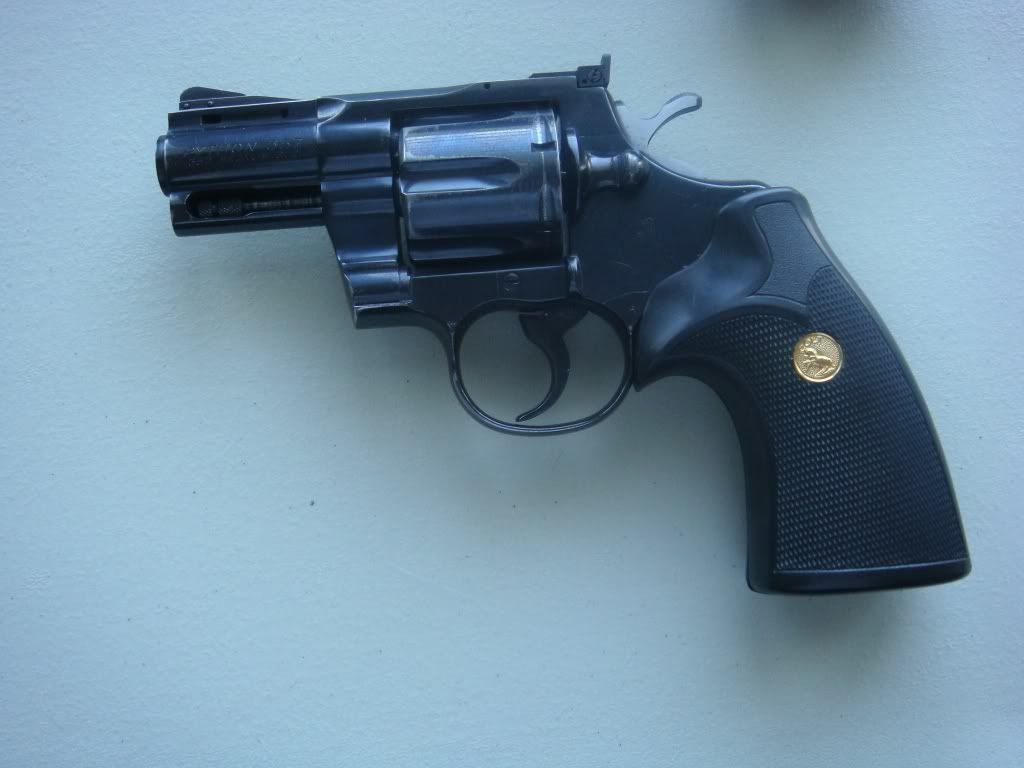
Here's my initial four (dads' are not pictured). A really nice handling old style 357 trooper, a bull barreled python, a snub python, and a 1957 python that someone jacked up the front sight on and sold the checked grips:
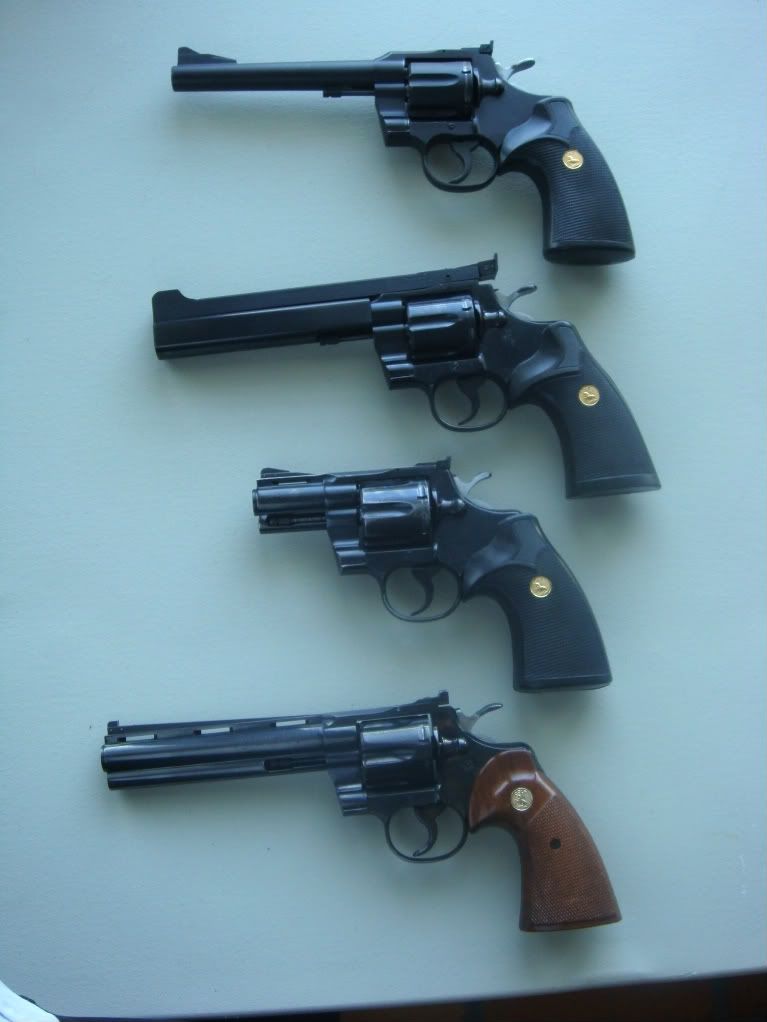
All were selected to have endshake issues: excessive play or, worse, direct contact of the cylinder and barrel face.
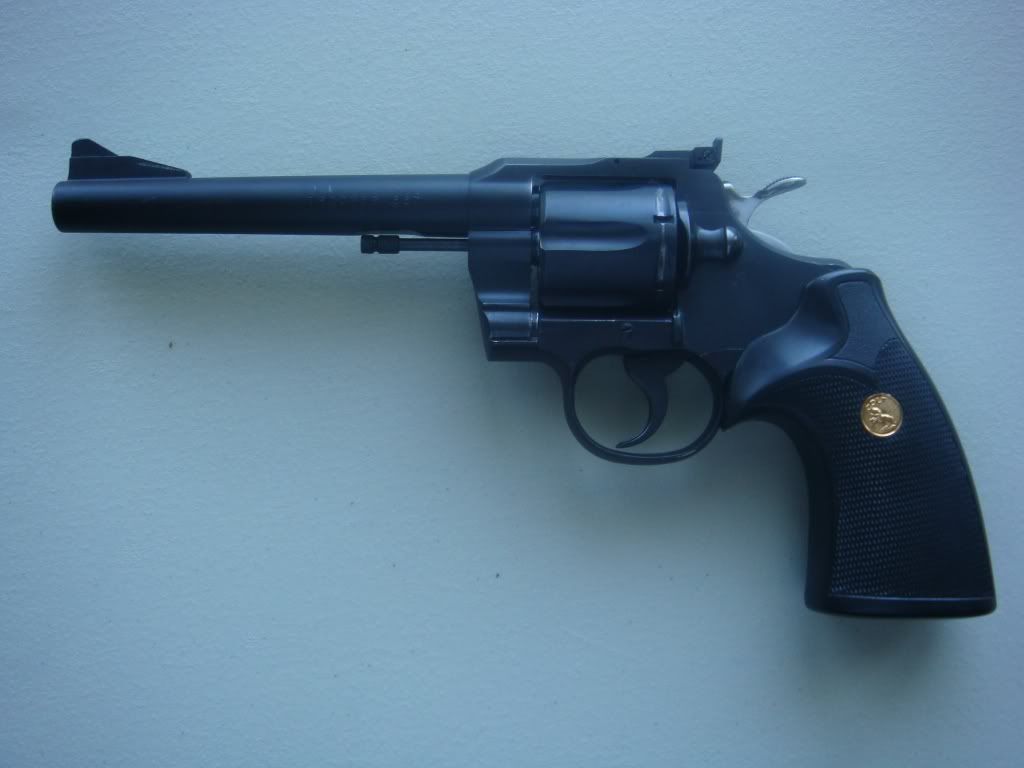
First gun: Trooper.
We started with the trooper. Max is around .012 and min is around .004, for an endshake of .008! Quite a bit over the .003 recommended as the absolute max by the shop manual and others.
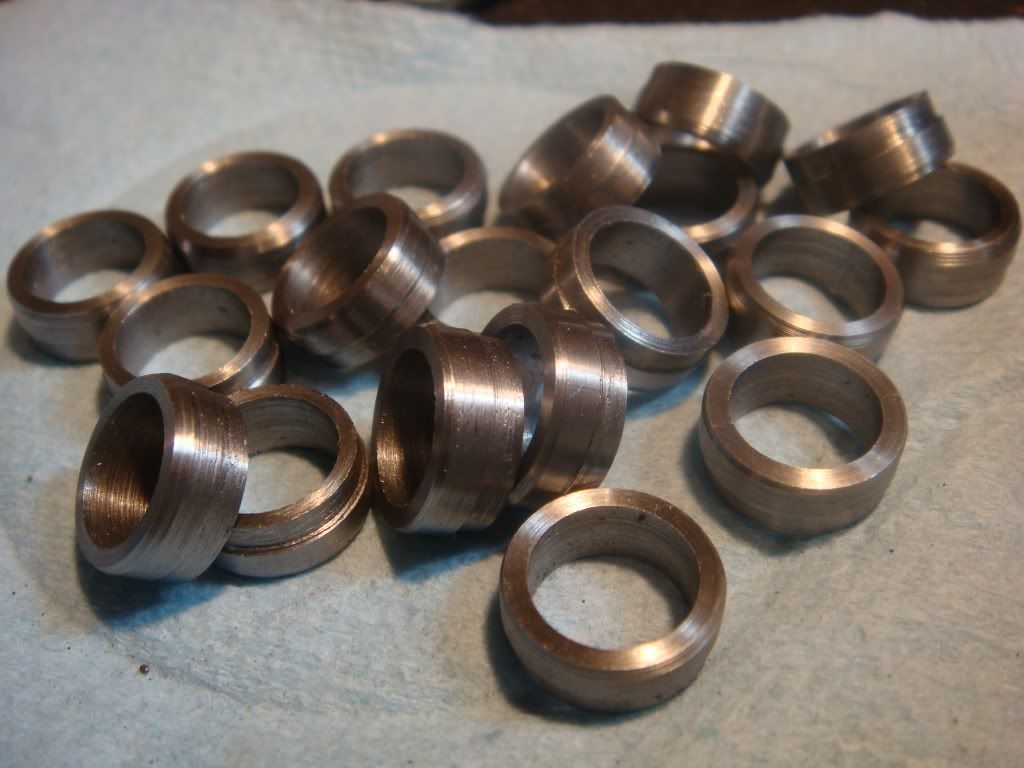
The endshake gets fixed using the "traditional" way of replacing the cylinder collar with a press fit bushing that has a longer collar, thereby preventing the cylinder from moving forward.
Here's a photo of a bunch of bushings I premade before going to out to AZ. Unfortunately I bored the internal too wide, which meant they weren't very useful. Most people make a bushing after boring the cylinder out: that way you can machine it to exactly the size of the hole you made.
You put one in by boring a hole in the cylinder that is slightly smaller than the diameter of the bushing and then pressing it in so that the thinner "collar" part sticks out of the cylinder. This collar is what touches the crane. The longer it is, the less the cylinder can travel forward. If the bushing collar is long enough, there will be 0 forward movement, which means the max and min barrel/cylinder gaps will be the same, which means the endshake is 0. You can roughly calculate the length of the bushing collar needed by adding the current cylinder collar height to the max barrel gap. Of course, you do not have to get that aggressive. In any case you leave the bushing a bit longer than you want and then cut it down to what you need very slowly, checking the fit in the revolver before each step. (You can't add metal so if you made it too short you have to remake from scratch.)
And, of course, before doing any of this you need to make sure there is enough headspace (room at the back of the cylinder) by using go/no go gauges appropriately.
I used to be a hardcore fanatic about the wonders of 0 endshake. One theme running throughout our story is that 0 endshake is not the wondrous nirvana state that a gun *user* tends to assume but rather is a very brittle state that takes any existing imperfections the revolver has and multiplies it by a non trivial amount.
In order to have near 0 endshake, you need a collar that positions the cylinder right against the rear of the frame and prevents all forward motion (or more aggressively: pushing against the rear). At least two problems explode out of this situation. First, if any two contact surfaces are rough, they will be pressed tightly against each other, with obvious consequences. Second, if the cylinder cannot move forward, then as it rotates, if it encounters any resistance it must be forced straight through it. With some play the cylinder can often work around such things. The practical result? For each of the guns where we set endshake to near 0 there was a substantial epilogue of playing "why is the revolver binding and how to fix it?" that took longer, generally, than doing the dramatic surgery of shoving a bushing into the core of the cylinder.
Ok. Enough chitchat, how does this work?
- Put the cylinder in a 4 jaw chuck on a lathe.
- Use an indicator to make sure that the hole through the cylinder has less than .0005" runout (variance) in it's position
- Use a carbide boring tool (the cylinder is hardened) to widen the internal hole so that the bushing will fit. (You can use HSS, but if it gets dull at the wrong moment things can not be super happy.)
- At each step, measure, remeasure, re double check.
- After you have made the dimensions you planned on, measure the dimensions you have and make the bushing based on them: first get the diameter right (final check: use the cylinder), then cut the right sized hole through it (final check: use the crane), then get the bushing collar (constantly check using a micrometer).
- Press fit it into the collar.
- Cut it back to fit in the frame. If it's too long the cylinder won't swing in, so slowly cut back. If it fits in, if there is binding when you rotate the cylinder by hand check that the collar isn't touching the barrel.
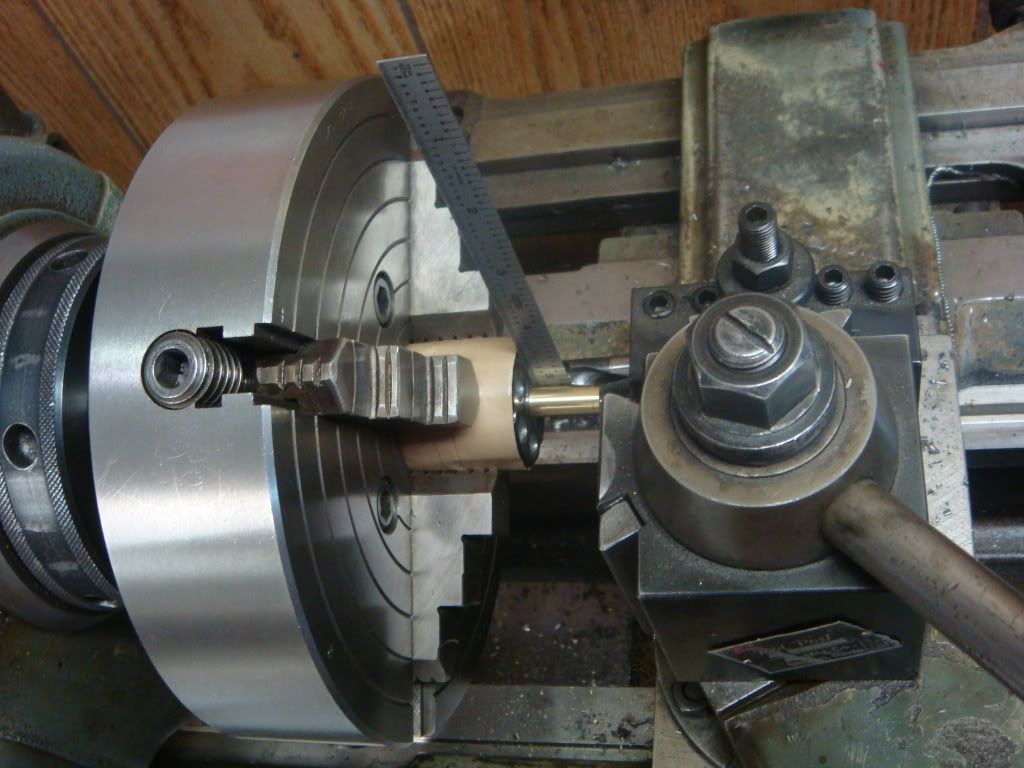
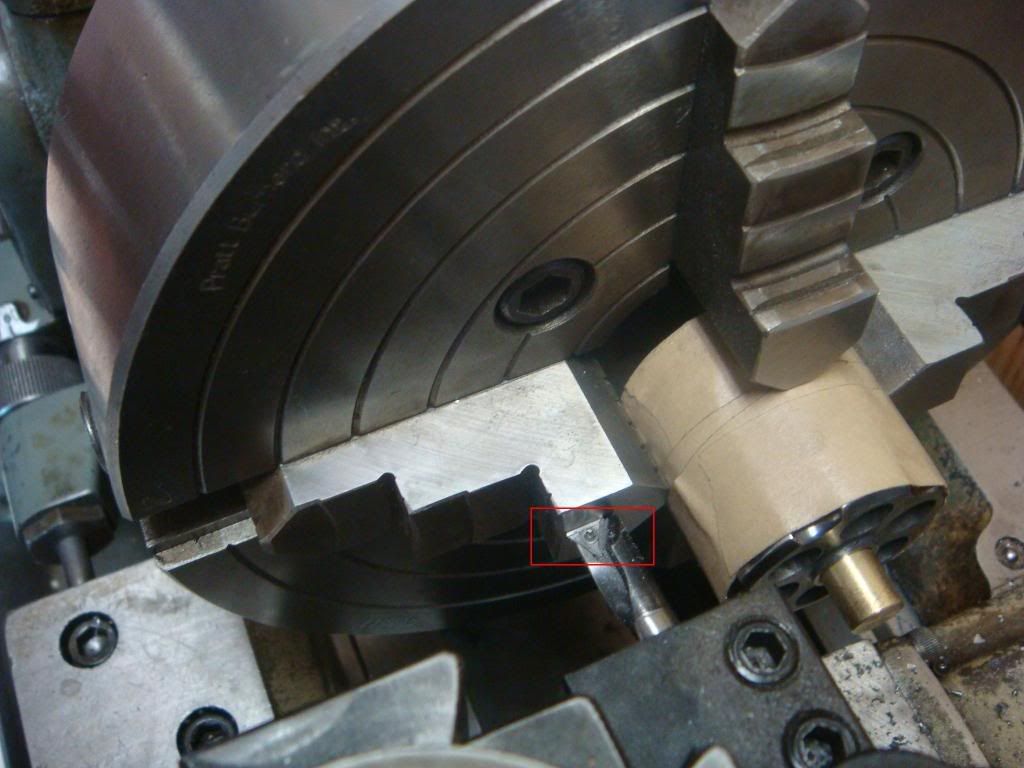
Notice the use of a straight edge against a brass rod (custom made) that goes through the inside of the cylinder to set the cutter on the centerline of the cylinder: you need this to position the carbide cutter (the piece pushing against the straight edge). If the straight edge isn't perpendicular to the lathe bottom, you haven't centered the tool.
You also check that the carbide cutter fits exactly flat to the front of the cylinder so that the bottom of the bushing hole will be perpendicular to the axis:
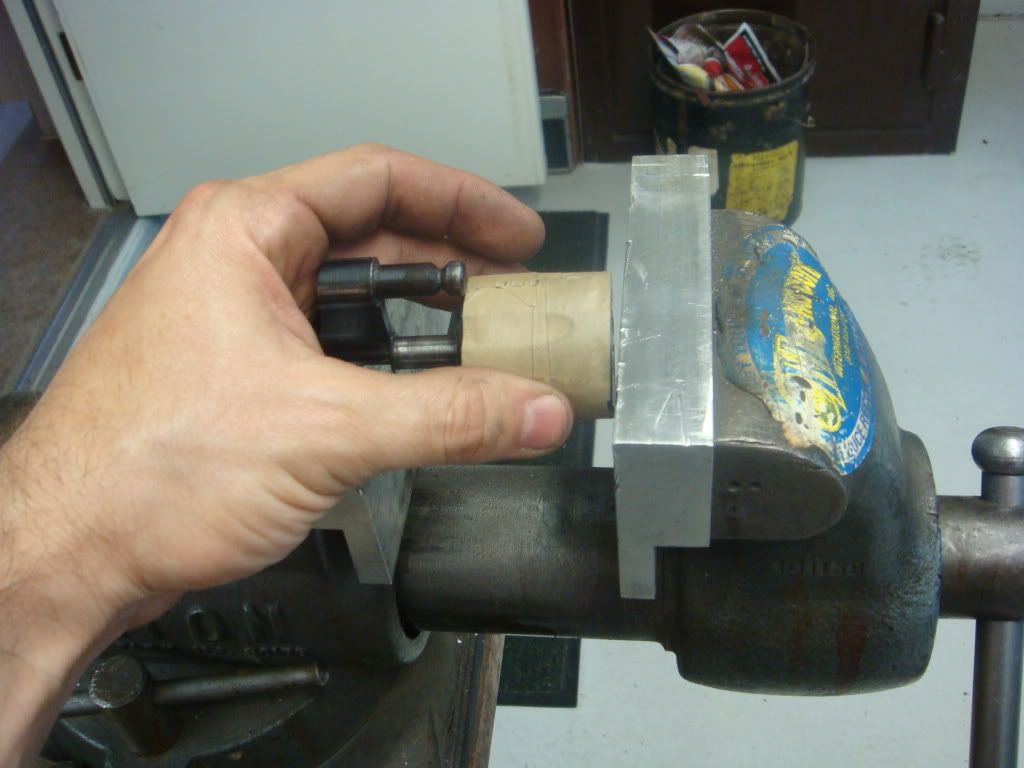
This is one of the many places where we need more photos than what we have. Here's one of using the crane and a vise to press fit (I'm going to make a tool for this):
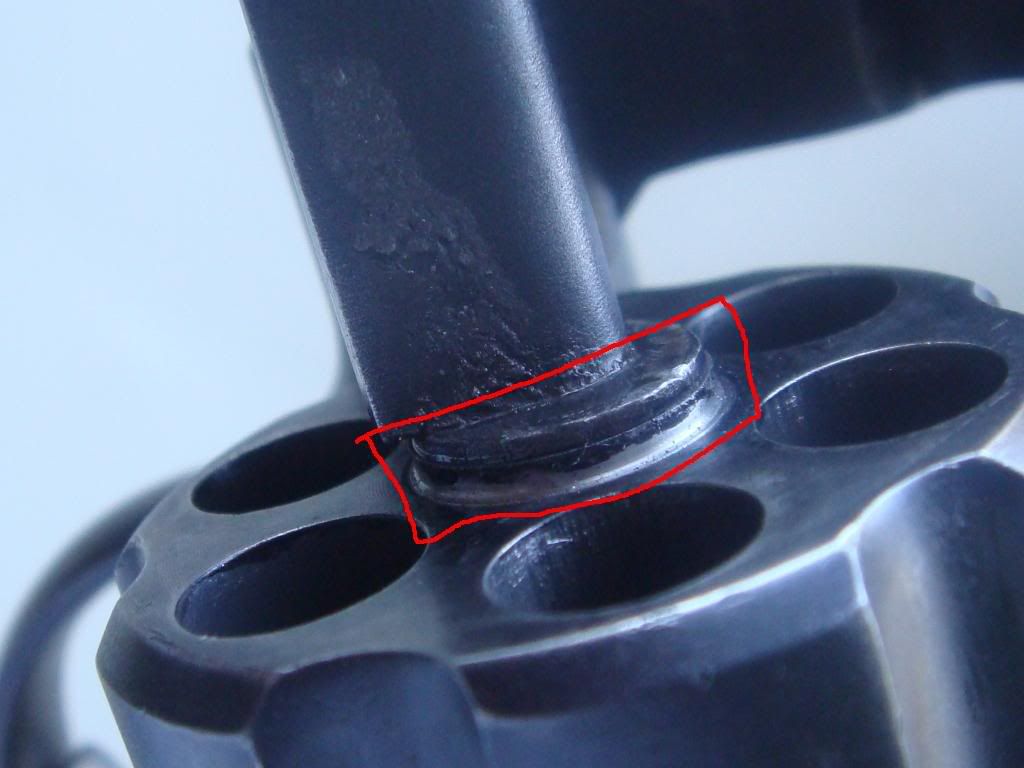
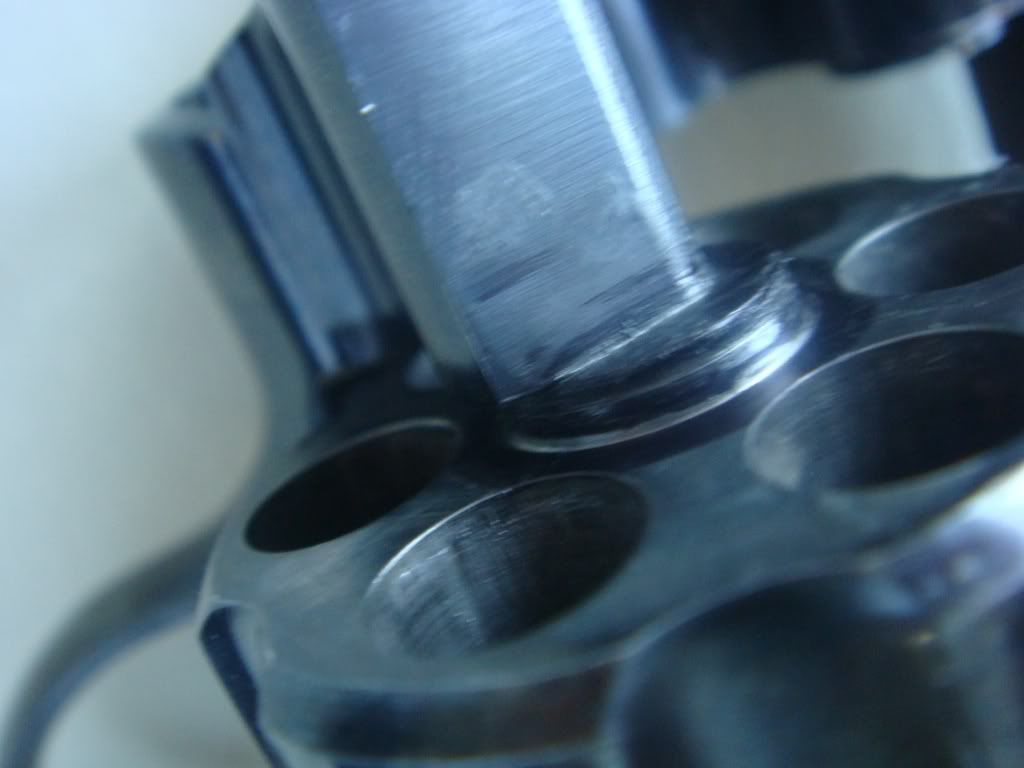
Here's a side view of the bushing in the cylinder: all you can see is the faint line of silver:
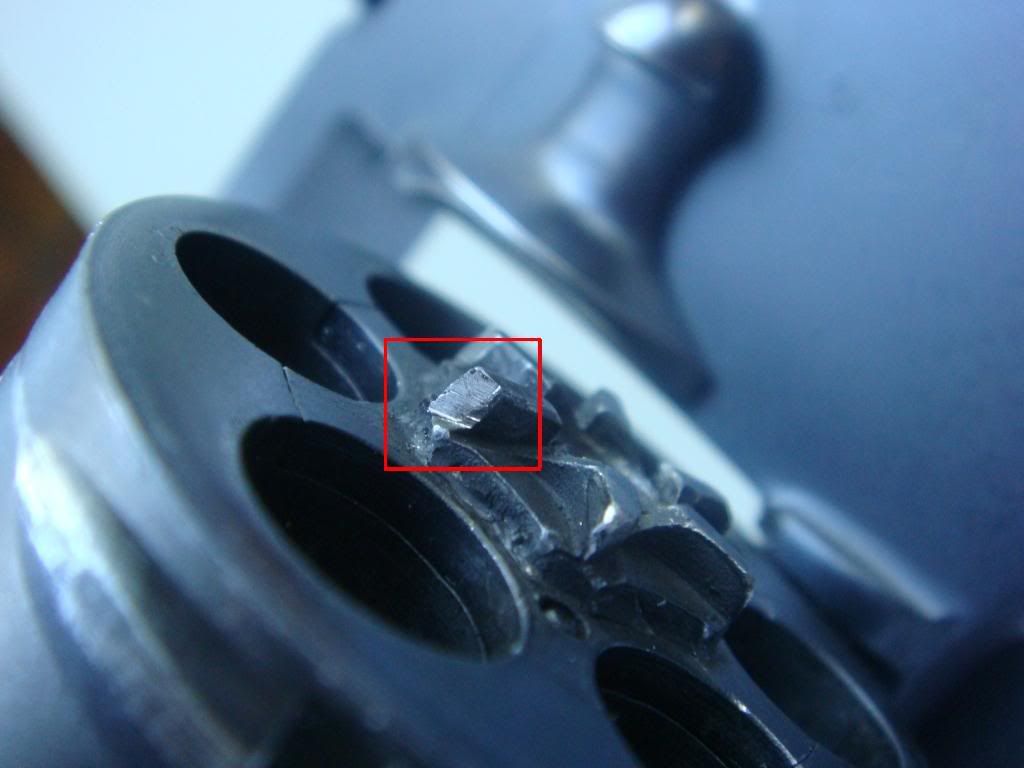
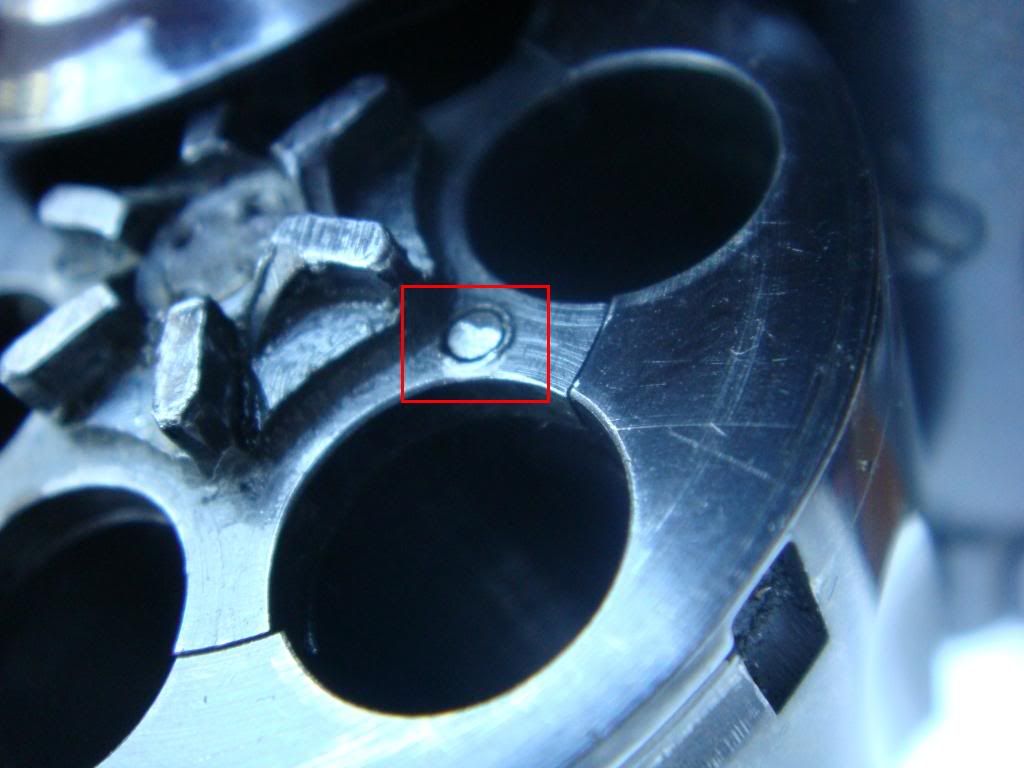
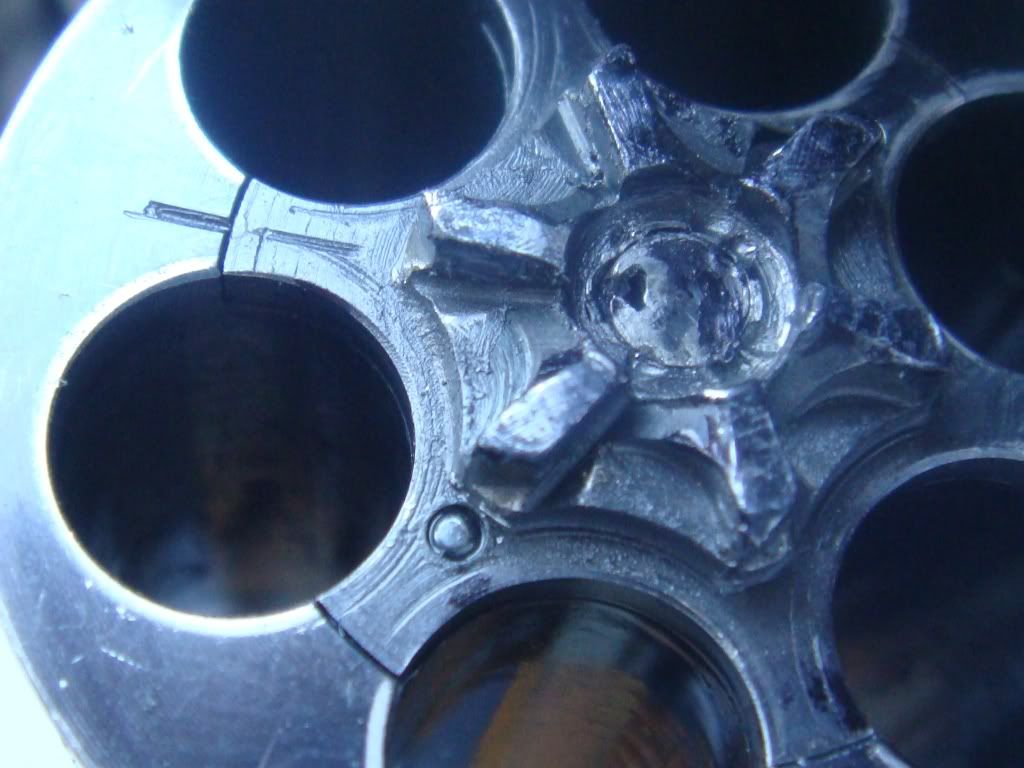
As promised: the end end result was near 0 endshake. As also promised, this caused problems. The cylinder would rotate fine usually, but on one chamber would bind up. After a bunch of poking around (mostly marking contact surfaces w/ a sharpie marker and seeing if there was suspicious rubbing) we figured out that for that one cylinder the top hand didn't move it enough around and so the bottom hand would slightly bind. One possible fix was would be to lengthen the hand. In this case, since there was only one chamber that had the problem, evening that ratchet lug to be like the others was more appropriate. You can see this shiny mark from filing (barrett file with a safe edge):
Now things are much smoother. There is still slight binding. I'm planning on shooting the gun a bit before fussing around more since the breaking in will likely cure things: removing metal in the current artificial state isn't a super idea since you can't put it back.
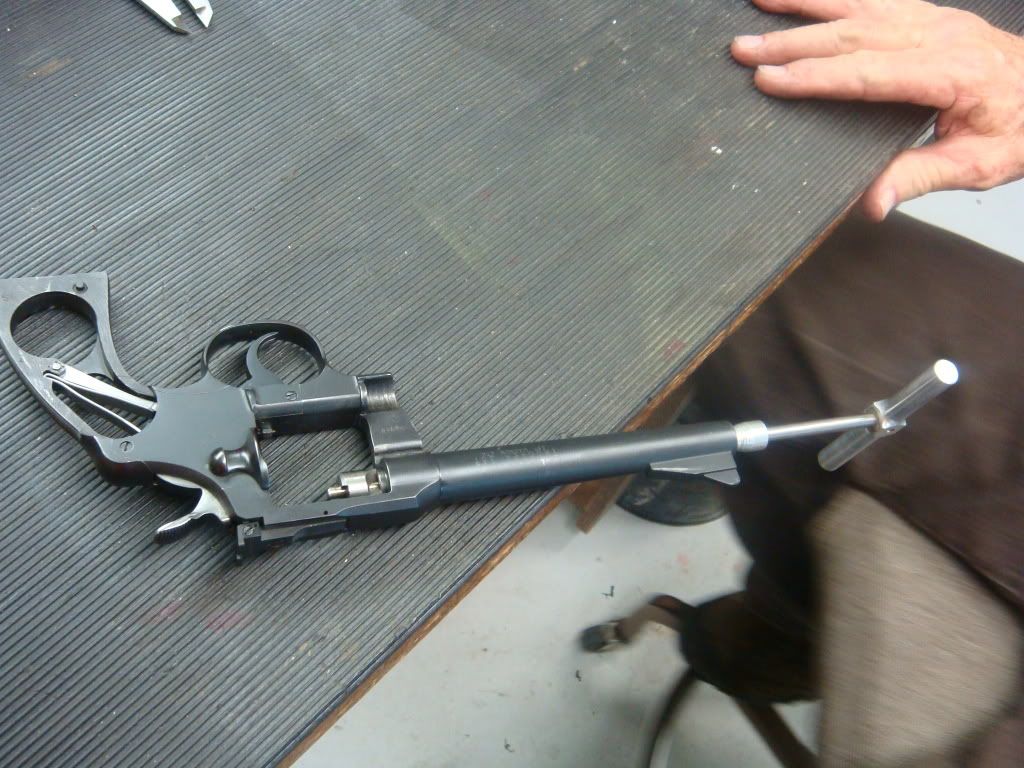
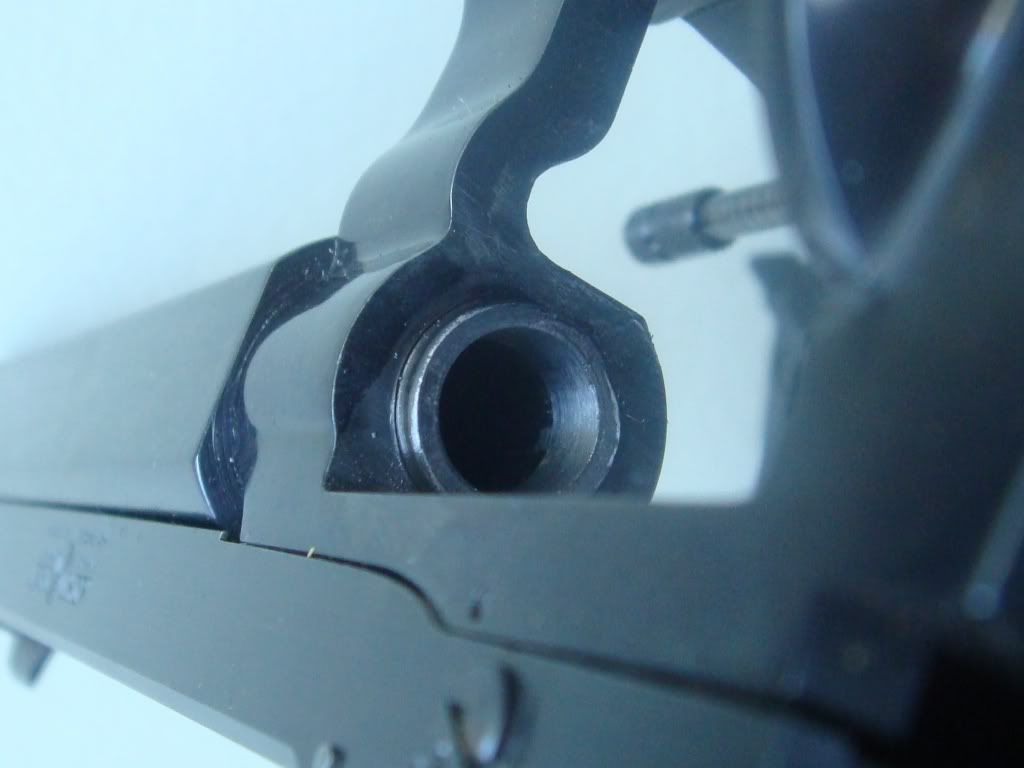
Of course, we fixed the endshake, but now the min barrel gap is the same as the max: .012. That's a bit excessive. The barrel gets removed,
The shoulder of the barrel gets cut back in the lathe almost one turn, you screw the barrel on to see where the front sight will sit, cut more, check, etc. (What are the different ways that people check that the front sight is at 12 o'clock? Using witness marks?)
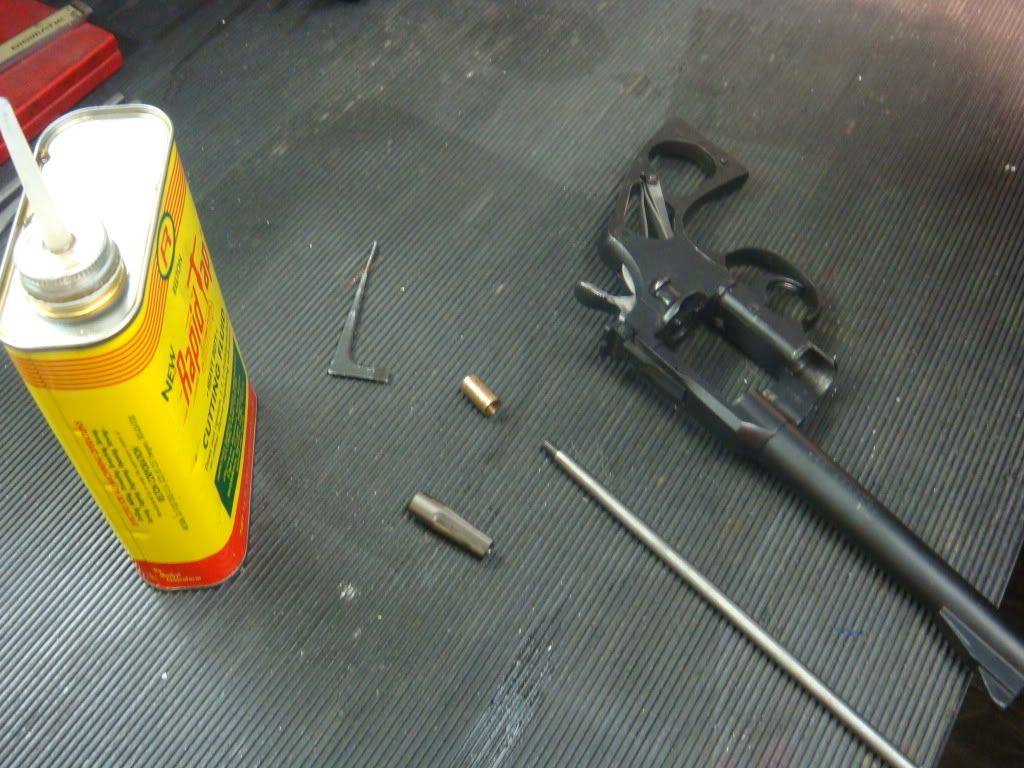
One full turn back is pretty far. So we use a back facing cutter and a T handle (and cutting fluid!) to remove part of the barrel:
We keep going til the gap between barrel and cylinder is what we want. We then recut the forcing cone using the same T handle, with a different 9 degree cutter (note the aluminum guard for the muzzle and the brass pilot for the inside):
Here's the end of the barrel when done; you can see the shiny part where the lands in the forcing cone were removed:
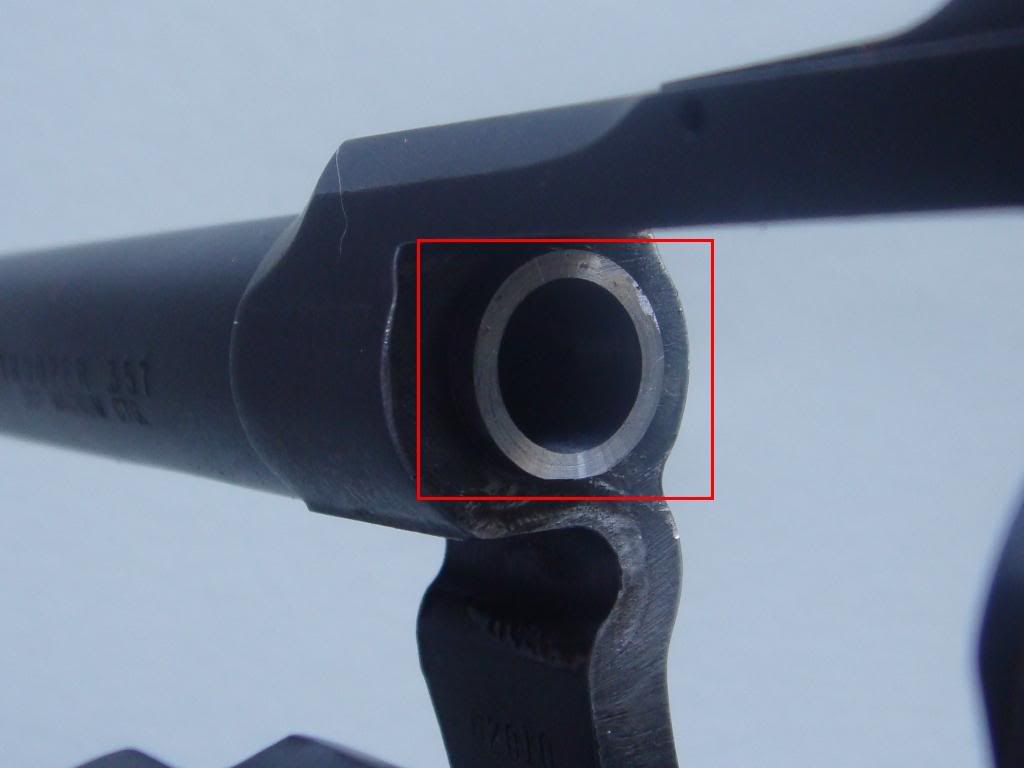
The chatter in the barrel that you can see should have probably been filed away; it definitely should be after each cutting step since these marks will propagate.
And there you have the first one!
Bull barrel python
In this case the endshake was excessive, so I put in a bushing. Things went smoothly! Before this trip, I thought fixing endshake was a fairly dramatic, complicated process. In fact it's actually mostly just machining, rather than "gunsmithing" (Where by "gunsmithing" I mean the often difficult struggle of figuring out what is actually causing a problem that can have many possible sources.) If you go slowly and recheck everything, the end result is under your control. This is a nice situation.
Here's the bushing after we jam it into the cylinder as before:
One odd thing was that they hadn't fit the ratchet pins, so the cylinder would rock on a flat surface. That got filed down:
Finally, when you closed the cylinder and rotated it by hand (holding trigger back slightly so the bolt cleared) it would bind. After poking around, it turned out that when they put the barrel on they didn't cut the threads, so there was no clearance. These got filed down. Problem solved. In general when you cut the barrel shoulder back (as with the trooper above) you have to remove the first thread or so since otherwise this binding will occur.
After all this, the max gap was .006, but it got left that way. Perhaps not super accurate at long range, but at least will be fairly reliable even with a billion lead bullets :)
The forcing cone had been miscut (less than the min indicated by a plug gauge) so that got cut using the T handle setup from before. The end result:
The most interesting thing was that removing a .001 of the material in the right place changed this from a not very good action to one of the best I have (well, with a spring change too). I had put a curved sear trigger in this gun previously (http://coltpython.blogspot.com/2009/05/removing-stacking-in-bull-barrel-python.html). However, even with a pull of around 7lbs and all stacking removed, the bolt drop on it always made the last bit of the rotation feel very rough and unpleasant.
Since I was there with Frank we went over it to find the problem. One cliched cause of a sharp bolt drop is that the bolt falls off the side of the rebound cam rather than the front of the triangle. Here it *did* fall off the front of the cam as it should, however, it would then go off sideways before traveling down the face. This small deviation from perfect either caused or signaled there was a problem (still unclear to me). A compounding issue: I had previously bent the bolt against the rebound in order to prevent it from falling off the cam immediately (as it did when the gun first showed up). However that pushed the bolt drop pretty late, so I had to keep the bolt spring at full strength (or it would drop later) which made the bolt "click" even more pronounced.
After studying the rebound, Frank pointed out that the front of the triangle had a small flat surface rather than a sharp edge. This was fixed by filing.
Unfortunately, as is often the case with colts, another problem then came up. In this case, the bolt now traveled over the cam correctly, but then got stuck, dropping even later or not at all (rather than sooner, as is often the case when removing material from the front of the rebound cam). Removing a slight amount of material from the tail of the bolt right on the "bevel" of the fixed tail this. In total removing a few file strokes on the rebound, and a few strokes of a stone on the bolt made the bolt drop much less sharp.
Adding happiness to happiness, I was then able to bend the bolt tail slightly away from the cam so that it dropped slightly early and then weaken the bolt spring by about 1/2. The result is now the bolt drop is imperceptible other than a sound (no feel at all!) and the bull barrel now has close to (or has) the smoothest of any I've done!
2.5" snub
Here's our gun:
I had spent a bunch of time fixing neglect on this and putting in a curved trigger:
Fixing: http://coltpython.blogspot.com/2009/05/part-i-fixing-most-loose-25-python-ever.html
The main remaining problem was endshake. This we fixed in the usual way, which I'll skip other than the required bushing porn:

The other bushings were shortened by using a 3 jaw chuck and some filing. This one I cut down to the exact size a 4 jaw chuck just to be pig headed. The result is < .0005 endshake. This lack of endshake immediately exposed problems. Before there was about 1 lb of difference doing DA with the cylinder open and closed. Now there was over 3 lbs in the worst case! Fortunately, the sharpie trick turned up one main cause almost immediately: one ratchet lug was taller than the others (indicated by the sharpie mark on it being worn off while the others remained). I triple checked this and then filed down the one lug a couple short strokes, checked again, another stroke, check, etc til it was down as the others. This photo isn't particularly helpful since it's at the end where you can't tell much difference, but in any case:
A second lug issue (not shown) is that one of the bottom ratchet lugs was thicker than the other. You could tell this by cocking the hammer, holding it, pulling the trigger, then moving the hammer up and down: it would catch on the double action strut attached to the hammer. This ratchet, once found, got filed down to the thickness of the rest.
At this point, DA is much more even, though the weight is noticeably different with the cylinder open vs closed.
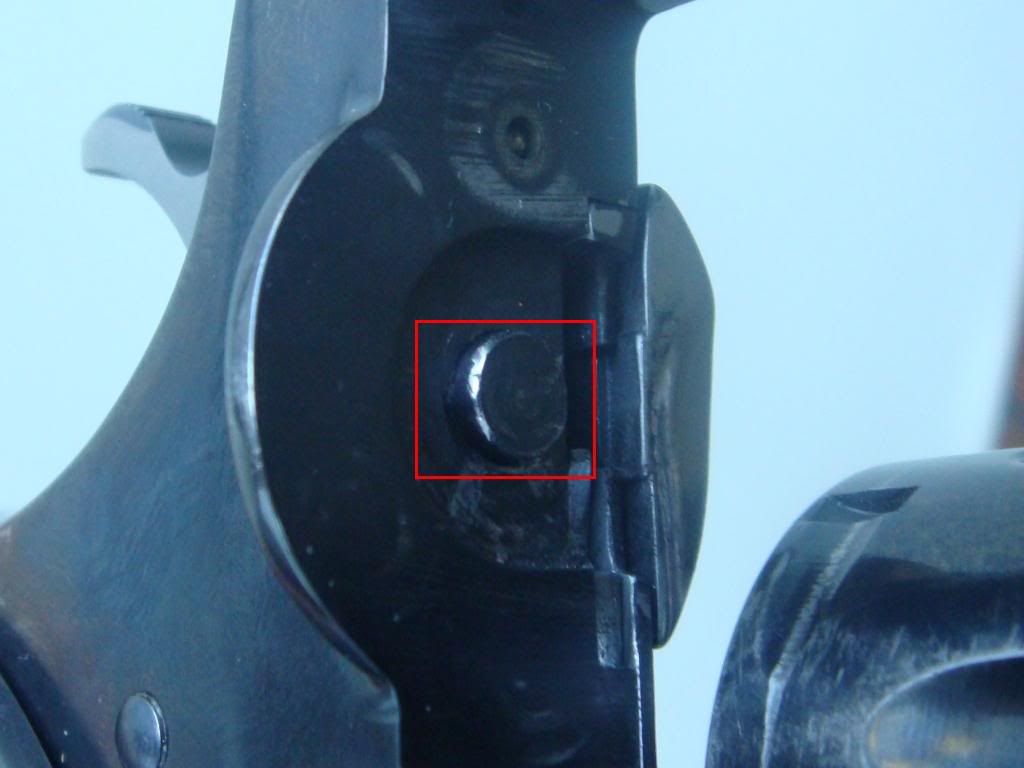
After poking around some more, it turns out that the cylinder latch pin I used to fix things previously was the problem. When I first got the gun, the cylinder would move laterally a bunch when you pushed on it. I had reduced that by using a new latch pin. This pin was unbeveled while the place it seated in the ratchet was curved. Since there was serious endshake this was ok, and actually (perhaps) demanded this mismatch: the unbeveled latch pin would still engage the ratchet even when the cylinder was pushed forward a bunch. However, when you removed endshake, the ratchet's rounded edged hole pressed against the unrounded end of the latch pin hard, causing noticeable binding. The solution was to manually bevel the pin on a polishing wheel. I did a pretty poor job, but it fixed the problem nonetheless. When you rotate by hand it goes smoothly. You can see the rough bevel in this photo:
I should probably just drop the original back in. And in the future use a jewelers lathe to bevel such things.
In any case: very tight gun now!
Bending Triggers
"Inexplicably" Frank's lathe broke for the first time in 20 years the second day I used it. I pointed out numerous times that this was entirely coincidental to me using it. Frank was too polite to point out the obvious.
In any case, while waiting the couple hours to get it fixed, he showed me how to bend triggers with a torch. It's easy enough that my gf did a few as well.

I put one I did in an m357 of my dad's and slicked up the action. Fixed numerous rebound issues (similar in ways to the bull barrel), weakened the bolt spring and some others, polished the hammer strut, sear, rebound and lubed it. The gun is now pretty damn sweet. No photos though.
And that's it. I found it to be a very useful trip.
While musing God's plan for my life, and mulling over several conversations about the mechanical ingenuous ways of predicting actions of parts in motion.....I found your adventure in diagnostic
ReplyDeleteanalysis and perseverance to suceed....BTW Frank sent me a Python several years ago to evaluate, I not only found his work to be credible, but thorough with a excellent attitude for sharing and improvement.....Appreciate the memories....
this revived......it seems so many folks get caught up in the money end they forget each gun must perform in all circumstances intended even if it means saving by taking....May the Creator
bless your efforts. FYI early models did not ride on the frame and maintained longer life with minimum end shake....hundreds of thousands of 357 heavy loads (35,000 to 40,000 cup) have beared that out....do not over look the depth of the bolt in the cylinder and its thickness as the maintain the longivity of alignment and ultimately rotating pressure on the hand...That little nob in center of the trigger can be used as trigger stop on the frame by tapping carefully with 6-32 and installing a allen head set screw and filling to length as the trigger clear the single action notch......lots of other good stuff maybe later.........still alive and faithful the Creator who gave His life that I may have eternity with Him and all those who will believe.........Jerry Moran; not a legend just a humble servent of the King.....
Good to hear from you sir! Have you been playing with any colts lately? Frank mentioned you just emailed him after perhaps 20 years of radio silence. He's a great guy. Very patient and clear speaking. If you can get him to make you a mess of ribs in his green egg I recommend it.
ReplyDeleteThat's an interesting point about the older models. I hadn't noticed any difference --- will have to dig a few out of the safe and look more closely. To be honest, I've not shot any of my 50s guns since the prices have gone up so high.
Nice point about the trigger stop --- I have one heavily modified python supposedly done by Travis Strahan with a bull barrel, modified to take moon clips and with a trigger stop exactly how you suggest. I haven't taken it apart to see what else he might have done.
My favorite has been a sherman roller action. I'm not sure it actually makes much of a difference compared to a Tedford curved sear, but at least it looks fancy :)
Good to hear from you. Very serendipitous --- I've just started doing colt-related work after a couple year hiatus. I retrofitted a CNC mill and lathe and am hoping to make some colt parts (rebound, hand, bolt, fiber optic front sight).
Appreciate the kind words, plan to call Frank this week......the FYI the roller idea is over 100 years old...Willy Korth figured he liked it for his high end Sport and Combat models....matching the place at which the .343 radius on the strut rolls with the =<.343 radius on the trigger timed with main spring tension is the key to constant felt trigger pull in double action.......grip angle that fits also facilitates consistant double action firing at high speed in the .ooo1 of seconds.....later trigger and hammers had wire cuts of design given to me by the Creator.......attitude still out performs what ever is next.....sucess comes with that attitude of humility of knowledge.....we used to call it learning.......
ReplyDeleteMost appreciate your keeping the momentum going....Someone recognize me at event last week and remarked they had a pre-70's Python for 1800.....did not flinch when I said does it group well.... the expression was worth it.....My old tired, but still accurate Python is worth nothing........in the box........and everything, if I am called to use it....Elmer told me, beware of the guy with one....gun....
enough ramble........Peace be with you my son....A humble servent of the King.......JM
Although i haven't shot any gun but i find this superb piece of content and amazing pictures
ReplyDeleteSuperb blog and very informative on the old Colt action. I am curious as to how you curve the triggers for the action job on the E and I frame Colts. I think I read someplace that you heat up the single action sear and hammer it over a rod. If so what is the diameter of the rod you use? Do you have a fixture to do this. Thanks for the great blog.
ReplyDelete