A collection of posts often on colt E- and I-frame revolvers: pythons, model 357s, officer model specials, etc. Topics not limited to: action jobs, fixing Bubba-gone-wrong gunsmith mistakes, and revolver porn. And sometimes I'll wander off the reservation and type random nouns and verbs that have nothing to do with our sole purpose, because who the hell can really pay attention that long?

Showing posts with label gunsmithing. Show all posts

Saturday, January 2, 2010

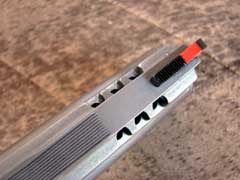
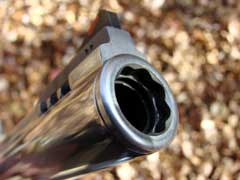
A managerie of ported revolvers (and others)

I've been experimenting with porting using a mill rather than an  EDM machine.  The biggest challenge is cutting a hole so that there are no burrs inside the barrel.  There are ways to do this, but to reduce risk I've been looking for porting that allows enough clearance to deburr after if need be (possibly using a custom ground deburring tool).

So this is a collection of different porting methods for inspiration.

There's a good writeup on a ported S&W 500 at: http://www.gunblast.com/SW-500.htm


One way to deal with burrs is to bore out the barrel after cutting the ports, removing any burrs in the process. I don't think this is what they did here, but S&W has done it on other revolvers I've seen:


Titanium just isn't that expensive.

I bought 22" of .25" round stock titanium on ebay for around $10 (including shipping).

I'm going to see if making a Ti firing pin actually helps a colt. "Probably not" is the expected verdict, but on the other hand "my python has a titanium firing pin" sounds cool.

So what can you do.

Wednesday, December 2, 2009

Memoria

I've been getting a bunch of old machines and revolvers.  Since they are generally older than 50 years, all the original owners are dead.  It's a strange feeling to be working late at night, where almost everything you touch belongs to a ghost.

Initials on tools seem more appropriate  markers  than text carved on stone:


Sunday, November 22, 2009

Relatively inexpensive reamers for rechambering

http://www.pacifictoolandgauge.com/products.htm

And a how-to on rechambering a 50cal: http://www.riflebarrels.com/articles/50calibre/chambering_50cal_rifle_barrels.htm

Friday, November 13, 2009

Fixing my dad's 357 trooper


My dad bought out a Colt 357 trooper with some problems: these are I frames, identical to pythons on the inside. This is a short writeup on fixing the problems (for the most part). Note there's no sexy action work here, just a few fairly typical problems and one weird one. I write this stuff up so I don't forget, but no guarantees about riveting narratives.

The first problem: the cylinder does not spring back when you push it:


Tuesday, November 10, 2009

forensic photos: 2.5 ported armoralloy python


It's been a while since I opened a python side plate, which at my age means I'm just about to forget everything. So, to counter that my dad and I went through a 2.5 ported python has that someone went through some trouble for to make into a very (very) nice carry gun with a great trigger and excellent porting.

Here's what we have to work with:


Saturday, November 7, 2009

One of my favorite python sight combinations


This is a great setup. A Kensight "Elliason" rear (you can buy these at Brownells) with a front sight that was thinned a couple hundredths of an inch using a milling machine.

Front:


Rear:


Sunday, August 30, 2009

Diagnose that colt #2!


I was going over a m357 I'd tuned for my dad, correcting some issues. I replaced the rear sight with one of the very nice kensights (clone of the elliason) available from brownells and, since the sight was off, just to be thorough I went to take off the firing pin plate to clean out the recess.

As my dad watched, I had an incredibly hard time getting the firing pin plate off. And then it was just about impossible to get it back on.

This, of course, should never happen. A child with a punch can get the plate off and on --- there's really nothing tricky, nothing to go wrong. If you see anyone having a hard time with it, they really must not know what they are doing.

When I took the pin and spring out the plate would go in w/o any issue.

Any guesses for what the deal was? It was kind of amusing. Kuhnhausen has a warning about such things, but I always skip it thinking "irrelevant information."
One of the other issues was that when reblueing, the person couldn't be bothered to take the bolt off, and essentially sheared the end down to a flat with the buffer. This seemed to cause it to come loose under fire.


So, after having all the difficulty, it eventually dawned on me that the only real reason it could be hard to get in w/ the firing pin in place but not without it removed was that the spring must not be compressing enough. Well how could that be? Oh, did they ... ? Yes they did!

Answer below after a few line feeds :)


Here's a stock firing pin spring and bolt screw on the left, and the spring we have in place and the sheared bolt screw on the right:


Thursday, August 13, 2009

Forensic photos: Cylinder and Slide python


I bought a CR-B ($312) and CR-C ($466) package from C&S so I could see how they work on things. The CR-C is their premier colt package; I got it done for an SS python. This post is to dissect the work they did. As they describe it:


CR-C - Colt Revolver - Package CR-C

Colt Python, Diamondback, Detective Special, SF-VII, DS-II Revolver Super Tune Up. Customer Must Specify Whether this Weapon is for Duty/Carry or Target Use Only.

Super Action Job on Python, Diamondback, Detective Special, SF-VI or DS-II
Chamfer Cylinder Mouths and Polish Chamber - 38/357 and 44

The following items will be checked and corrected as necessary: Crane and ejector rod straightness, barrel to cylinder chamber alignment, barrel turned up square with frame, barrel forcing cone square, re-cut forcing cone as needed, barrel muzzle crown

Test Fire for Function and Adjust Sights for Zero at 15 Yds.

Return Shipping and Insurance - Will be Arranged with Customer at Time of Shipment.


They did a couple of very interesting things I hadn't seen before. And they did one very surprising thing I had seen before but didn't realize was still being used (hint: "Austin Behlert" action job).

Unfortunately, despite the novelty, the end result --- how the DA actually feels --- was not worth the money. The SS python feels better than stock, but no where near as good as the colts I have that were done by Frank Glenn or Reeves Jungkind (or even me!). It sounds like there has been a change in personal, since other people have had excellent results w/ C&S previously.

As on additional warning, they corrected the barrel cylinder gap on both guns, but did not clear it with me first. The total bill was over $1200!

In any case, let's get to it.

Here's the SS with it's clothes on:


Monday, August 10, 2009

Diagnose that colt #1!


A pretty common question goes along the lines of: "my hammer won't cock back when I pull the trigger, what's the problem?"

It was only a matter of time, but it happened to me. In this case on an m357 that I had tuned for my dad. Fortunately it only happened when I checked it after getting home so he's none the wiser.

So: any guesses for what went wrong here? (For what it's worth, I got it wrong.)

Here's a photo showing the maximum distance the hammer can be cocked:


.


Wednesday, July 22, 2009

Using screw extractors to fix bull barrel python


Thanks to some helpful suggestions, I was able to extract the broken screws on the bull barrel python discussed here: http://coltpython.blogspot.com/2009/07/fixing-misfires-in-41-mag-python.html

I went to OSH and get a couple screw extractors, used a drill, and the broken screws came out. And it was pretty easy.

Here's the patient for surgery with full contact restraints via a bi-lok CNC vise w/ aluminum jaws. You can see the extractor laying on the lower part of the vise:


Monday, July 20, 2009

Fixing misfires in a 41 mag python


[As always: this is just for entertainment purposes. If you do any of this t your gun it's going to get ruined! Note there are suggestions at the end of the post for things to do differently.]

I recently got a 41 mag python, which got dissected to see how Jack Huntington did the conversion (http://coltpython.blogspot.com/2009/07/forensic-photos-41-magnum-python-by.html). It had a lot of enshake which I fixed (http://coltpython.blogspot.com/2009/07/fixing-endshake-on-41-magnum-python.html). And while it didn't blow up after shooting a couple hundred rounds (http://coltpython.blogspot.com/2009/07/41-magnum-range-report-it-does-not-blow.html) it would also misfire about 1 round per cylinder.

The misfires were with large pistol CCI primers. I got told to just use federal, but that's cheating, so spent some time this weekend attempting to fix things.

The DA pull is around 6.2lbs, so it's possible that the mainspring is the problem. However, I've done colts that have a lighter pull and they've worked w/o issue, so the problem could be something else. Admittedly these other guns shoot 357, so perhaps the force needed to ignite small pistol primers is less than for large. However, I don't want to just blindly increase the mainspring as a way to mask any underlying issue.

To spare you the dynamic tension, in the end I did wind up increasing the mainspring by about 4oz but a lot of stuff got fixed along the way, so perhaps it's interesting anyway.

Just for reference here's the gun after the endshake fix:


A good colt smith gave a rundown of things to check for tracking down misfires, so we do some of those first.

Friday, July 17, 2009

making a 50bmg barrel.

Not super detailed, but interesting nonetheless: http://www.riflebarrels.com/articles/50calibre/chambering_50cal_rifle_barrels.htm

More Randy Lee on hammer mass and firing pins

http://smith-wessonforum.com/s-w-smithing/90499-my-thoughts-firing-pin-length-ignition.html

I need to track down the rest of his posts. But anyone that gets reliable guns at a DA pull of 3lbs needs to be paid attention to.

Hat tip: Paul D.

Monday, July 13, 2009

Forensic photos: Sherman Roller Action


There's been a bunch of threads on the Walt Sherman "roller action" where he used a ball bearing to reduce friction in double action. Unfortunately there hasn't been much detail. So to fix that we now err on the excessive detail end of things.

I bought a purported Sherman Officer Model Special (OMS) in 38spl a while back with Fishpaw grips, but hadn't had the courage to open it up.

Well that changes now! It was a pretty interesting set of internals that were in the gun.

Outside

Here's the outside:


2.5" snub needs a recrown.


The trick I was told to use to figure out if a barrel crown has issues: shoot a bunch of lead bullets and look to see how symmetrical the marks are. Symmetry = good. Not symmetry = not good.

I have a 2.5" snub shoots hard to the left and after checking the marks recrowning seems like a useful thing. I broke down and ordered a frame wrench from brownells. I'll make mine after seeing how people who get paid money do it :).

I'm currently trying to get a near mirror finish on the muzzle of a junk python barrel (bore rusted, heavy pitting, etc). It's taking a bit longer than one could hope for.

Here's the damning evidence --- the previous owner was extremely uncareful (cleaning? Drop? Bang around in safe?):


Thursday, July 9, 2009

Fixing endshake on 41 magnum python


I got a 41 magnum python conversion a while back, but unfortunately hadn't been able to shoot it b/c of excessive endshake. The difference between the max and min barrel / cylinder gap was well over .005 and, even worse, the minimum barrel / cylinder gap was about .00025 which made it seem likely the cylinder would slam into the barrel.

This weekend I finally got a chance to fix the problem by cutting out the cylinder, machining a bushing and putting it all together (with a bunch of fitting). I first did two shooter model 357s for practice (it won't be an easy matter to replace a jacked up 41 mag python cylinder) and then did the 41 magnum.

The process was not entirely smooth: I had to rip one bushing out and start over and the fitting was made excessively tedious since I did not record the minimum barrel/cylinder gap measurement before cutting out the cylinders. However, in the end all three colts now have < .001 endshake. Of course, they need to survive a bunch of rounds before declaring success. But, that's why god made next week :)


In promising news I've already done the identical fix to two pythons and a trooper when I went out to visit Frank Glenn. For these three colts it seems that things were done right: when I finally did a range test last week they survived 500+ rounds between them without issue. (They seem smoother too since they started at close to .0000 endshake, which forced the cylinder to travel through any binding rather than slip around it.)

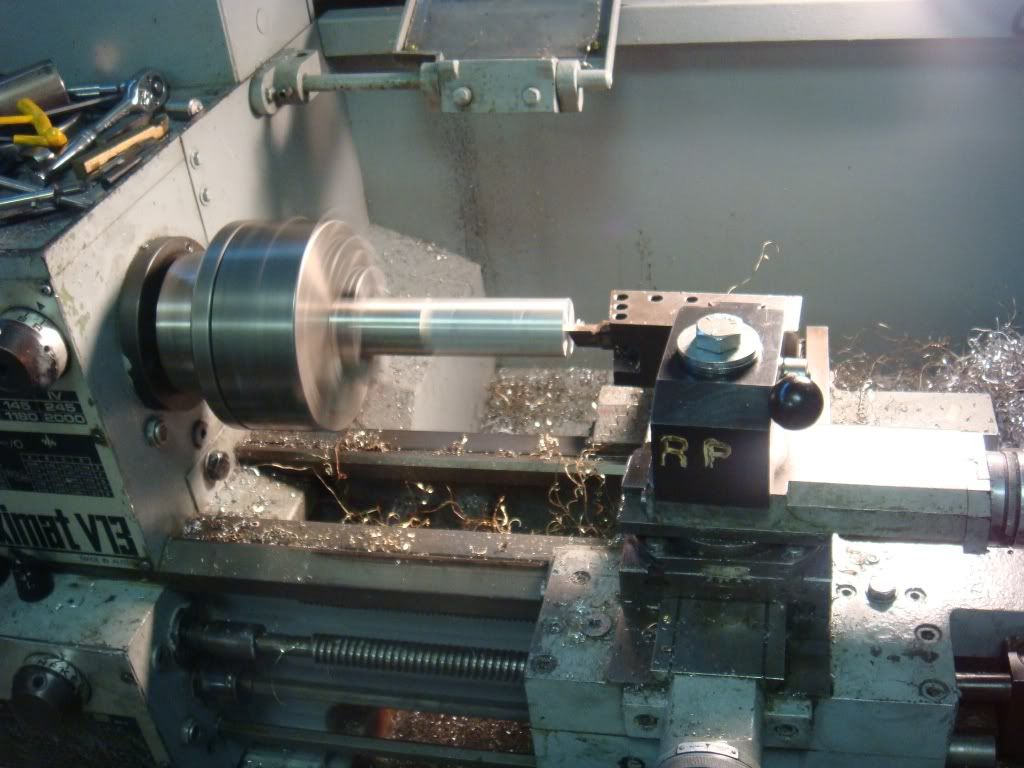
OK. So let's get to it. We get excessive endshake when the collar on the cylinder is too short, and thus allows the cylinder to travel forward too far. You can stretch the collar using a special fixture but, unfortunately, that's a one time fix. We instead replace the collar by removing it and putting in a bushing in its place: you remove endshake by making the bushing sufficiently long.

Our algorithm:
  1. Measure headspace to make sure we are comfortably above the minimum. If not, we can't do this fix (and likely will have to replace the ratchet).
  2. Take the cylinder apart completely.
  3. Put the cylinder in a 4 jaw chuck in a lathe and use an indicator to ensure that as it spins it wobbles by less than .0005".
  4. Use a boring tool to cut a hole where the collar is until all (or just about all) of the collar material is removed.
  5. Construct a bushing that reaches the bottom of the hole and has has a wide enough diameter so we can press fit it in the cylinder. The "collar" sticking out needs to be thinner than this part so it does not contact the barrel.
  6. Press fit the bushing in.
  7. Slowly remove material from the collar until the cylinder will fit in. Slowly remove more until it will turn. Be careful: just b/c the cylinder isn't turning doesn't mean the bushing is too long! It could be that 0 endshake is exposing other sources of binding.

We'll step through each step.

Cutting collar

Here's the cylinder and the carbide tipped boring tool we're going to use to cut out the collar and make a flat bottomed hole:
Monday, July 6, 2009

Some interesting revolver work


Apex seems to have an excellent reputation and some interesting ideas. E.g., the highly recommended apex barrel has 10 lands and grooves (!?):


Or the use of a lighter cylinder to reduce DA pull and momentum:


And here Randy Lee of Apex gives a rundown on the affect of a lighter hammer on DA pull. He's gotten it down to 2lbs 14oz w/ carefully seated federal primers! :

Looks awesome. I'm going to try that out on some bobbed hammers I have.

Saturday, July 4, 2009

22 jgr followup

I bought a very interesting officers model special that was converted to 22 jgr a while back. : http://coltpython.blogspot.com/2009/05/forensic-photos-weirdo-22jgr-oms.html


One of the most tricky things was that the gunsmith had modified the OMS from using a hammer mounted firing pin (as all E frames used) to having an internal one, much like the I frames that came after it (python, trooper, m357).


One of the less interesting things about it is that I didn't see a way to reload 22 jgr with any degree of happiness.

On friday however a kind soul mailed me a 22 WMR E frame cylinder so that I could convert the 22 jgr to 22 wmr. That was a major event.

Then I happened to stumble across a discussion about how 22wmr is .224 diameter and 22lr is .222 (or so) so conversions don't work. Since the OMS was converted from 22lr this induced stress: while I can install cylinders, I'm not setup to rebarrel .22lr to .22wmr especially on an essentially irreplacable gun.

But, lo and behold, today we discovered that 22jgr is .224 (as, apparently, most center fire 22's are):


So, everything is set for happiness at this point. Other than I have to fit the cylinder, which hopefully won't be a big deal.


Wednesday, July 1, 2009

Forensic photos: 41 magnum Python by Jack Huntington


I've never seen any dissection of a 41 magnum python, nor really of a professional action job, so let's fix that!

I recently picked up a 41 magnum python conversion done by Jack Huntington (http://www.jrhgunmaker.com/). He was nice enough to chat on the phone. In his view it can handle a steady diet of 1,000 fps 41 mag loads. He also stated he worked at colt for a couple of years and has done around 2000 pythons. He did his version of an action job, including bending the trigger sear.

So, it'll be interesting to see what he did.

Last night I finally got to open stuff up. There were some interesting results, both in terms of what he did and what he didn't do.

Here's the gun (wrong stocks, I know):


Followers