I've never seen any dissection of a 41 magnum python, nor really of a professional action job, so let's fix that!
I recently picked up a 41 magnum python conversion done by Jack Huntington (http://www.jrhgunmaker.com/). He was nice enough to chat on the phone. In his view it can handle a steady diet of 1,000 fps 41 mag loads. He also stated he worked at colt for a couple of years and has done around 2000 pythons. He did his version of an action job, including bending the trigger sear.
So, it'll be interesting to see what he did.
Last night I finally got to open stuff up. There were some interesting results, both in terms of what he did and what he didn't do.
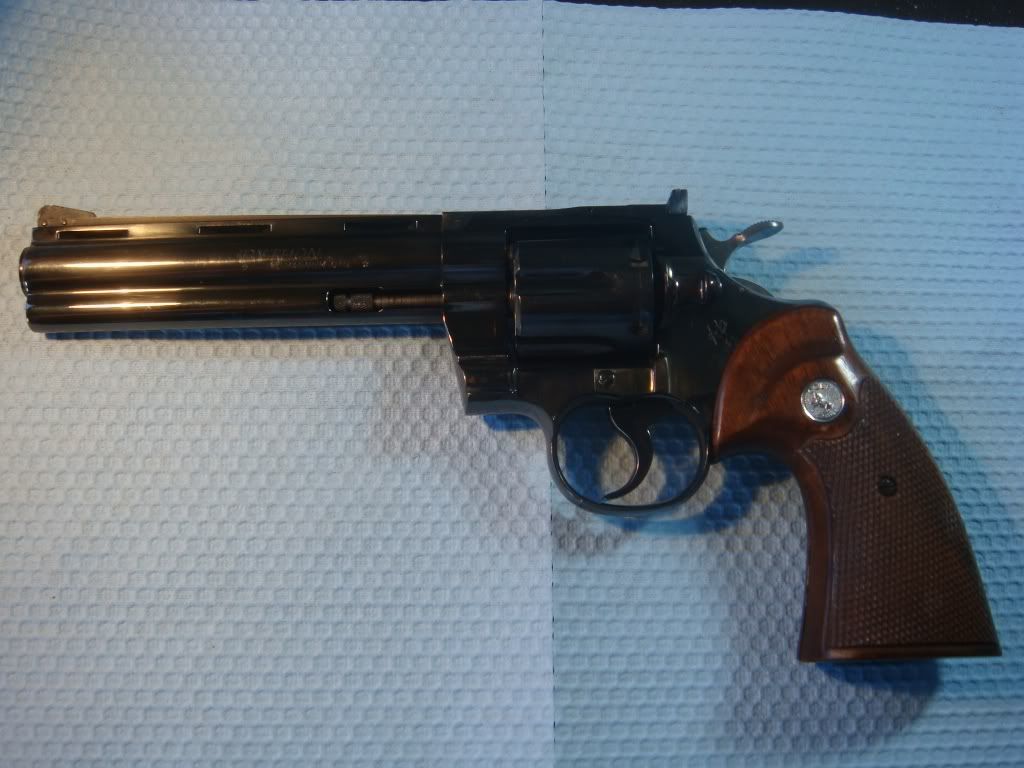
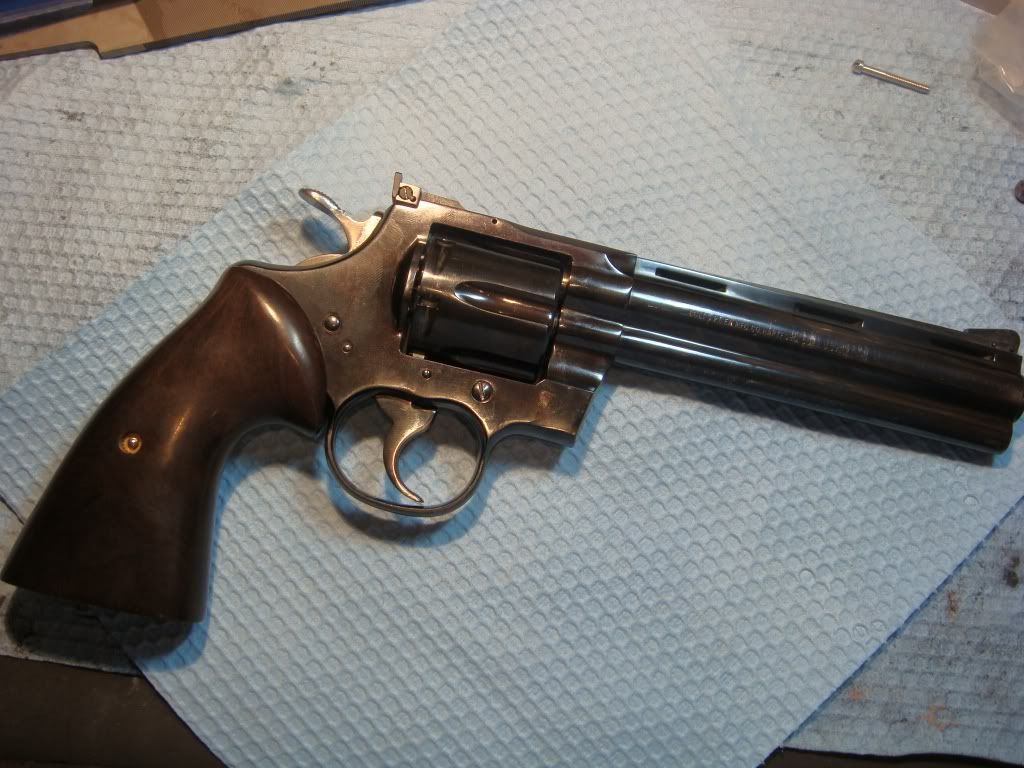
Here's the gun (wrong stocks, I know):
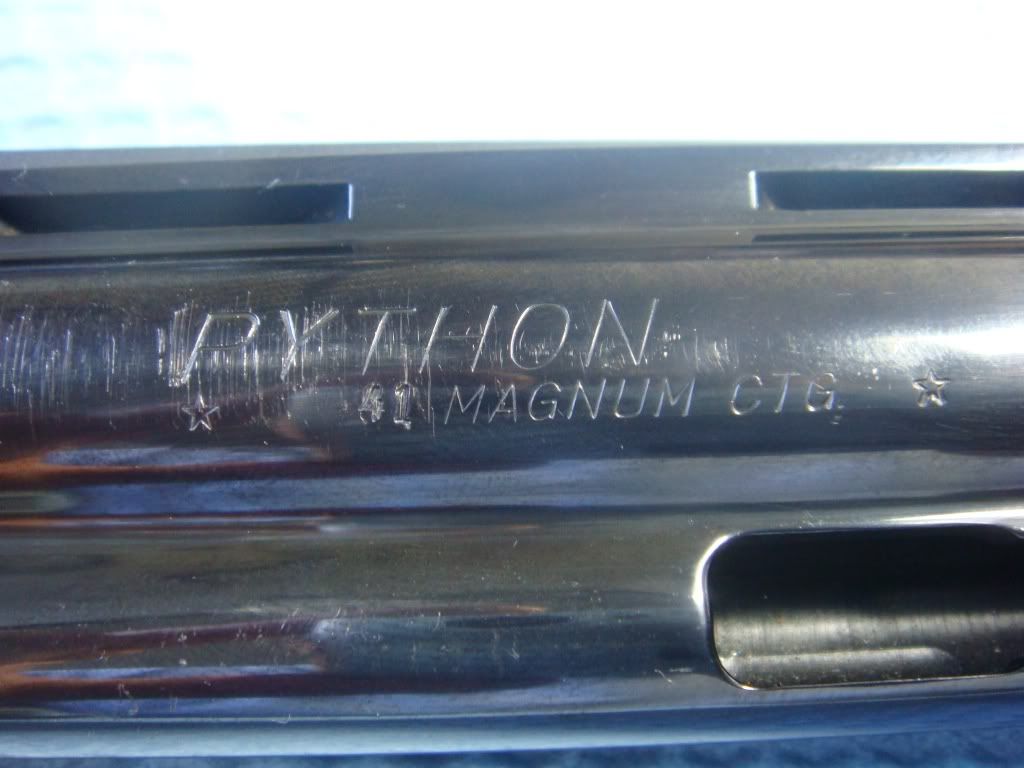
They did a crude stamp of "41" after grinding off "357":
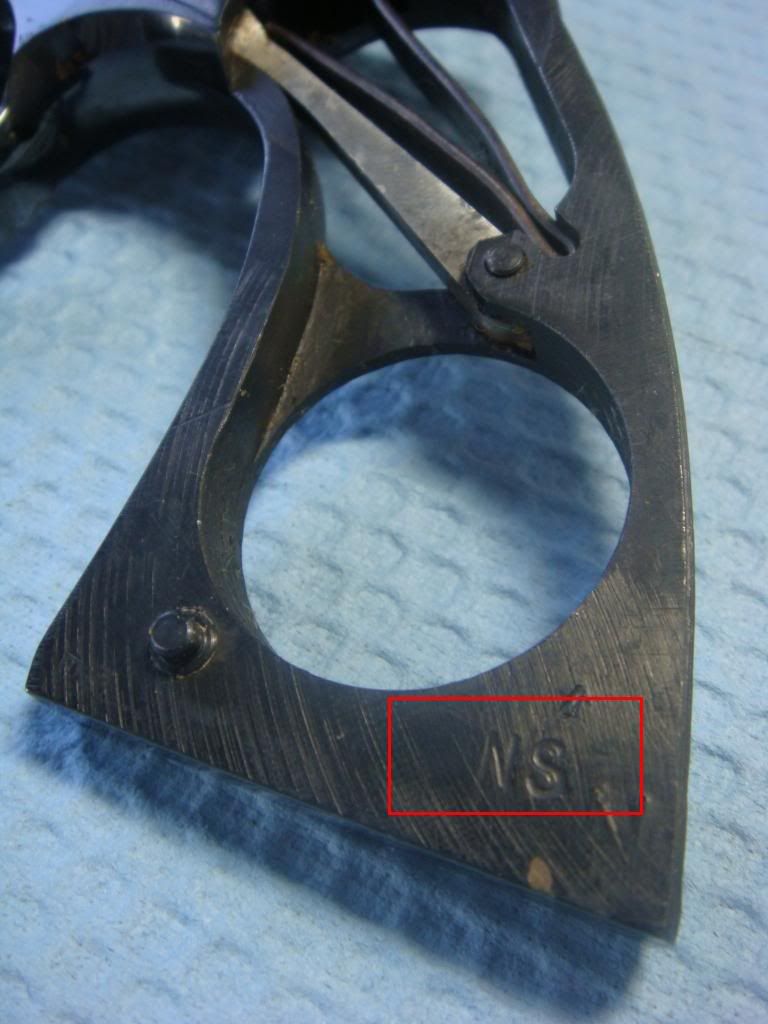
It's an early gun, but reblued (duh) so the INS ("inspected") on the handle has been partially obliterated:
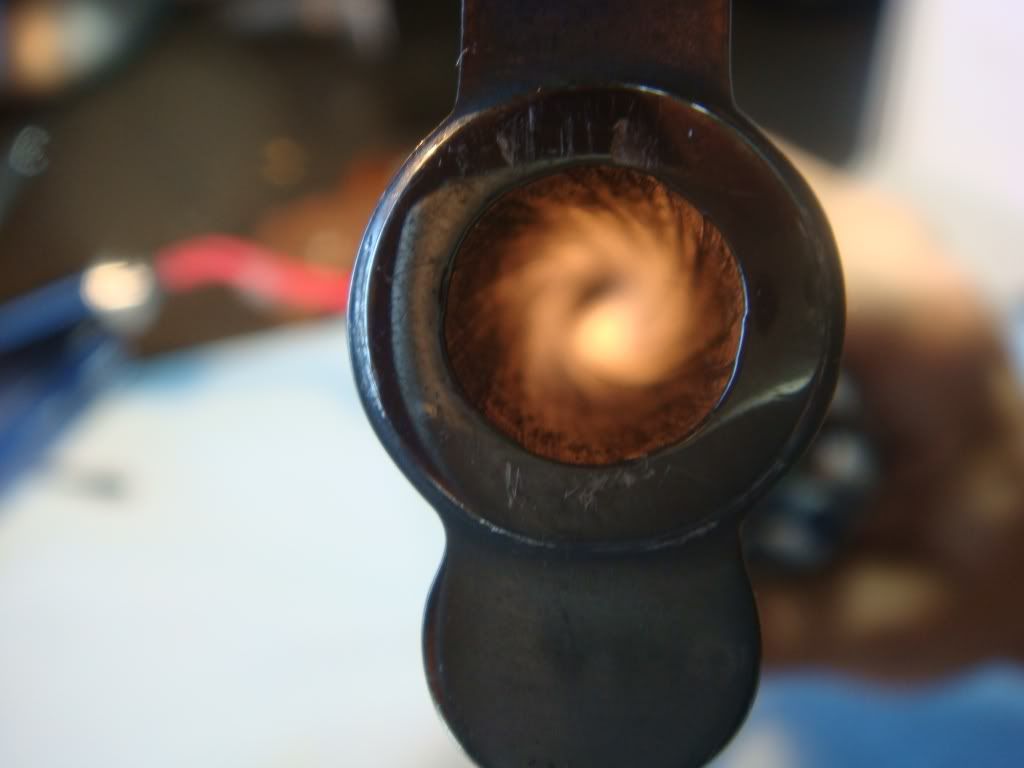
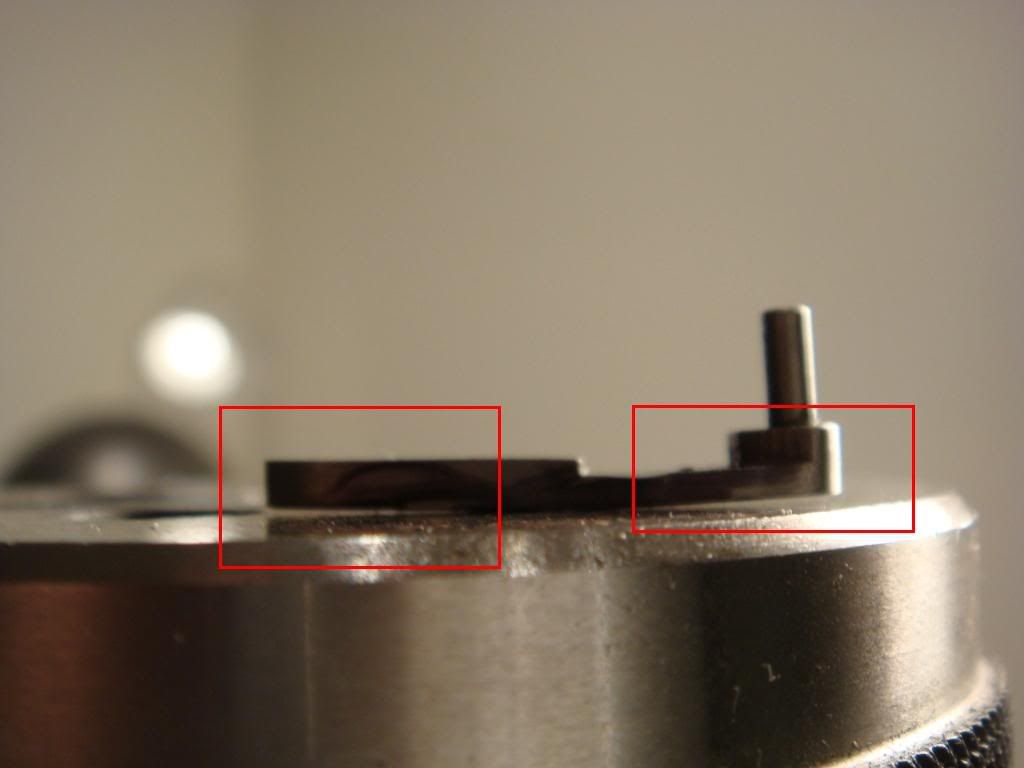
Backplate. Looks like the owner didn't fire many rounds. He claimed 12; I can believe it:
Despite not using the gun much and spending a bunch of money customizing it, the owner was pretty feckless with its care. Many scratches and the dirties bore on a purportedly not broken gun I've ever seen:
The outside
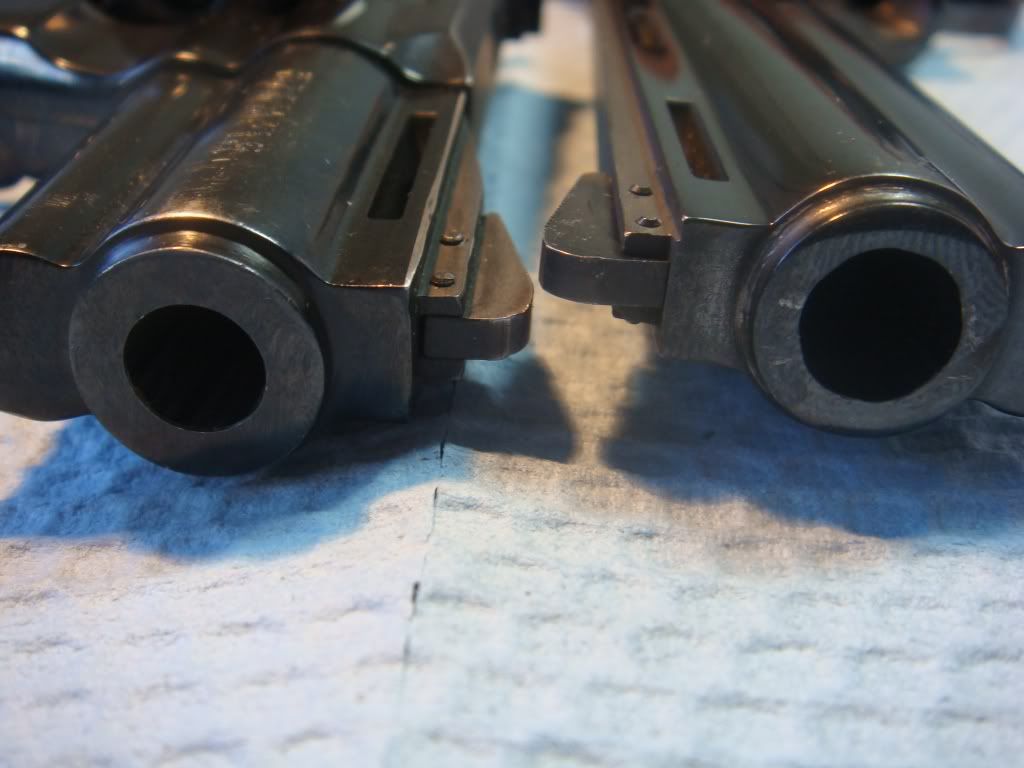
OK, let's get to what 41 magnum really looks like!
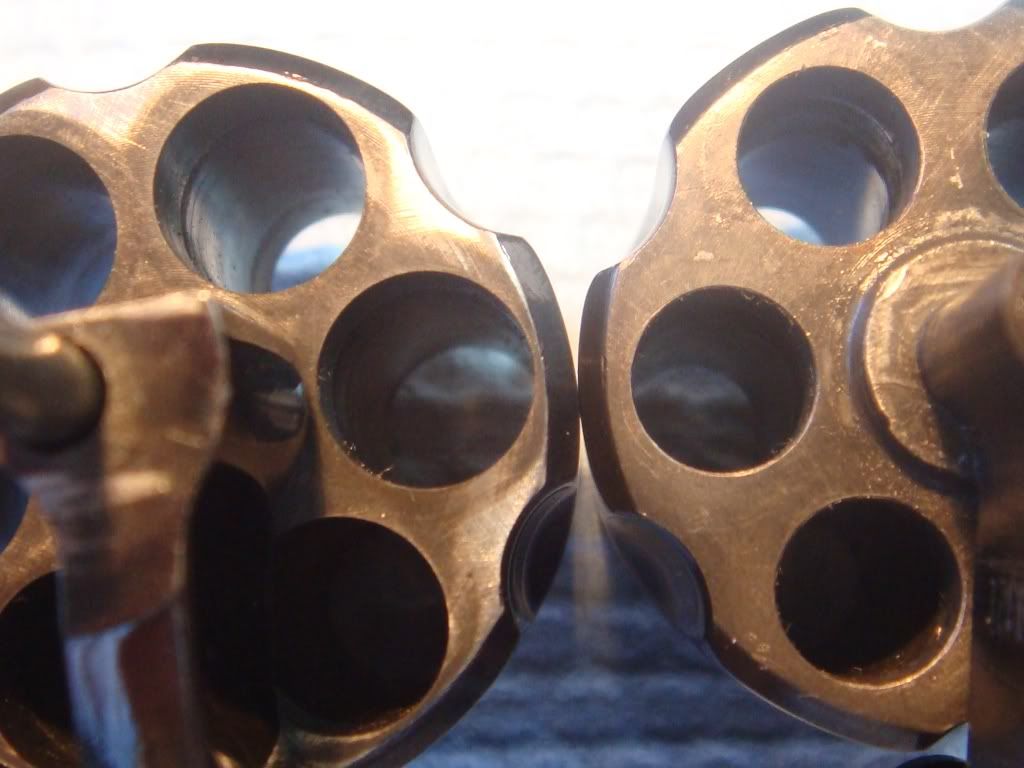
Comparing the barrel crown of a 357 (left) and our 41 mag (right):
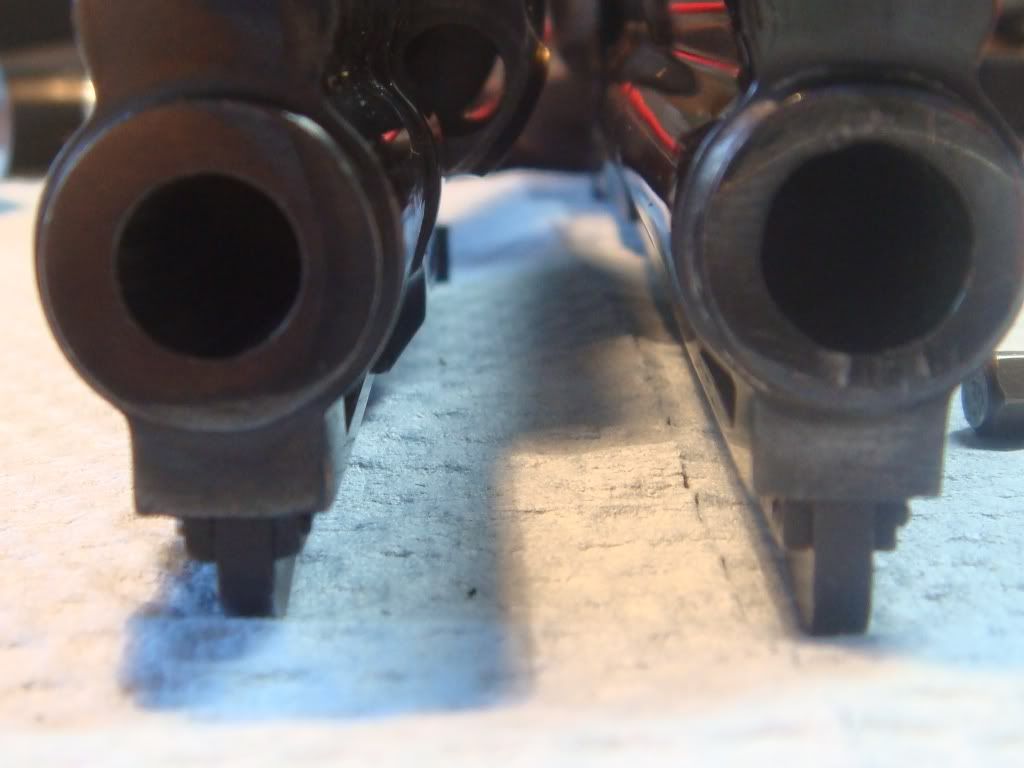
The forcing cone hasn't been re-enforced but, currently, isn't cracked; we'll see after it gets fed a bunch of 41magnum:
My calipers can't fit in there so unfortunately can't measure just how thin the forcing cone is. It doesn't look horrendously bad.
Something has to feed the barrel, so here's the 41 mag cylinder (left) and a normal 357 cylinder (right):
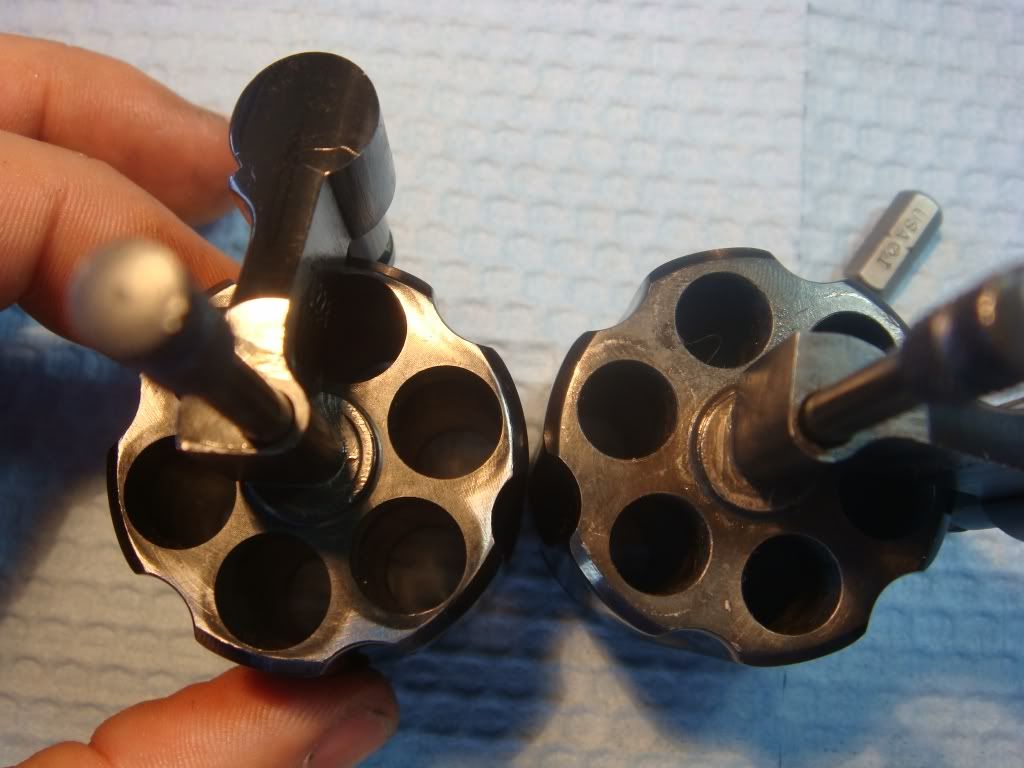
Close up. As you can see, not a lot of metal left between chambers; there ain't going to be a 44 mag python, ever:
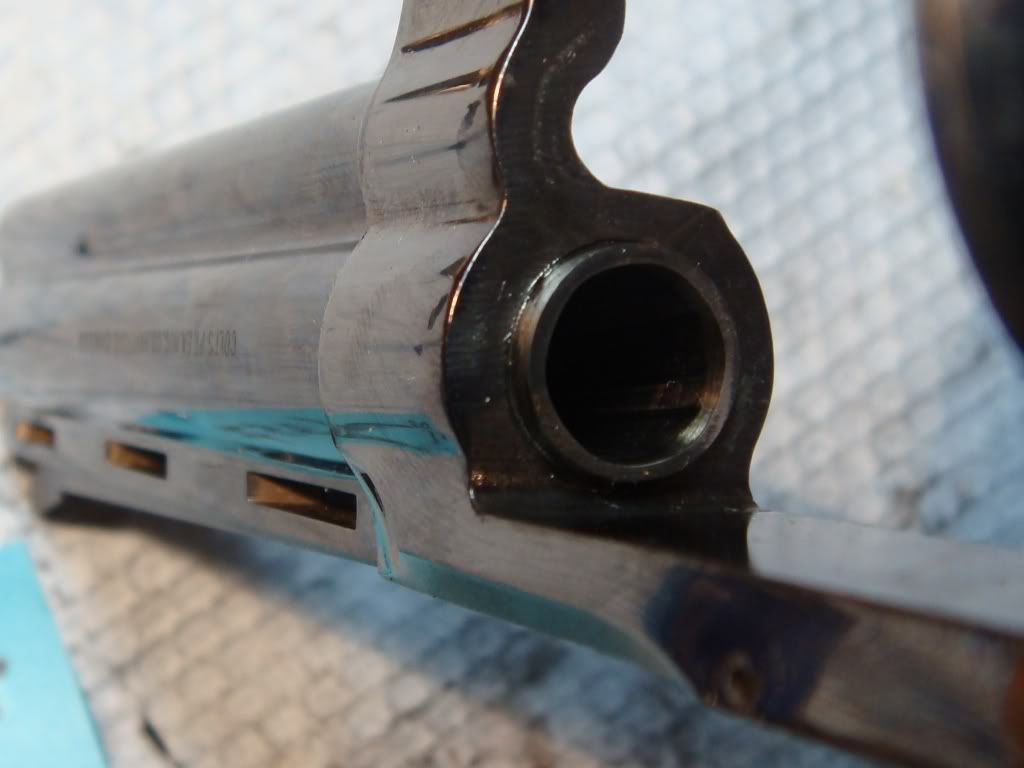
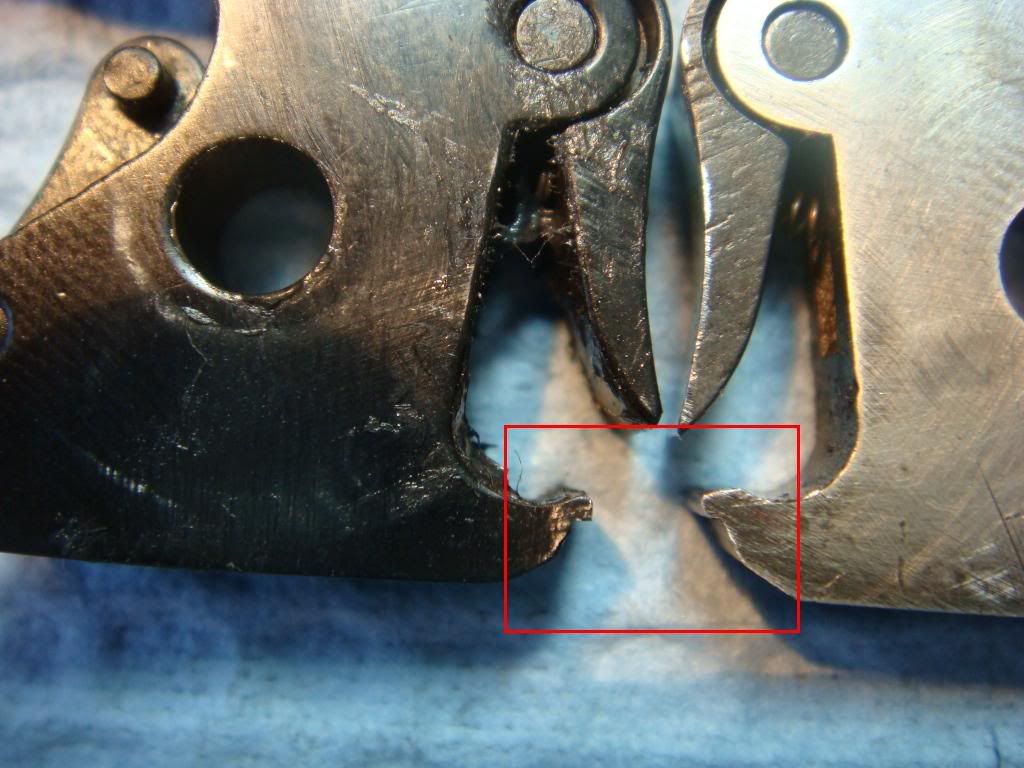
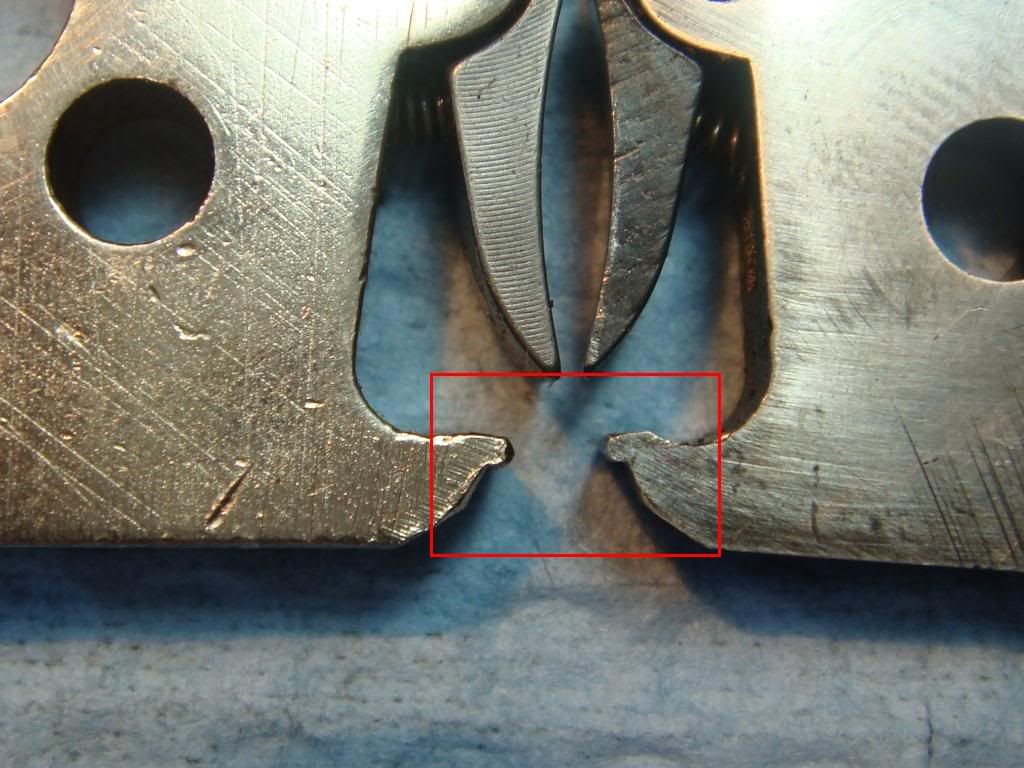
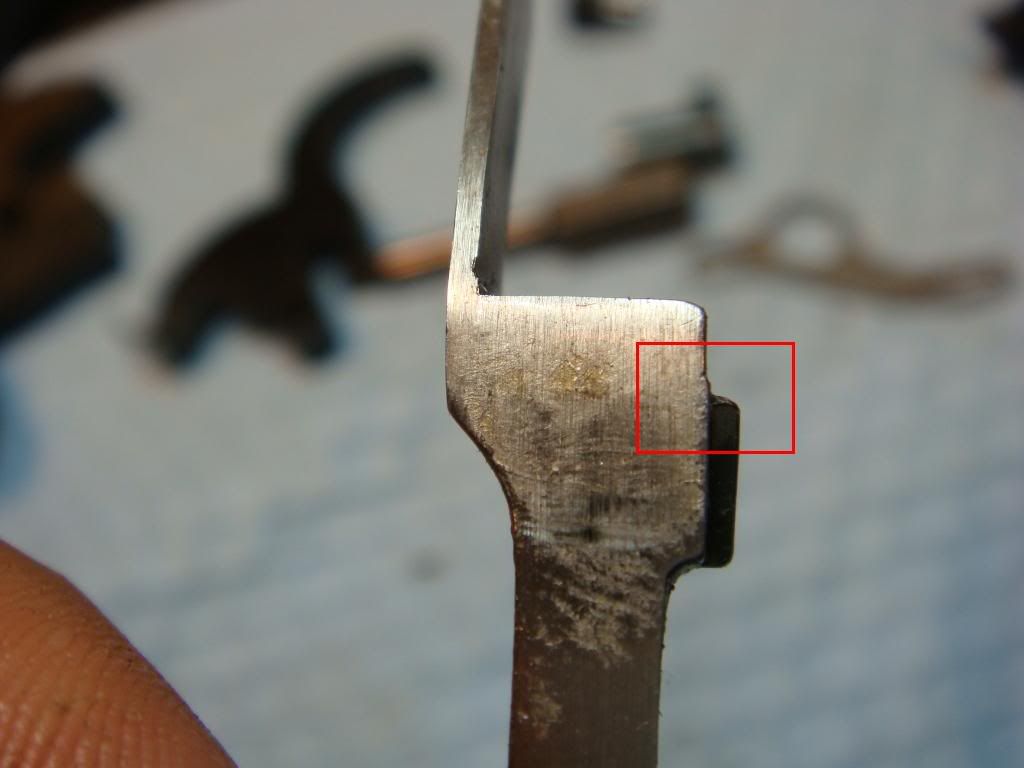
It's at the ratchet end of the cylinder where the fun starts. I'm betting that getting the ratchet right was the single largest pain in the ass thing of the whole process. It's certainly one of the main places they messed up. Normal 357 on left, 41 magnum on right, notice the red rectangle!
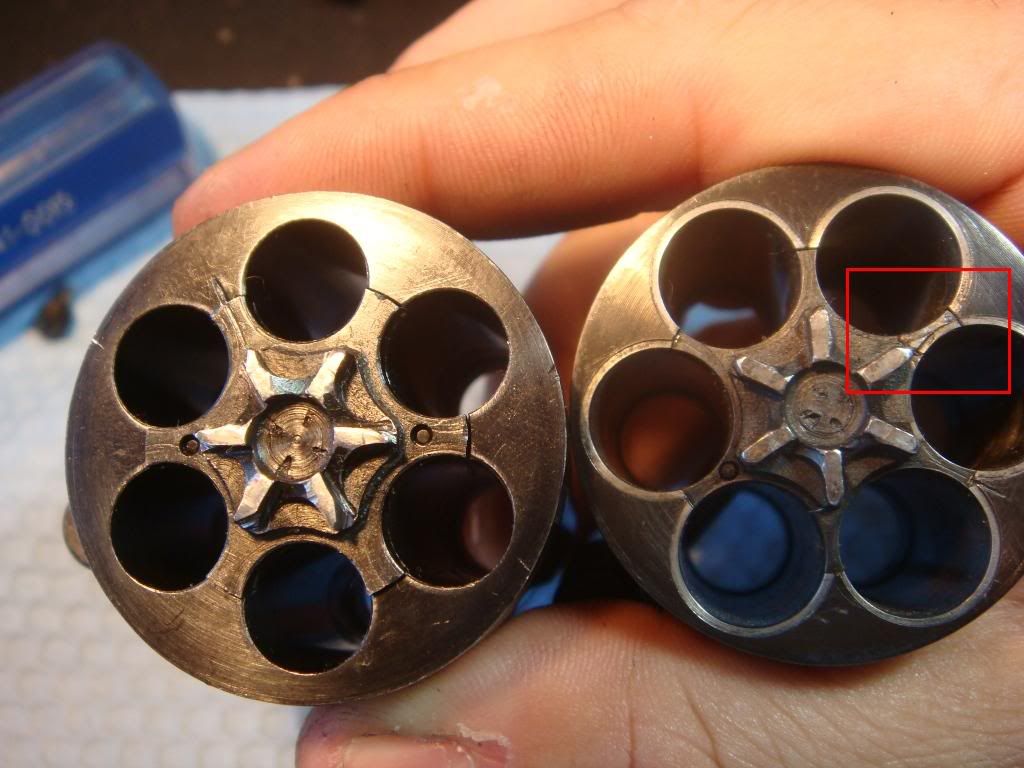
As you can see there is a missing ratchet pin hole:
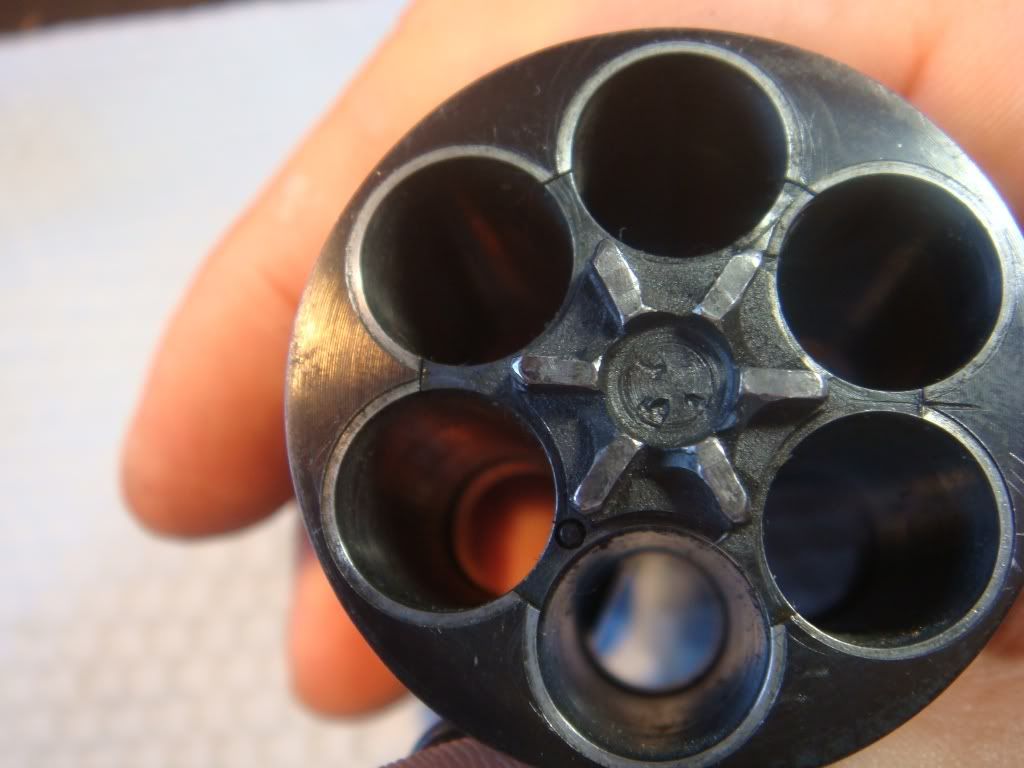
Now why would that be? If you look from the side, you can see that the ratchet broke on the hole (that will be the absolutely thinnest place):
After welding it back they probably decided redrilling the hole through it was a bad idea.
Ouch. That must have been annoying. I'm curious if it was the last hole of the 6? I'm assuming they bored these holes using a 4 jaw chuck on a lathe, but I'm curious if they had any tricks.
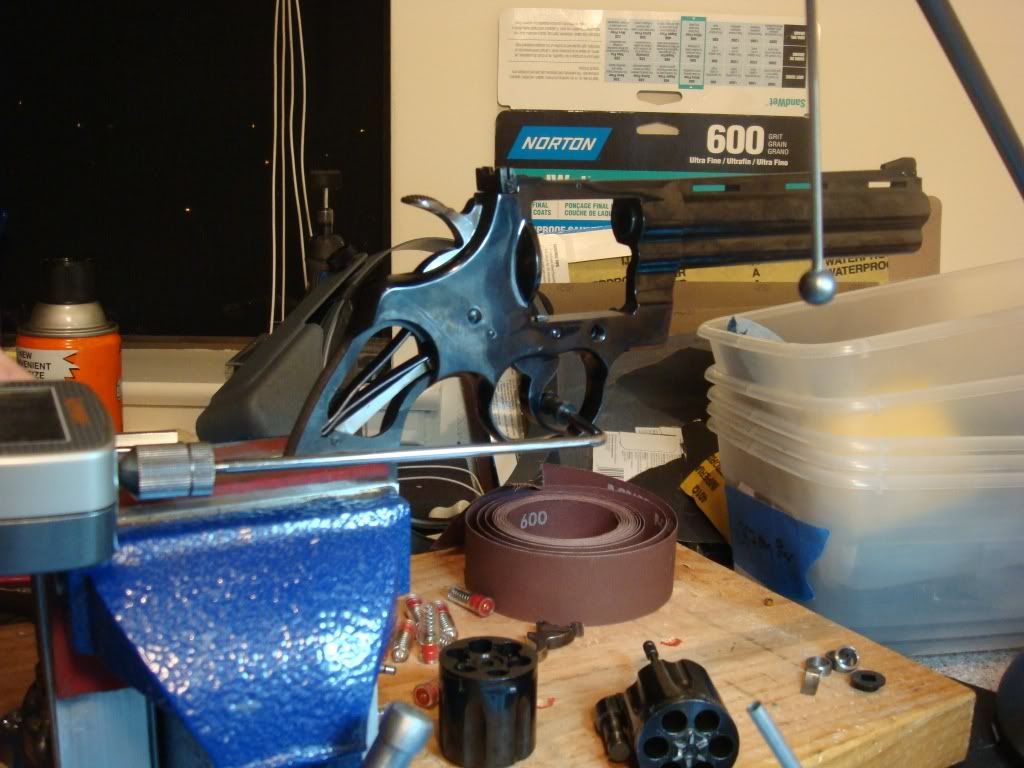
The inside: Part I: the trigger
OK. So taking the internals out, what does it look like?
The first obvious thing: the trigger. Here's three triggers: a stock python (upper), a Frank Glenn bent sear trigger that I've done a bunch of posts on (left) and the Huntington bent sear trigger (right):
The big news: Huntington's is bent, but (1) it's less round than Glenn's and (2) it's beveled at each end. The less bend means there is more stacking at the end, at least for my senses (measurement, sort of, to follow). The beveling I'm not sure about. I would guess he was trying to improve DA feel, but may in fact be making it worse: the trigger reset is scratchy and sticky compared to the Glenn action, I'm guessing perhaps b/c of the bevel. (A future experiment to do: I have a thinned strut, need to measure how it affects trigger pull weight.)
Here's the bevel: Huntington (left) and no bevel Glenn (right):
And another view comparing to stock (left), Glenn (middle), Huntington (right):

As you can see, the bevel seems slightly thinner than the hammer strut, which is what it travels up (in the back on DA) and down (in the front, on return):
Another view in comparision to the hammer strut, this time in situ:
The difference in curve between Huntington and Glenn is a bit hard to tell by eye, so we put both triggers in the same gun and use where the hammer strut resets to to check curvature. First, here's the Glenn trigger used with the Huntington hammer, note the strut can't reset very far since the curve is pronounced:
And here's the Huntington trigger: the hammer strut can go much farther up the curve b/c it's shallower:
However, note that though that without the rebound lever in place (which cants the hammer back slightly) the strut cannot reset; this is different from how I learned. The gap it leaves between the sear and the hammer strut seems to be smaller than that recommended by the shop manual.
There's a few possible advantages to Huntington's approach (perhaps the motivation?). One is that similar to Behlert's motivation is that he *may* have to do less fussing about with the hand, which often needs to be cut down with a large curve. Another is that he *may* have to fuss less with the hammer notch to eliminate creep: it was hard for me to tell if he cut less.
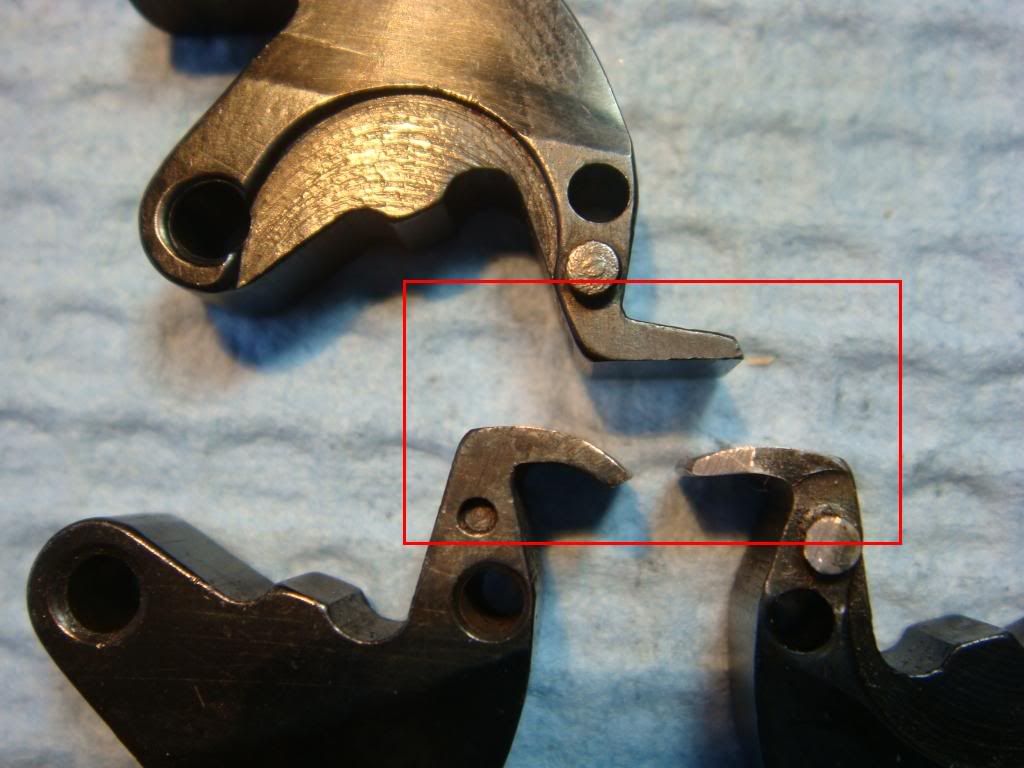
One definite change from using a smaller curve is that he had to cut less material out of the hammer toe in order to get reset. There's a Glenn style hammer on the left and Huntington's on the right:
And, for comparison, a stock hammer (left) vs Huntington's (right):
The inside: Part II: pull weight
OK. This is all well and good, but what's the effect of the different curves?
We do a simple experiment:
- Measure the DA pull of each in the 41 mag frame. Put the Huntington hammer/trigger in the 41 mag frame and and measure DA. Put the Glenn hammer/trigger in the 41 mag frame, measure DA.
- Measure the DA pull of each in the 357mag frame. Put the Huntington hammer/trigger in the 357 mag frame and and measure DA. Put the Glenn hammer/trigger in the 357 mag frame, measure DA.
To reduce variance we remove the cylinder from each frame, and use the mainspring that is already in each frame. I also added a bit of brownells lube to the Huntington hammer strut and trigger sear since they were pretty dry.
To measure pull we put the gun in a vise, try to keep it level and then use a lymans digital pull scale to measure DA:
I tried to to pull level on the trigger, but in retrospect I should have had it point straight up. You should keep these numbers as crude estimates. They are more suggestive than definitive. For each I tried to find the angle that gave the smallest reading without much variance and used that as the number.
For this experiment at least the Glenn trigger is consistently lighter: by about 12+oz in the 41 mag frame and 8+oz in the 357 frame:
With that said, it's not entirely clear what the effect of this difference is. The problem is that while the Glenn trigger is lighter and feels like it stacks less, the Huntington trigger pulls the hammer back slightly farther, which will likely generate more force when the hammer falls. What we really want to measure is: for the same amount of force driving the firing pin forward, how much DA pull (and stacking) was needed? I don't have a way to measure this, currently, so here's a couple pictures of how far back each pushes the hammer. Glenn first:
Then Huntington, slightly farther:
The inside: part III: spring adventures
Ok, what else is different? One obvious thing is that the bolt spring is non standard. This swap was done to lighten bolt drop: factory springs lead to a tactile "click" and (often) a noticeable drag as the cylinder rotates on a tuned gun. The old school way the colt shop would lighten was to file the outside of the trigger (perhaps removing about half) and/or to cut its length. He just used another spring entirely, as do other people I know, who actually use the same spring as well :)
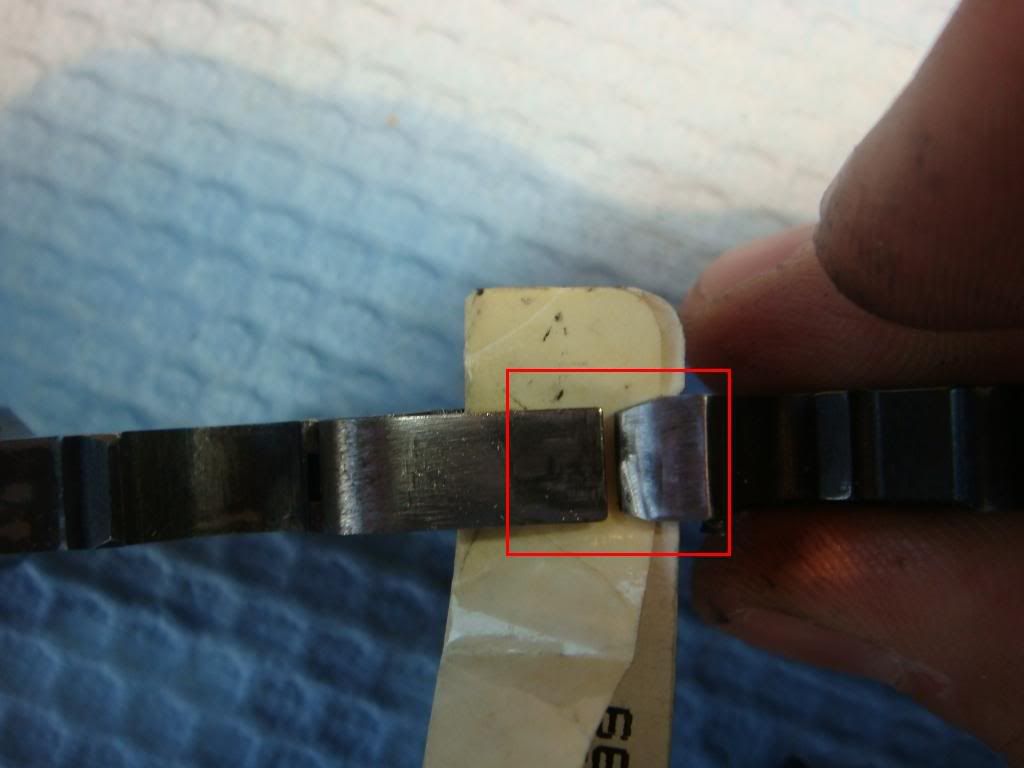
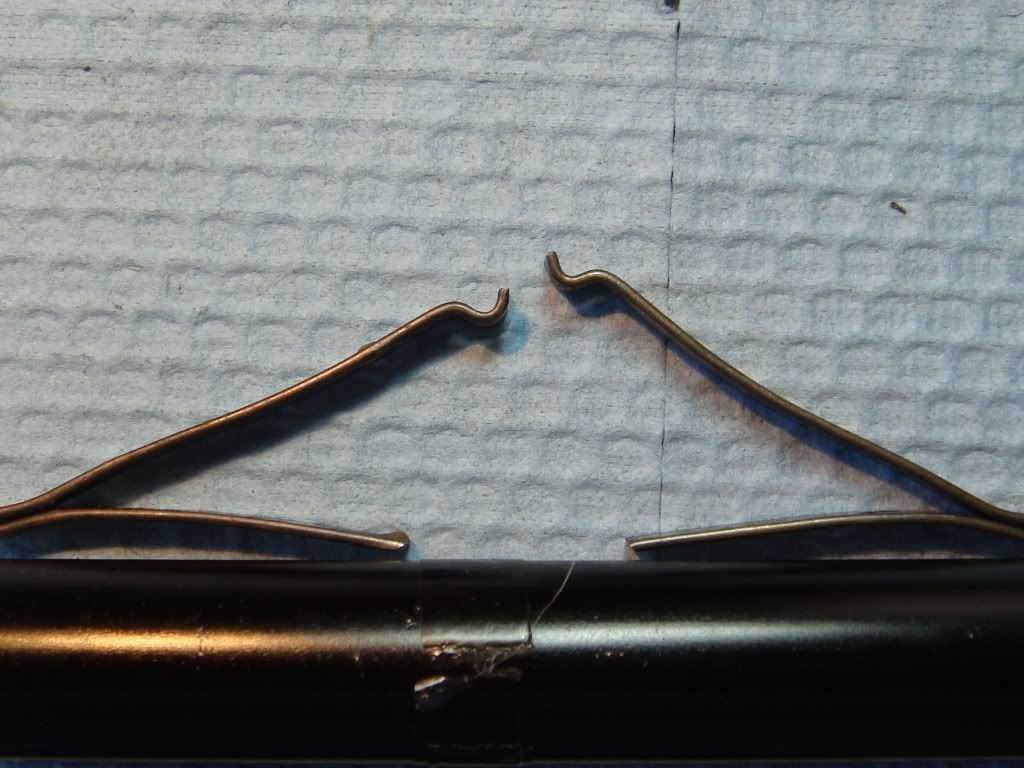
Here's a stock colt spring (top) vs what was in Huntington (bottom):
Notice that he trimmed his down to about the same length. Unlike how I was taught, however, he jammed the cut end into the bolt rather than into the frame: this way seems to allow the spring to bend better.
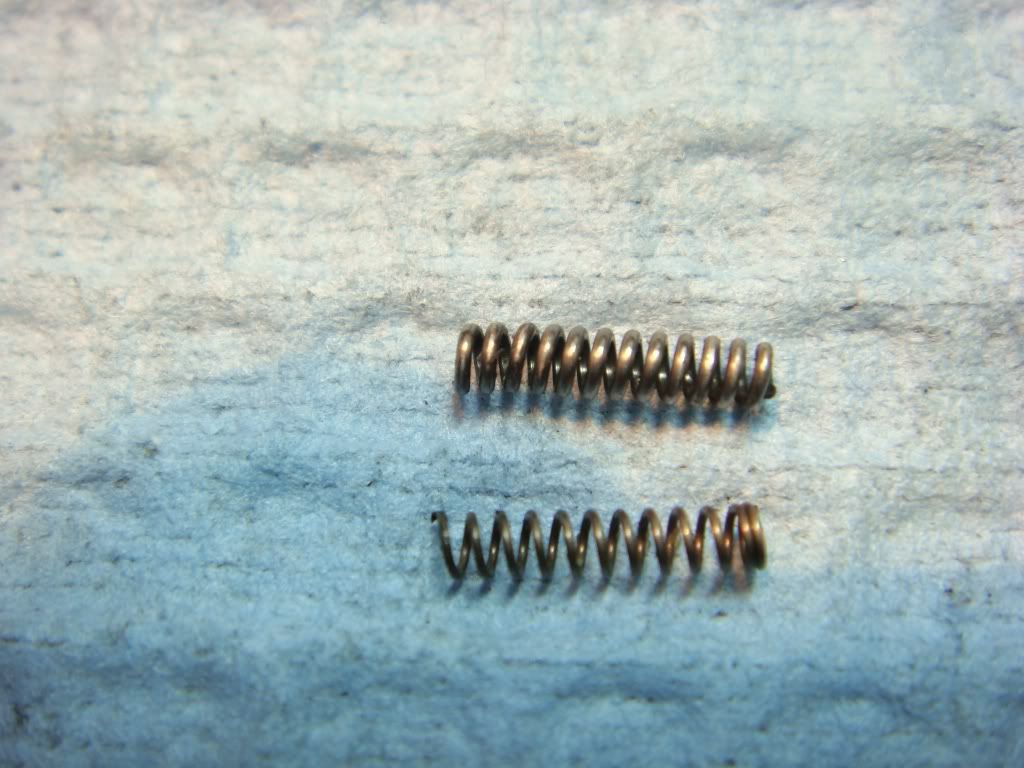
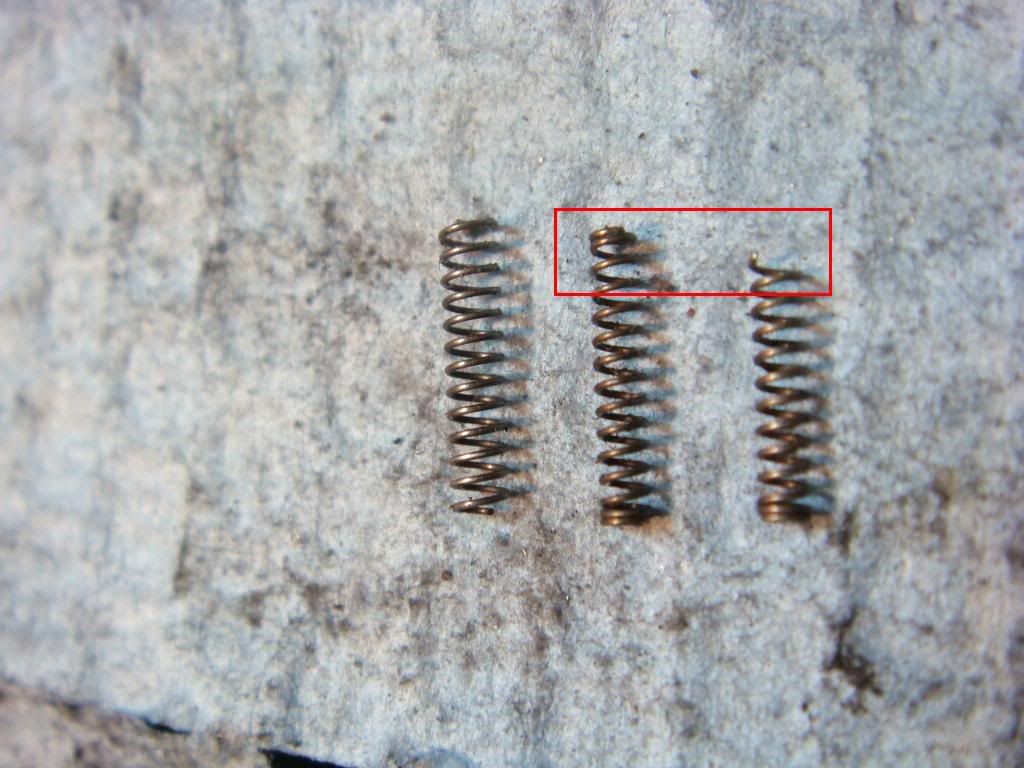
Interestingly, and slightly inexplicably, he also swapped what seems to be the *same* spring in for the hammer strut spring. I'm not sure why. One thing I noticed is that his setup seems to have issues with making the trigger return pretty sticky. This spring swap might be a hack to try to weaken the pressure from the strut so the hammer can return. Here's a comparison: stock hammer strut spring (left), the spring he replaced it with (middle) and the spring he used in the bolt (right). The cut part is highlighted with the rectangle:
The last spring is the mainspring. Here's the one from the 41 mag on the left and a "stock" one on the right:
The mainspring in the 41 mag gun has a narrower "V", which may be a coincidence, but likely means it got modified. If so, since there is not a "kink" in the top leg it seems that he does not use the old school shop manual method of putting a pin and cocking several times but instead uses pliers to bend the leg he wants (as I was taught).
Things that didn't happen that we might expect
Now, what else?
In terms of smoothing, it's interesting that he didn't smooth out anything in the frame itself, despite it having some high points which was adding drag (discussed in a subsequent post).
Another curious thing is what did not get fixed. I'm not sure what the original work order was, but from the fact that a curved trigger got put in it seems like it was for an action tune. In that case there are some things messed up in the current gun that I thought would have been fixed.
[NOTE: I am assuming that the gun did not get shot much so that things are still in about the same condition as when it left the shop.]
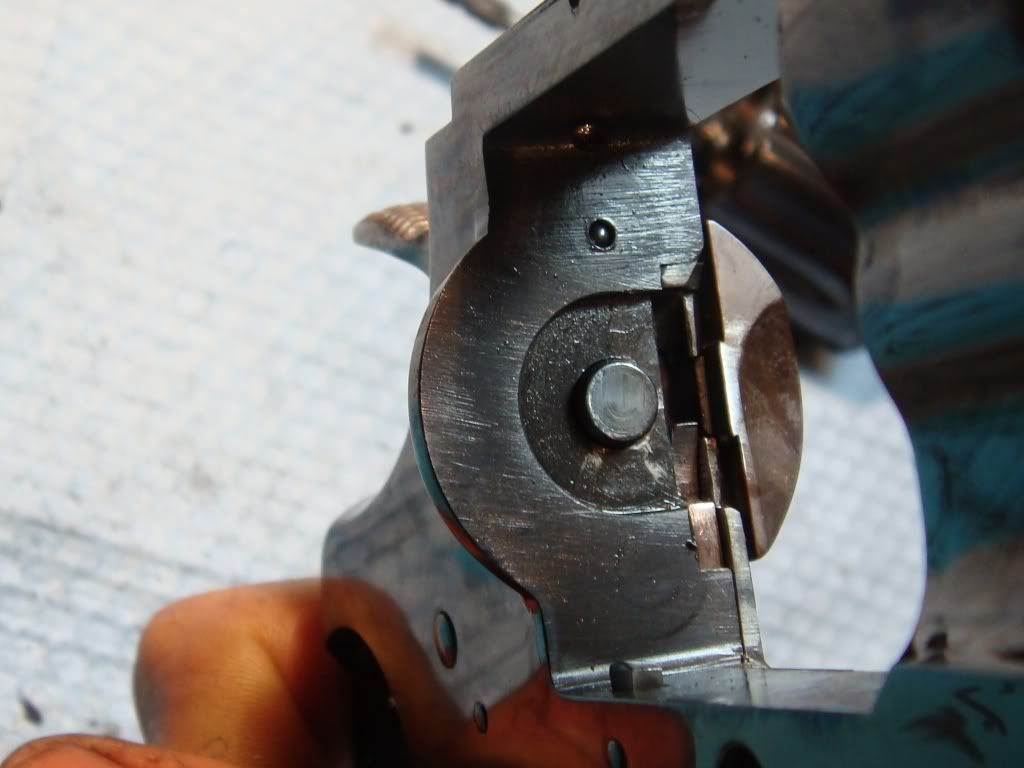
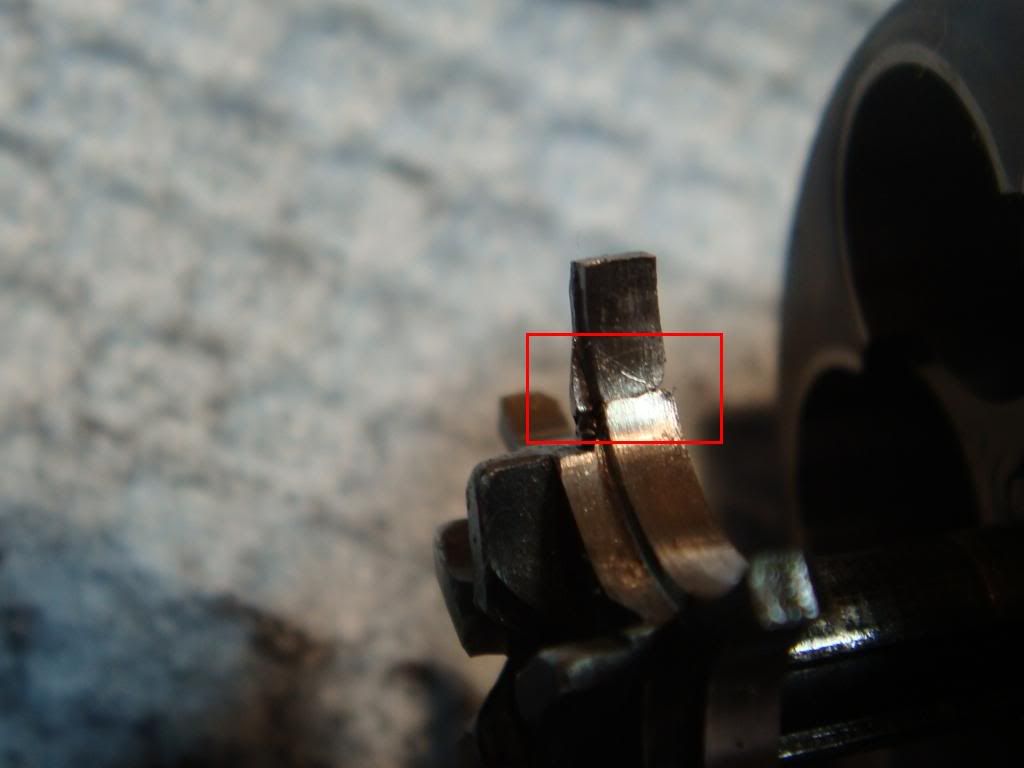
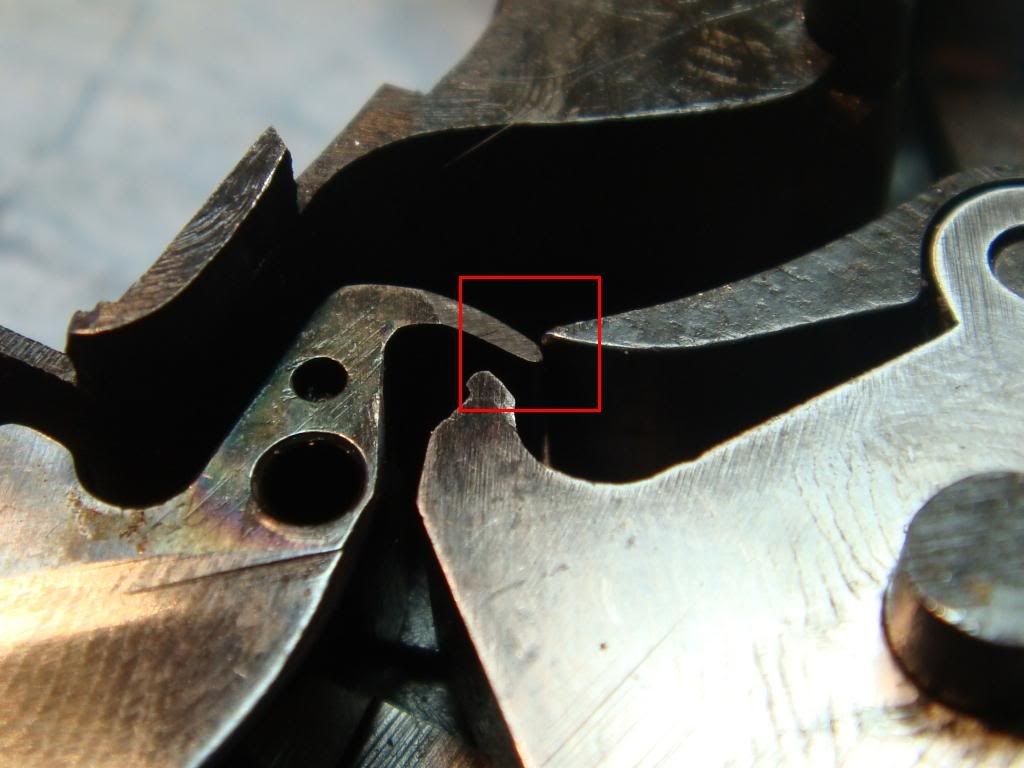
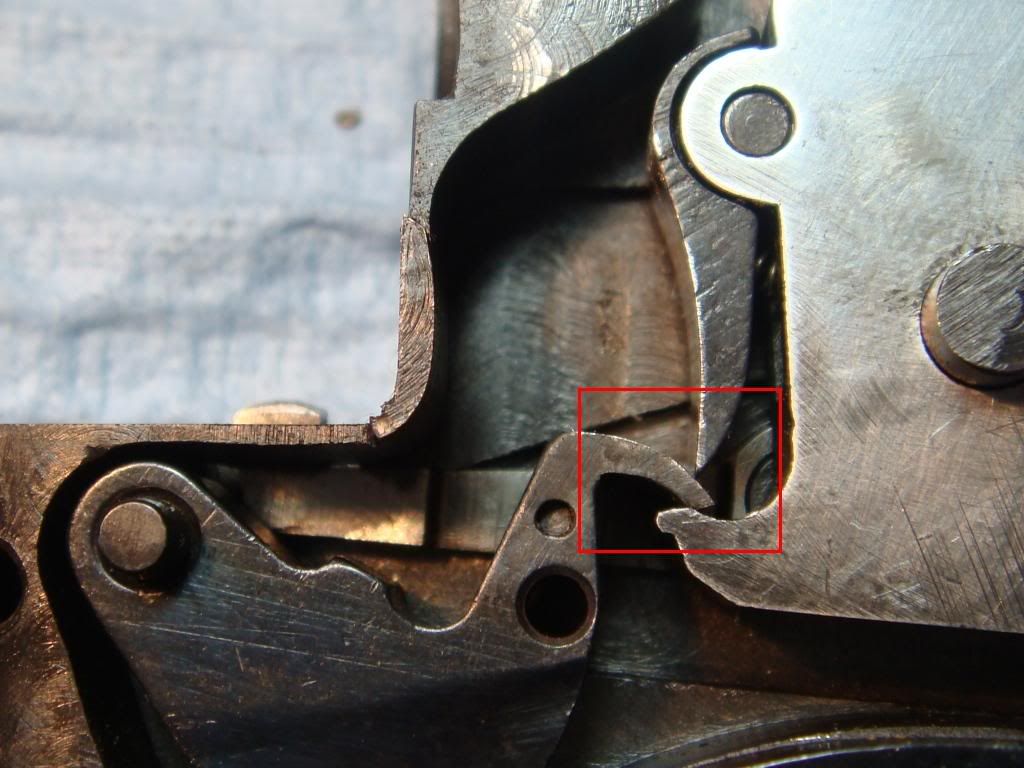
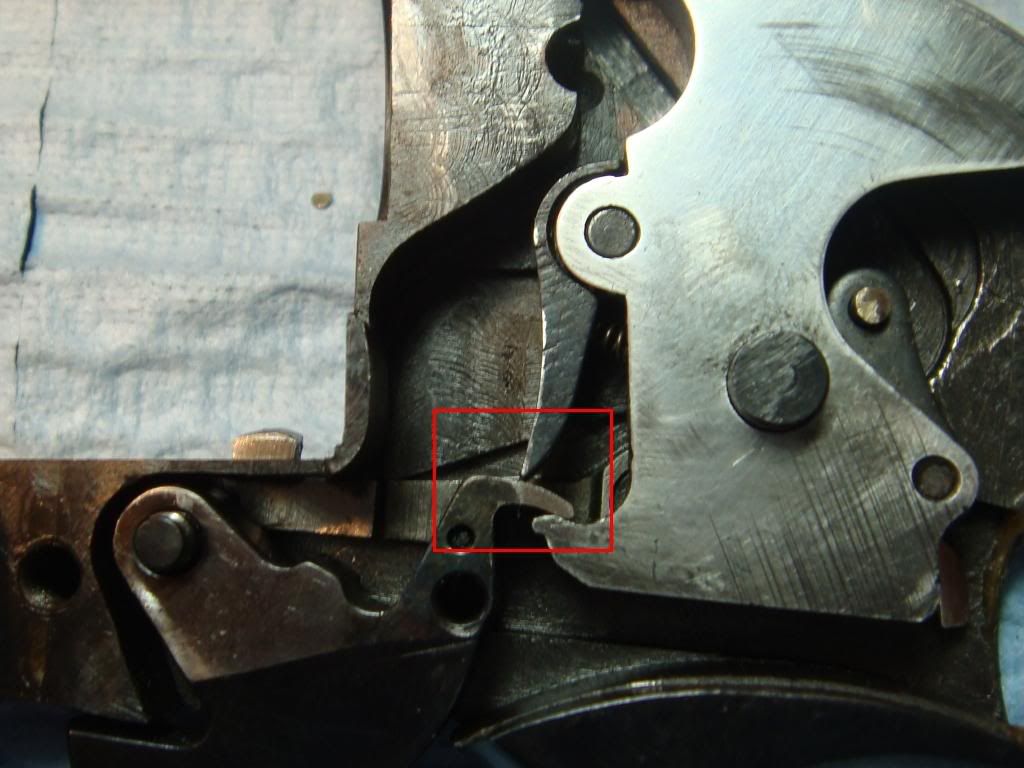
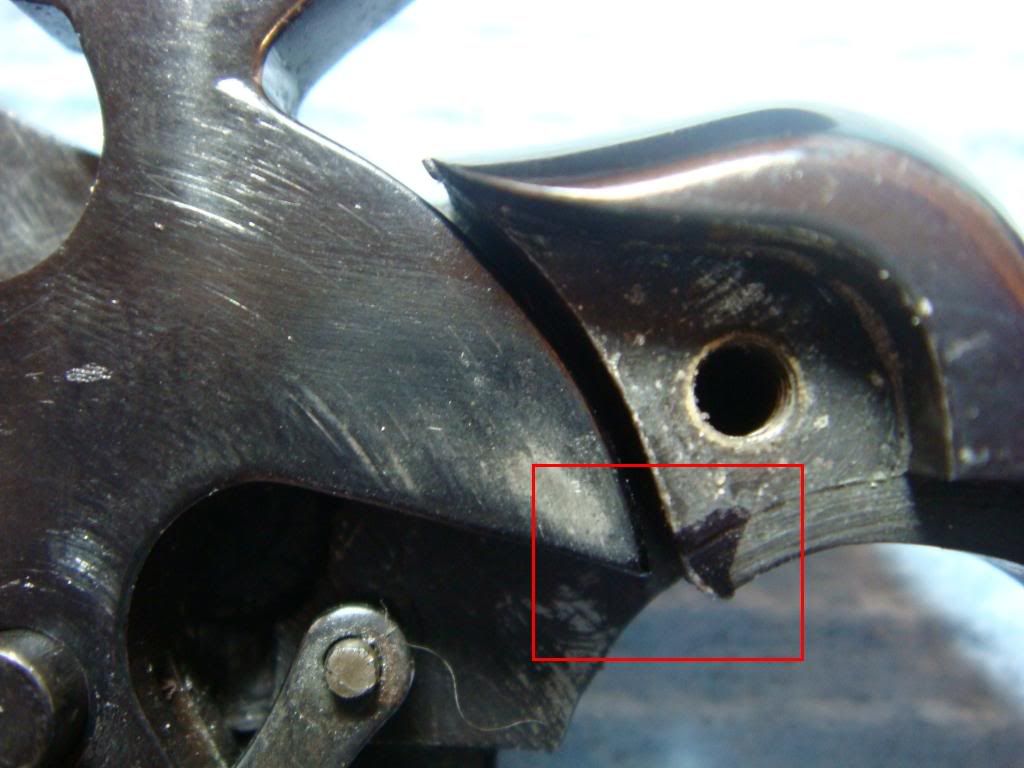
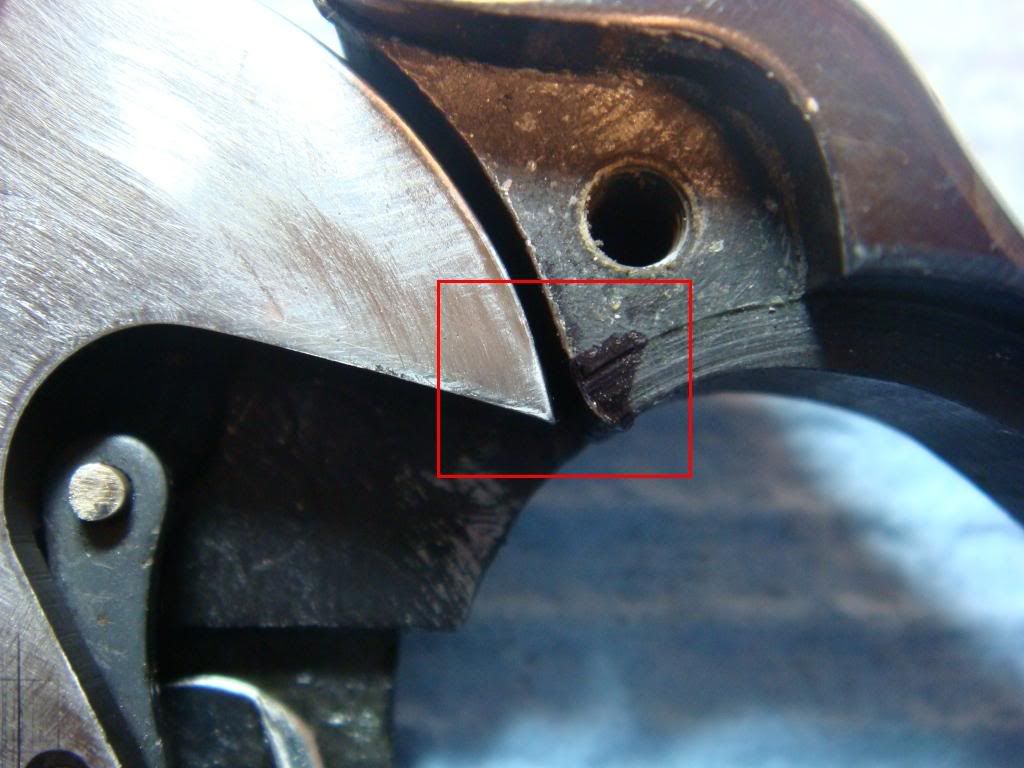
The main one wrong thing in the current gun is that the rebound cam is miscut. Here's a closeup shot of the rebound: the cam coming out of the side of the rebound should be at a 90 degree angle. Instead it's sloped down:
[Did you know? The rebound cam is what the bolt rides over and returns around. As you pull the trigger the bolt retracts as tits tail rides up the triangle, when the tail falls off the front the bolt pops back up. The bolt recovers by traveling around the side of the triangle, which is beveled and polished. :)]
The most common symptom with a sloping rebound cam is that the bolt falls off the side of the cam rather than traveling down the front. The cam isn't designed to work this way, so you get early wear, early bolt drop, weird timing. It's what happens on our gun. If you look closely you can see the tail of the bolt far away from the side of the rebound lever about to fall off the side of the triangle (keep your eye on the red rectangle!)
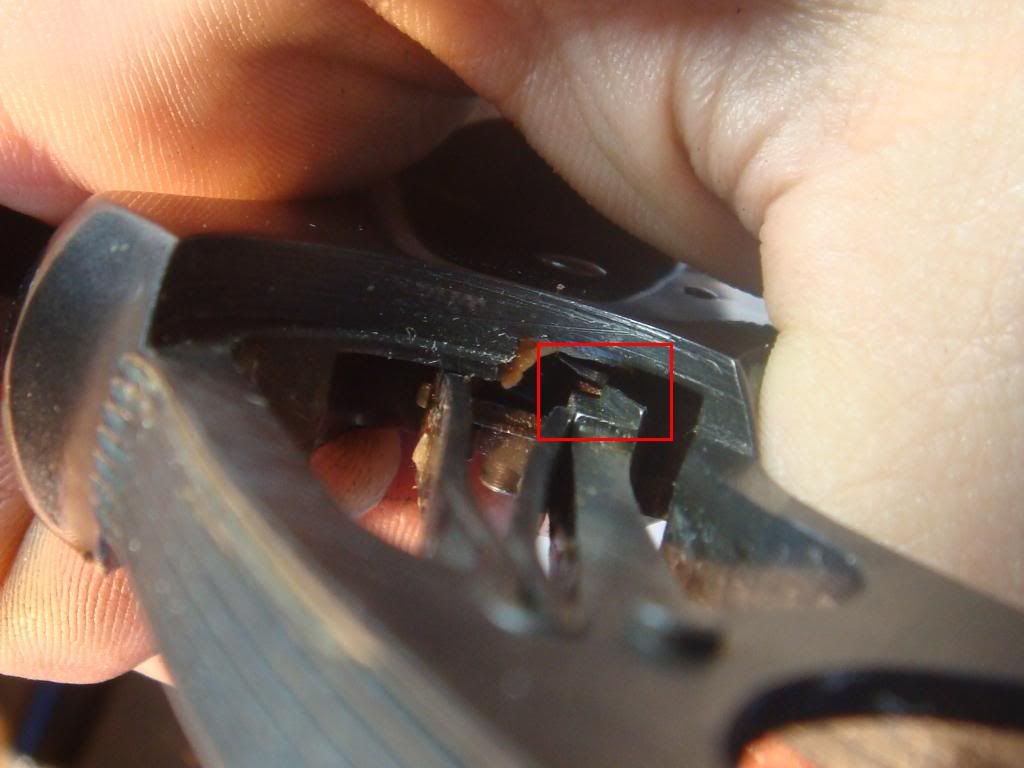
Another problem (assuming the timing works at all) is that that you get a hard, rough feel to the action when the bolt falls (as we do for this gun). It's not entirely clear to me what the exact cause of this affect is, but I think it's b/c the bolt falls directly off the cam rather getting lowered slowly down by riding the front. In any case, one of the first things you look for when you feel that hard crunch is a miscut cam.
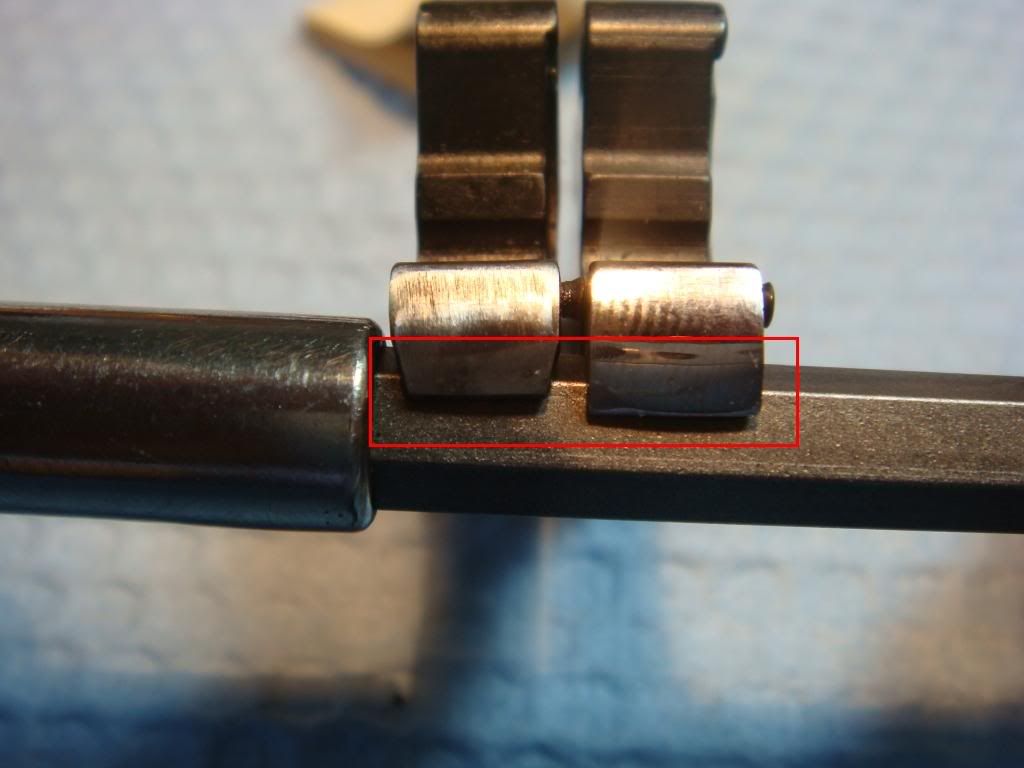
Another issue is that the the hand is aggressively over bent. You can't tell, but if the side plate is tightened firmly you can feel some drag from that (and when we mark things with a sharpie later it really stands out). Here it is laying down for comparison:
Conclusion
At this point we break to smooth and fix things for a few hours.
Finally, we swap the wrong grips for more useful eagle over-sized ebony grips to handle 41 mag recoil and a modern elliason based rear sight so we can aim more accurately.
To summarize:
- Interestingly, the forcing cone was not reinforced: he believes the gun will shoot 1,000 fps rounds w/o issue, indefinitely.
- Not much material is left between chambers in the cylinder (going to be hard to do a .42 mag!): So little that cutting the ratchet was actually likely the most delicate part, as you can see from the broken star.
- Huntington's trigger sear is bent less than a Glenn sear and beveled.
- Less curve means he has to cut the hammer toe less. He also leaves the cut shallow enough that the strut will not reset w/o the rebound in place.
- It seems to have 8+oz of more DA pull for the same mainspring with a perception of slight stacking,, but does pull the hammer slightly farther back.
- He swapped bolt springs for spring X.
- He also put what seems to be spring X for the hammer strut.
- As I received it (but perhaps not how Huntington left it), the gun has a miscut rebound and an overly bent hand that drags. Also the frame has rough spots.
And there you have it!

Nice!!!
ReplyDeleteGunsmithing is something I cannot do. But I always had an interest learning how a gun is made. Thanks for this detailed case study of Colt Python. I will visit your blog again for some interesting information. Keep writing!
ReplyDeleteBest Regards,
Jacky
MA Gun License