I bought a CR-B ($312) and CR-C ($466) package from C&S so I could see how they work on things. The CR-C is their premier colt package; I got it done for an SS python. This post is to dissect the work they did. As they describe it:
CR-C - Colt Revolver - Package CR-C
Colt Python, Diamondback, Detective Special, SF-VII, DS-II Revolver Super Tune Up. Customer Must Specify Whether this Weapon is for Duty/Carry or Target Use Only.
Super Action Job on Python, Diamondback, Detective Special, SF-VI or DS-II
Chamfer Cylinder Mouths and Polish Chamber - 38/357 and 44
The following items will be checked and corrected as necessary: Crane and ejector rod straightness, barrel to cylinder chamber alignment, barrel turned up square with frame, barrel forcing cone square, re-cut forcing cone as needed, barrel muzzle crown
Test Fire for Function and Adjust Sights for Zero at 15 Yds.
Return Shipping and Insurance - Will be Arranged with Customer at Time of Shipment.
They did a couple of very interesting things I hadn't seen before. And they did one very surprising thing I had seen before but didn't realize was still being used (hint: "Austin Behlert" action job).
Unfortunately, despite the novelty, the end result --- how the DA actually feels --- was not worth the money. The SS python feels better than stock, but no where near as good as the colts I have that were done by Frank Glenn or Reeves Jungkind (or even me!). It sounds like there has been a change in personal, since other people have had excellent results w/ C&S previously.
As on additional warning, they corrected the barrel cylinder gap on both guns, but did not clear it with me first. The total bill was over $1200!
In any case, let's get to it.
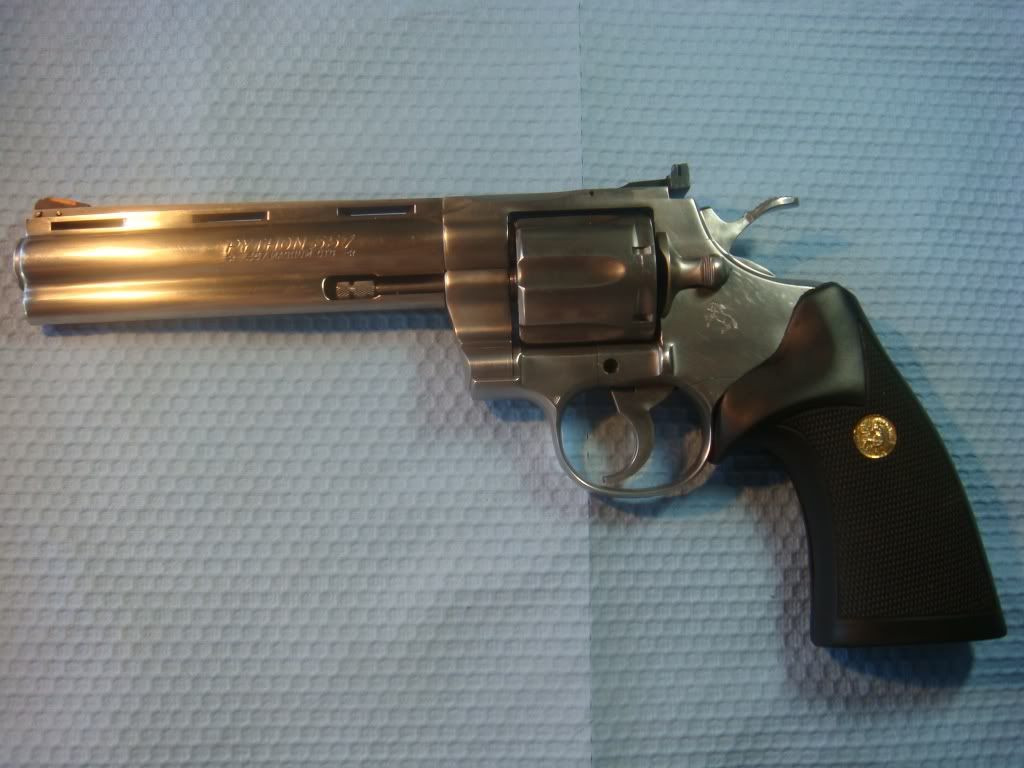
Here's the SS with it's clothes on:
Cool Cylinder Tricks
Taking the cylinder out, we immediately hit something interesting. They reworked the cylinder internals in a way I haven't seen before.
Here's a test Frank Glenn showed me. If you grab the crane of a stock python and let the cylinder hang, the cylinder doesn't move much:
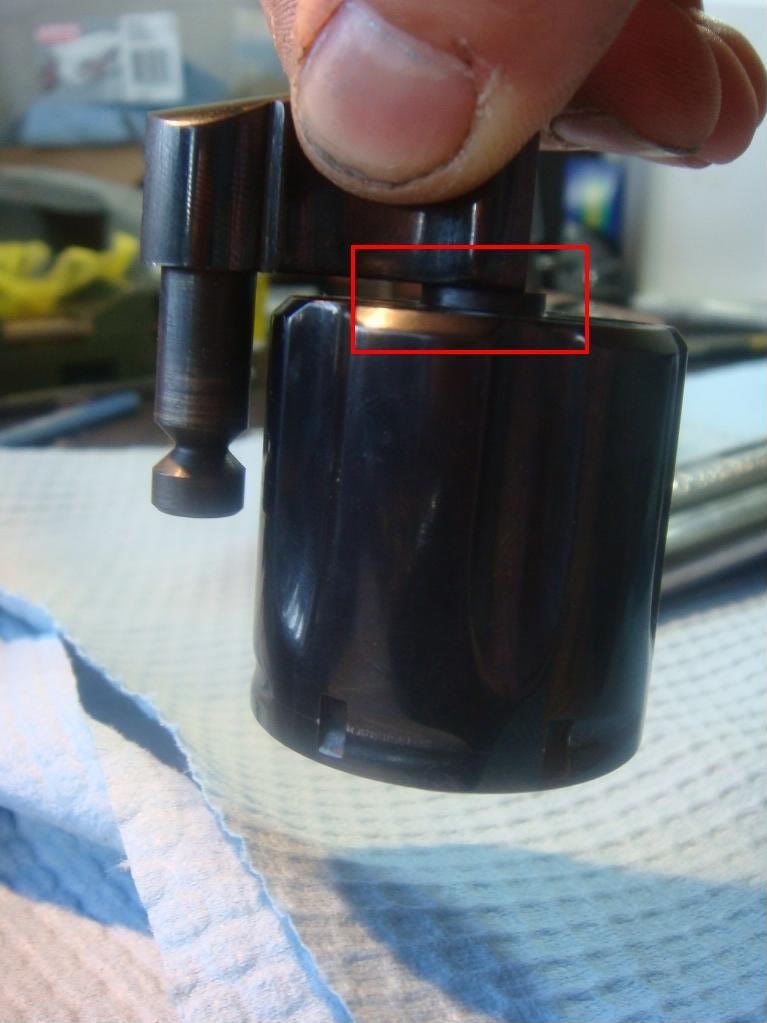
If you do it on some tuned pythons, you'll note the cylinder does drop down a bit b/c the spring has been weakened as a way to reduce the effort needed to turn the cylinder in DA:
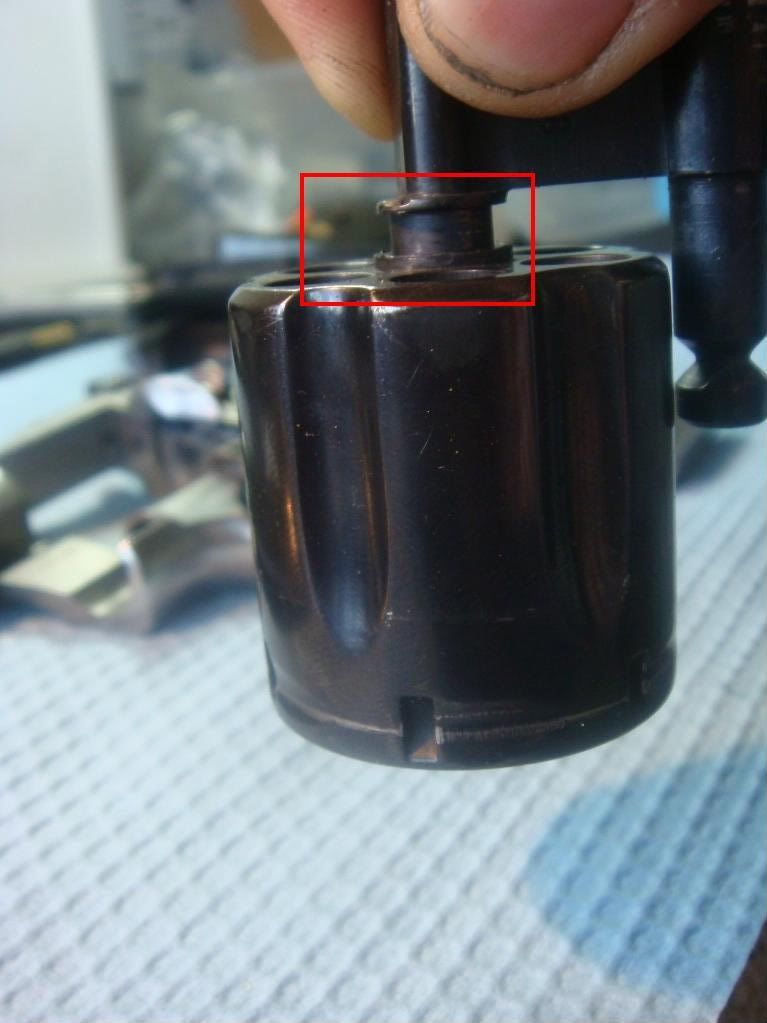
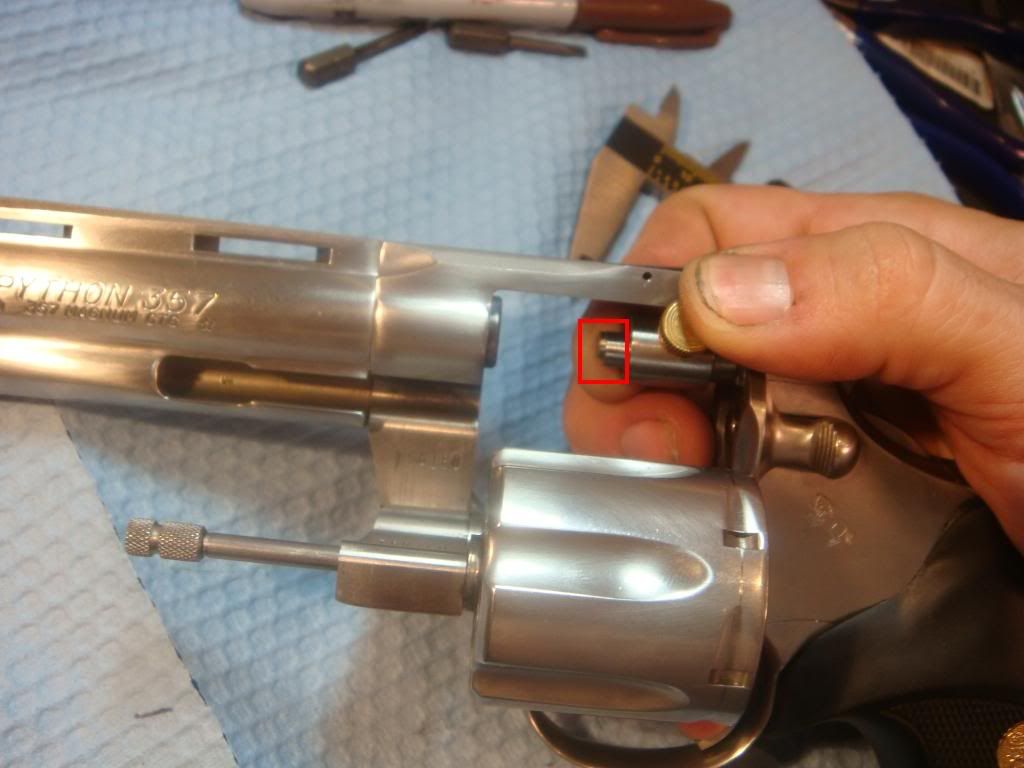
But, when we grab the crane for the C&S python, it drops down all the way!
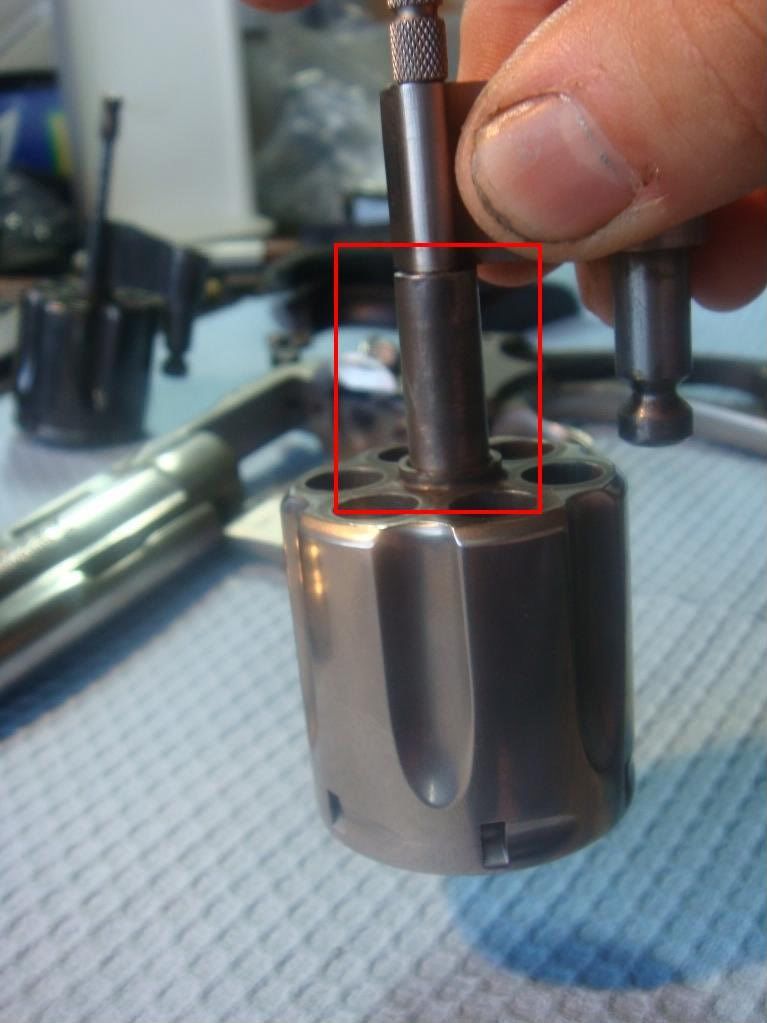
Despite being pissed off with the price, I think this is pretty cool. The ejector rod works fine, but there is no pressure. No pressure = no resistance (at lest from the spring) in DA. I've never seen this before. I wanted to take it apart to see how they reworked the inside, but it was pretty resistant to the crane wrench, so rather than potentially damage it, we're going to preserve some mystery at least for a little bit.
Interesting hammer trick
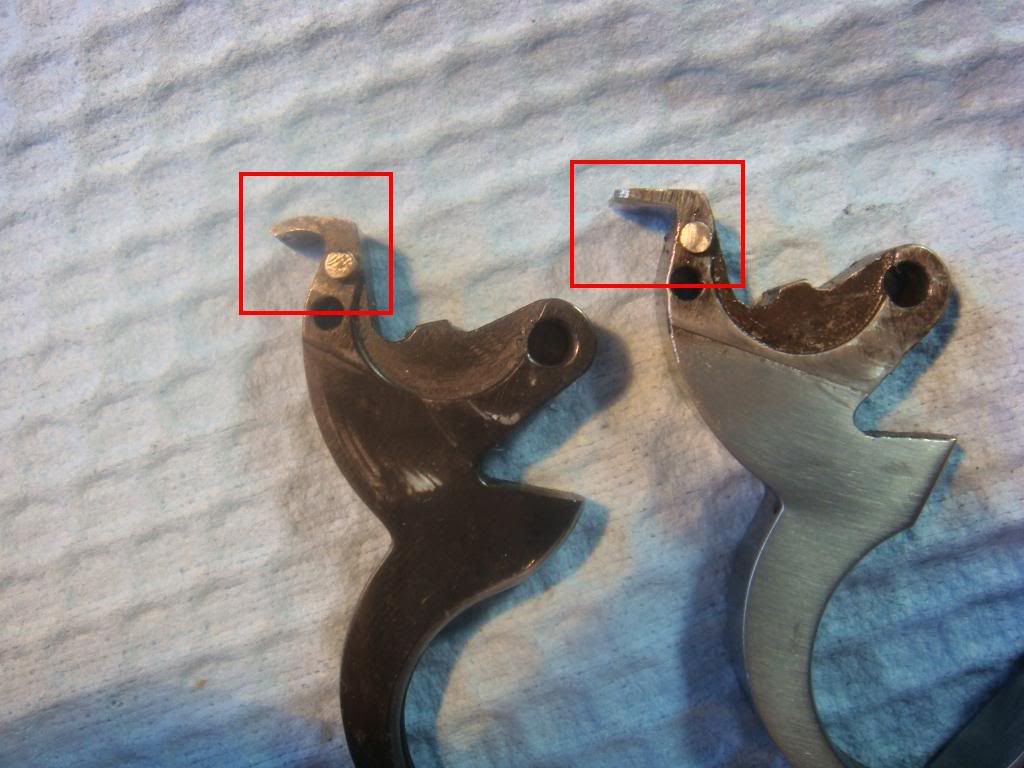
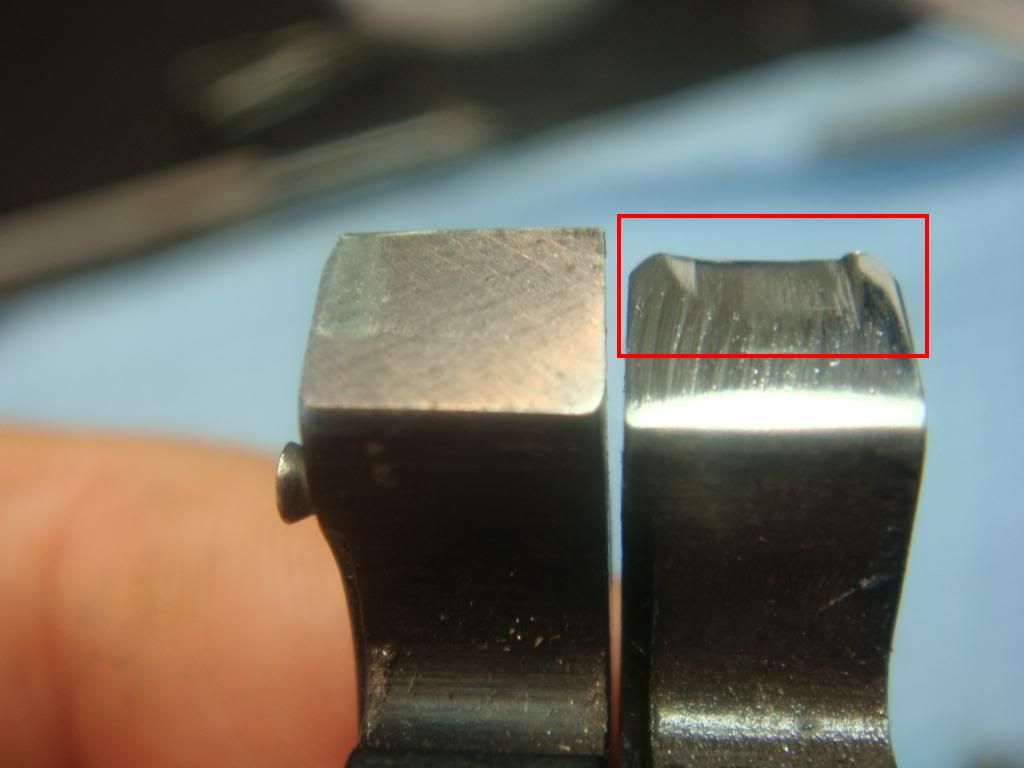
The next thing I haven't seen before on a colt is how they cut up the hammer.
The C&S hammer on the left, a stock one on the right:
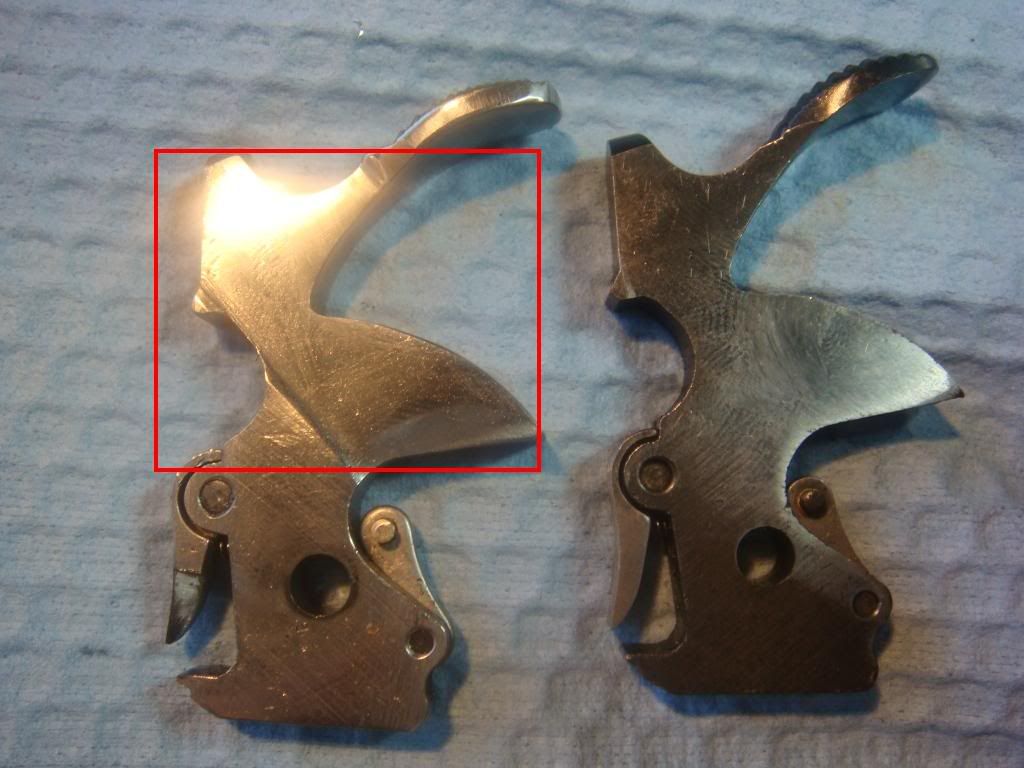
You can see they sheared a noticeable amount of material off the left side. Why? I'm pretty sure the main reason was to eliminate (completely) any rubbing of the side of the hammer on the frame. If you mark a stock hammer w/ a sharpie, you'll almost always see rub marks after cycling it a few times. Cutting this much off eliminates the problem. They didn't want to do it over the entire side, b/c then there would be side to side play in the hammer, which would cause things to get out of alignment.
It's also possible they did this to reduce weight as a way to get reliable ignition at lower pull weights. I don't think this is the cause since you can cut a hell of a lot more off than this and get the hammer to weigh about half of what it does normally (ask me how I know :)).
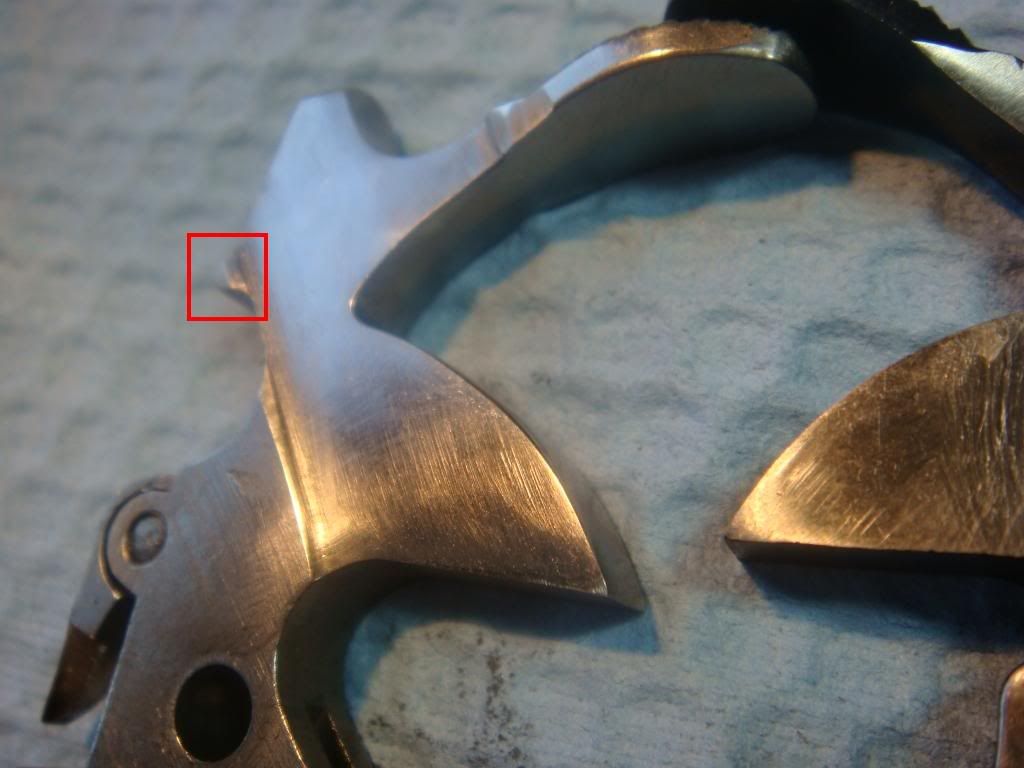
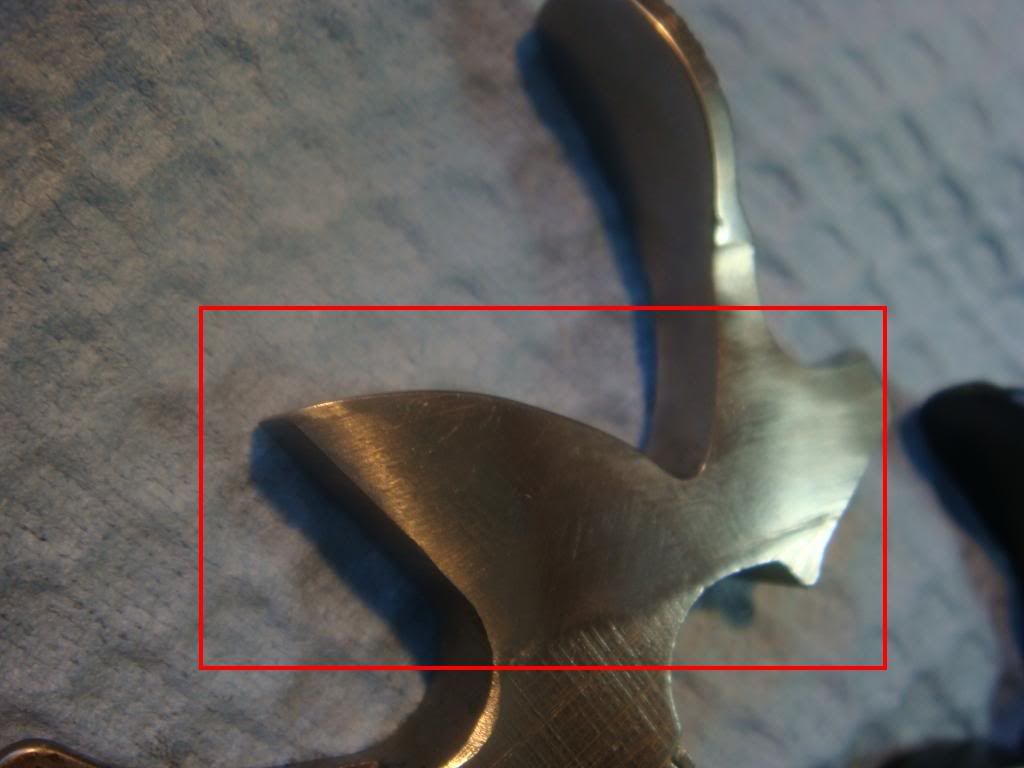
Looking closer (again on the left side of the hammer), note they did not cut into the part of the hammer that hits the safety:
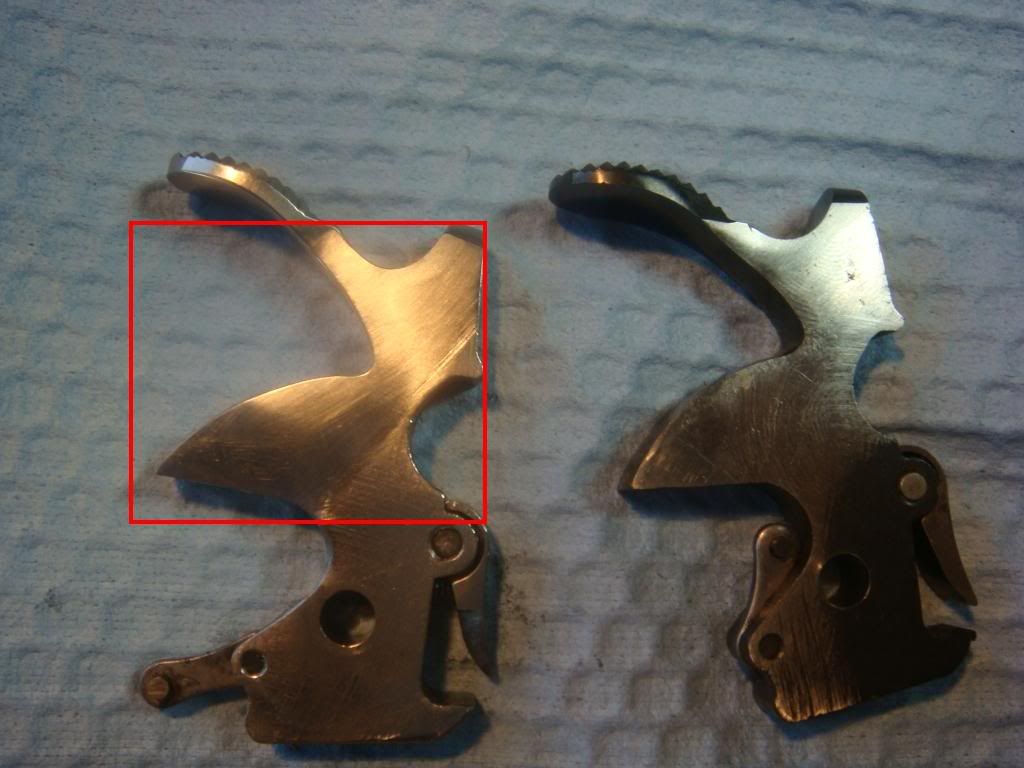
The right side, they did shear a bit off, but no where near the amount as on the left:
Since we love to get all scientifical we measure it:
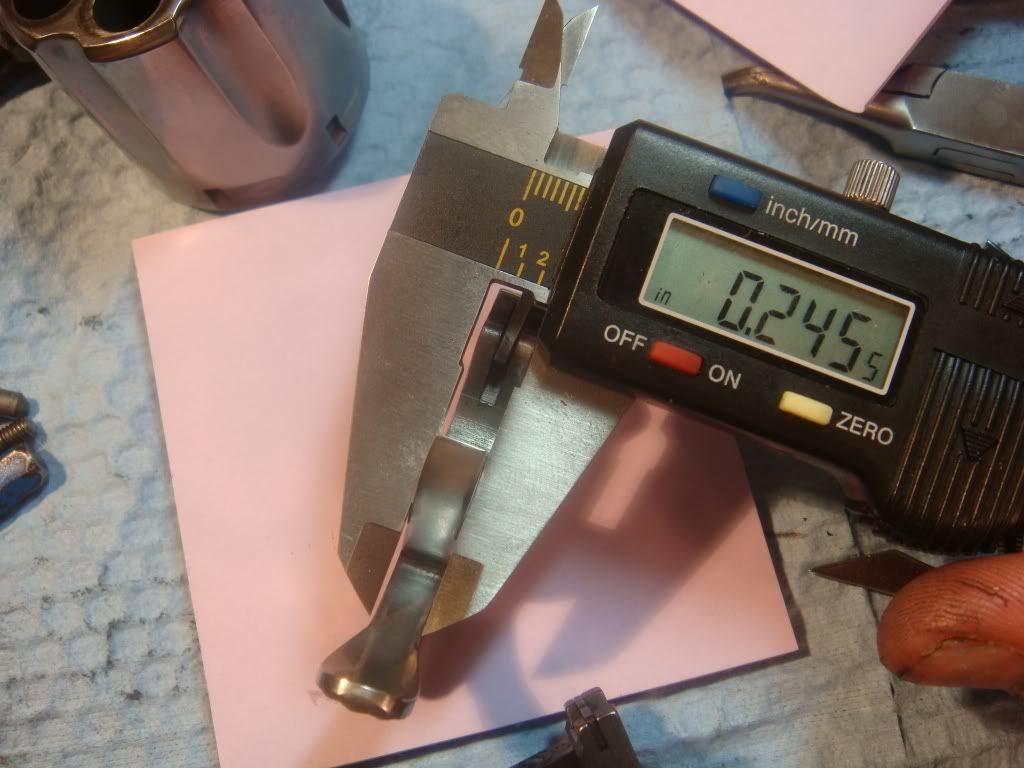
Winding up with a rough idea of how much they cut where:
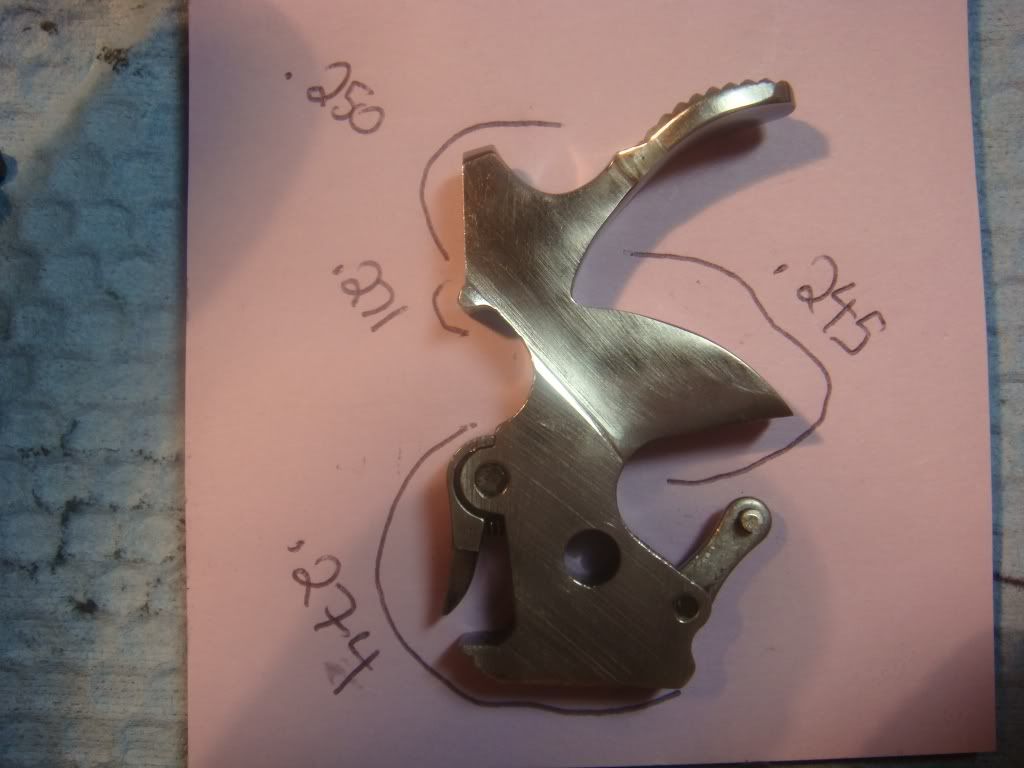
Given the variance, it's not clear they used a mill; perhaps a grinder + buffer.
Weird mainspring
Next thing interesting is the mainspring. Theirs on top, stock (sort of) on bottom:
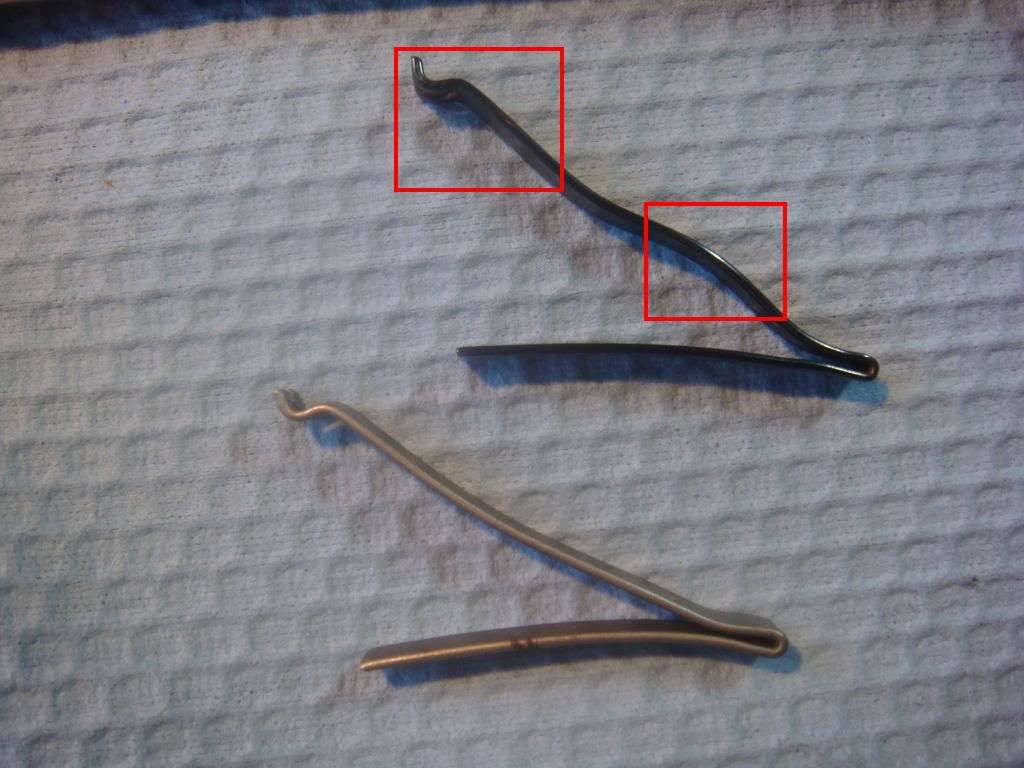
As you can see, there is one obvious bend and then (I think) a slight bend at the top. The obvious bend is about in the same place that most people do a poor mans action job by inserting a punch between the two legs and cocking the hammer a few times (Kuhnhausen actually says to do things this way). In their case, the bend seems more gentle. And, very weirdly, it seems as if the mainspring has been heat treated(?) --- possibly as a way to reform it rather than bend?
As you can perhaps see, it has a very odd blue, glossy color:
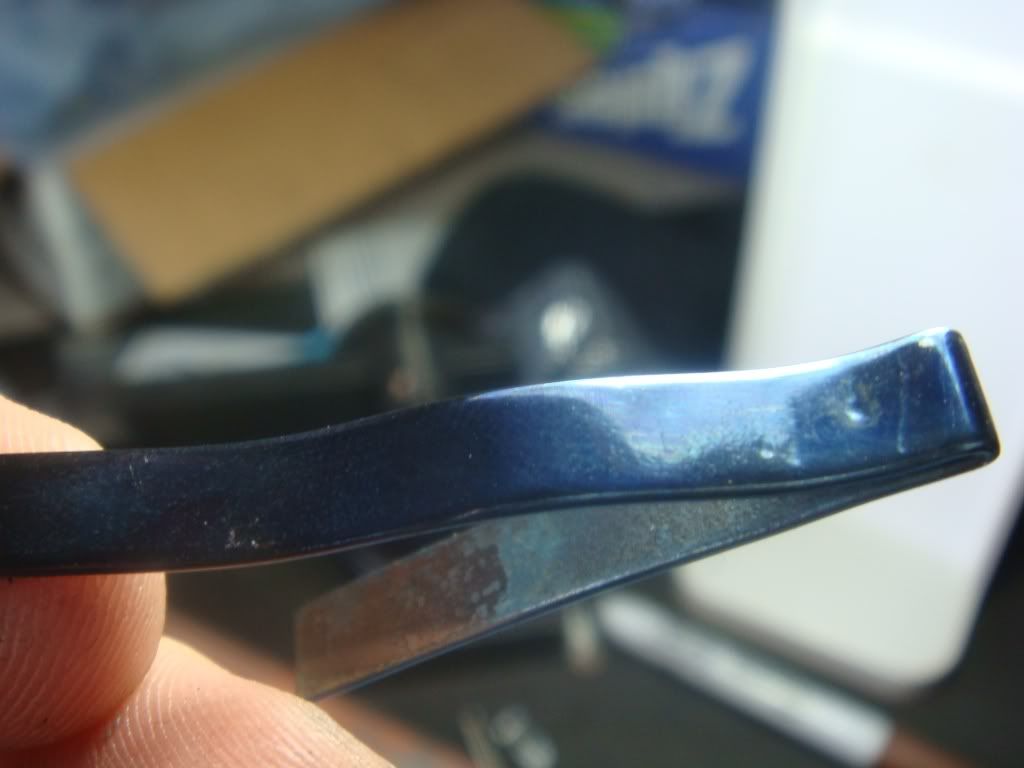
I've not seen that before. I'm not sure, actually, what they did. Or what it
all means. Do let us know if you figure it out.
What type of action job did they do?
The CR-C purports to be the the best action job C&S does. So I was really looking forward to what they did with the trigger. Basically, from the side, it looks like they did nothing, which means it stacks badly and is no where near what a well tuned python feels like.
For comparison, here's a trigger modified by Frank Glenn on the left (sear curved = less stacking) and the C&S trigger on the right (sear not curved = colt stacking):
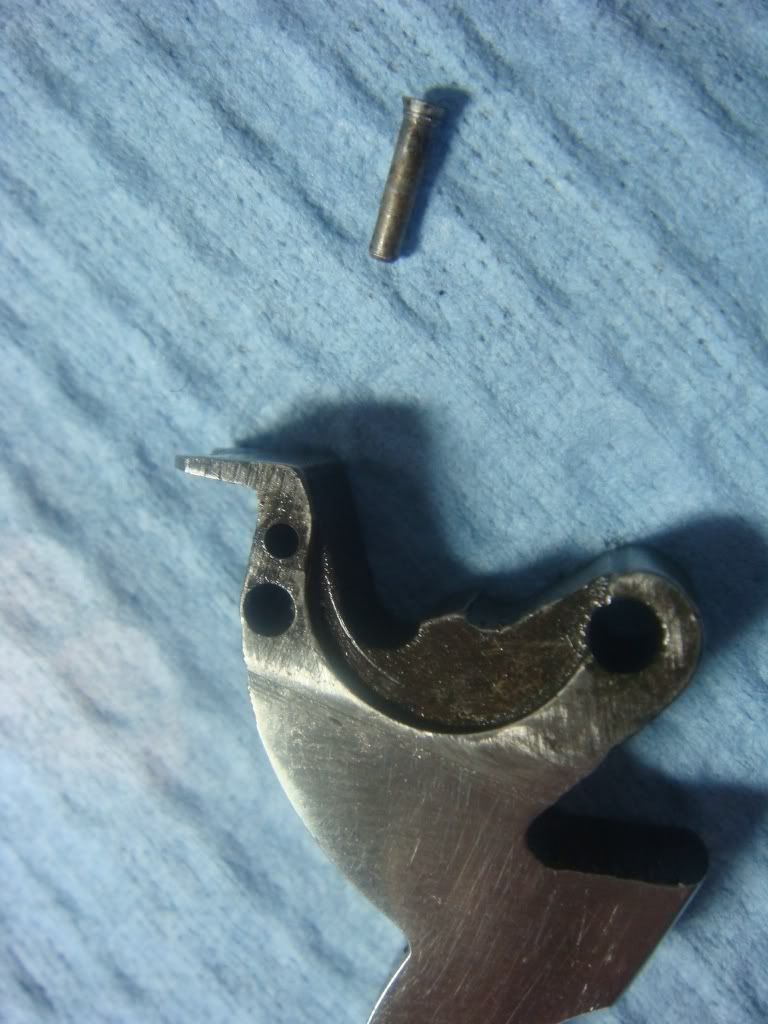
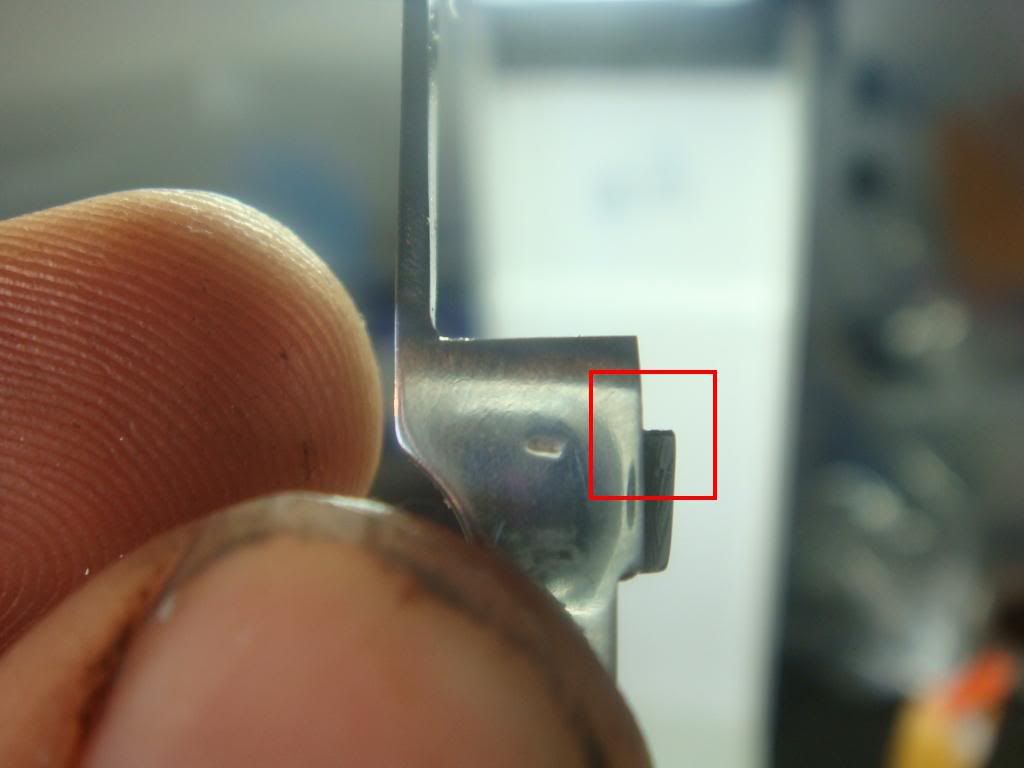
From the side, the only real modification they did to the trigger was somehow make it so the trigger pin (that holds the safety) could fall out:
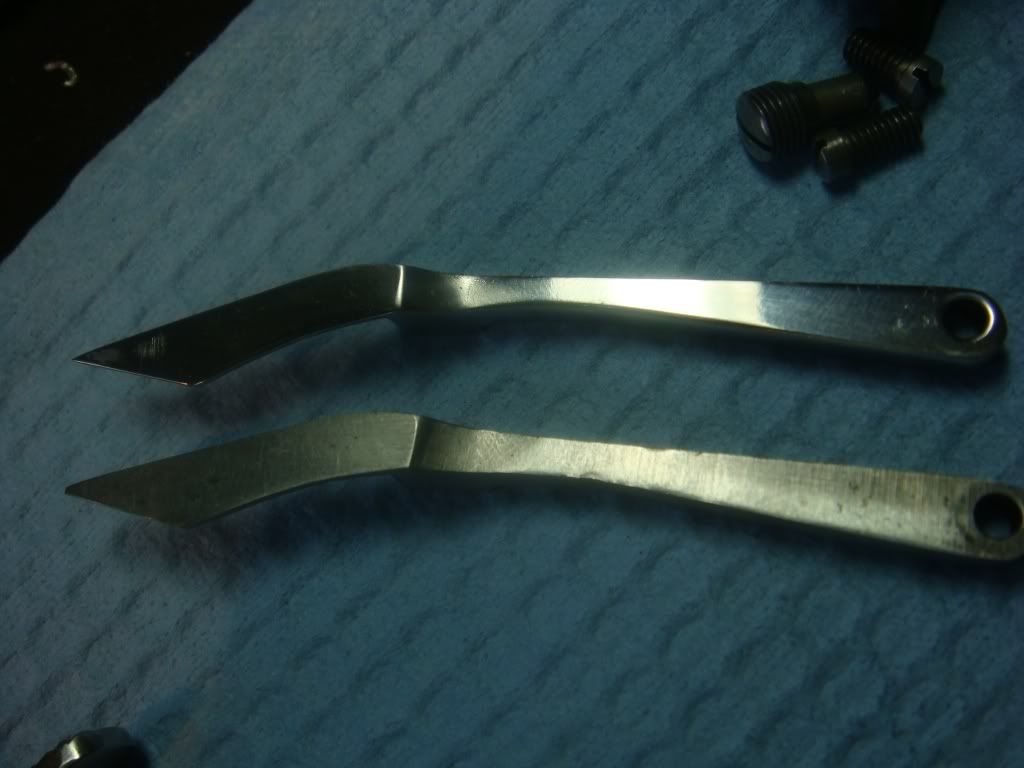
If you look at the hammer strut they cut it down to a more narrow wedge. Theirs on left, stock on right:
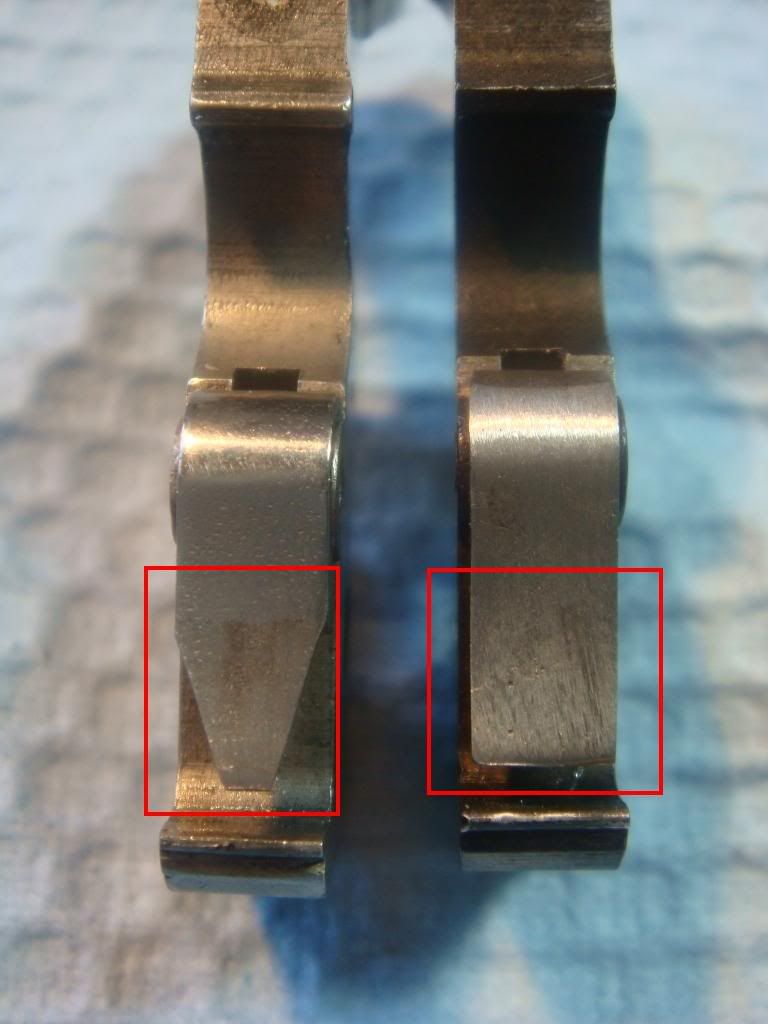
Closeups:
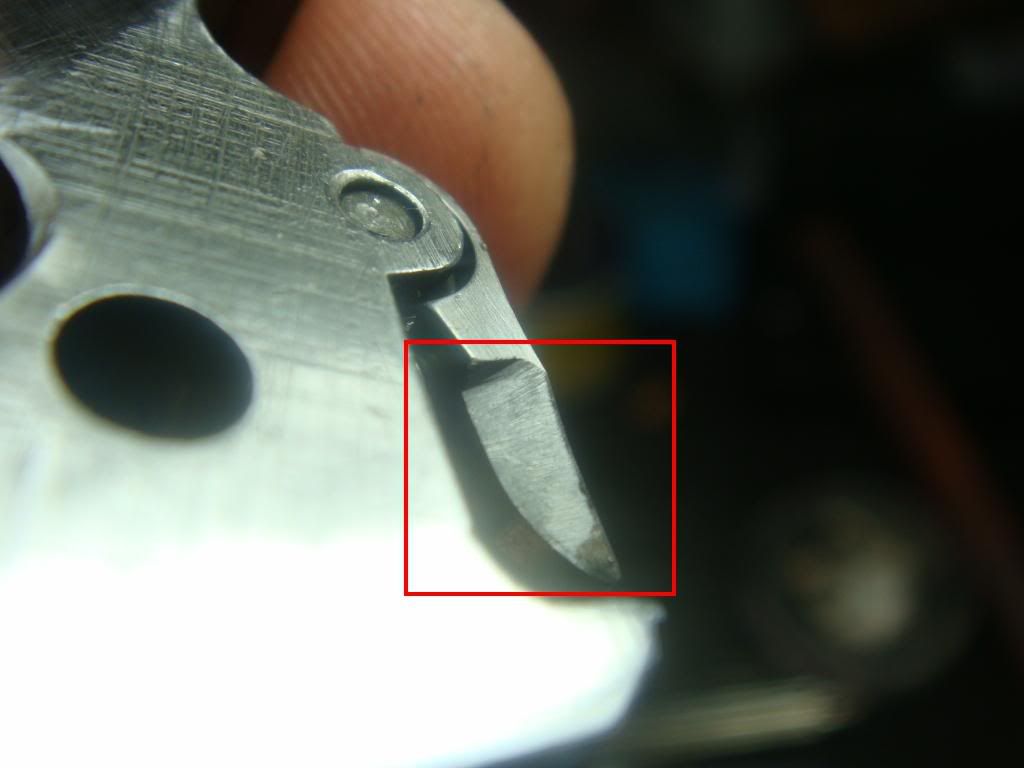
This is similar to how Jack Huntington did the strut on the 41 mag python I have (http://coltpython.blogspot.com/2009/07/forensic-photos-41-magnum-python-by.html) though his wedge was wider.
I am embarrassed to say, that after taking these photos, I went and took a bunch more thinking they didn't do a damn thing other than narrow the wedge, perhaps in an effort to reduce friction (I need to measure, but I don't believe it does).
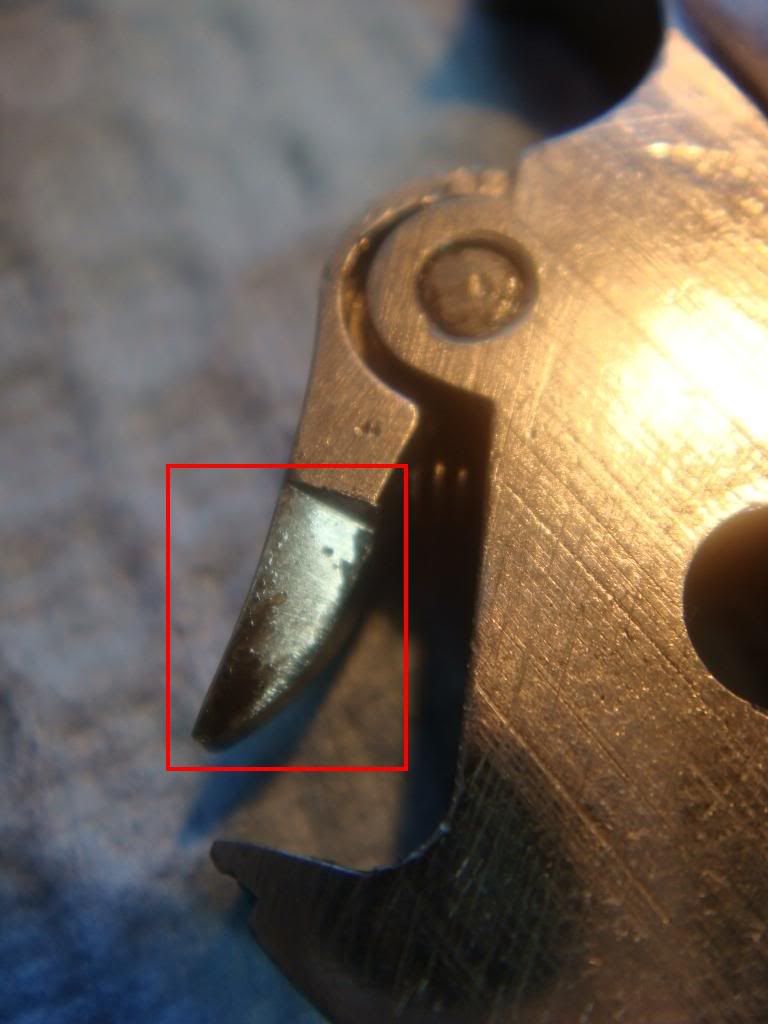
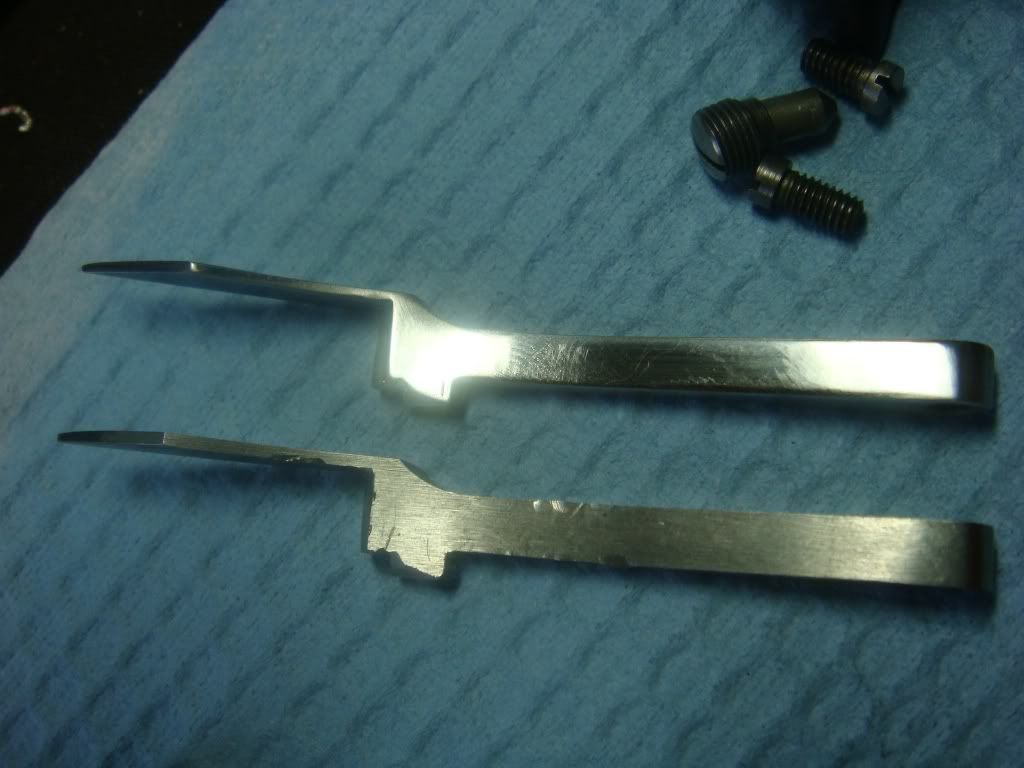
But, in fact, they did an old trick, one that I never would have expected them to use. Stock sear on left, C&S on right --- what do you notice?
Yeah: a groove! Hilarious! They must be the last practitioners of the late Austen Behlert method of tuning triggers! He wanted an easy way to reduce stacking without having to do all the usual work required after putting in a curved sear trigger --- cutting the hammer toe, fussing w/ the cocking notch to make SA not suck, messing with the hand and rebound lever, etc. His approach was to cut a groove in the sear and then narrow the strut to ride through it. The result is that the strut rides a more circular path as compared to a stock trigger, reducing stacking, but with the benefit that: you don't alter SA at all, leave the hammer toe as is, and don't change the geometry, so don't have to retime.
I'd done some previous experiments to recreate this:
http://www.coltforum.com/forums/showthread.php?t=18799&highlight=behlert
The verdict? Unfortunately, based on the prior experiment and how this python feels, while Austen's trick does improve things compared to stock it is still far from how a curved sear trigger feels. It *is* easy however, and the lack of adjustment needed after is a nice thing. It probably also has less legal liability issues since you don't touch the cocking notch.
With all that said, given the amount of money the CR-C cost, I expected them to do things in the best way they knew rather than this expedient, cute, but less effective approach.
So what is the pull in any case? At one level it's easy: just measure it. The other level it's harder --- for their design, what's the minimum DA pull you can get with reliable ignition? Anyone can bend a spring to make a low pull. (Zero is especially easy: just leave the mainspring out.) Lowing the pull and making a bang is the tricky part. In any case, it was too late to measure that (primers are loud), so I just measured pull.
About 7.0 to 7.3 lbs with the cylinder open, but 7.15 -- 8.12lbs with the cylinder closed:

You'd like the closed and open pulls to be pretty similar --- if not it indicates binding.
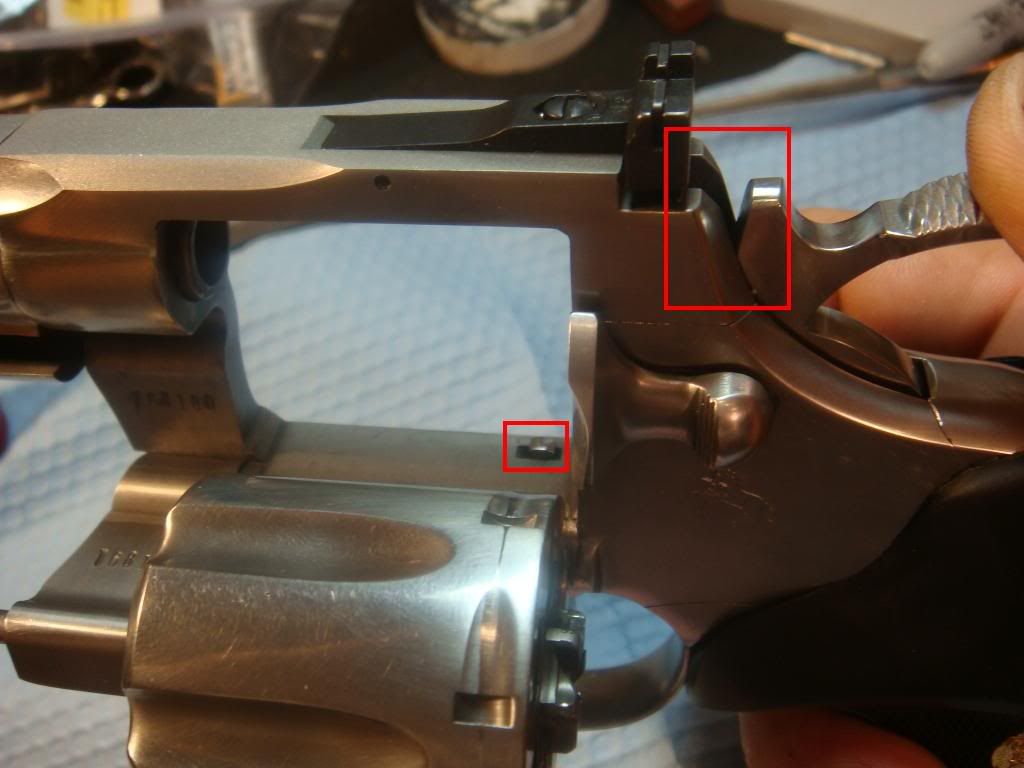
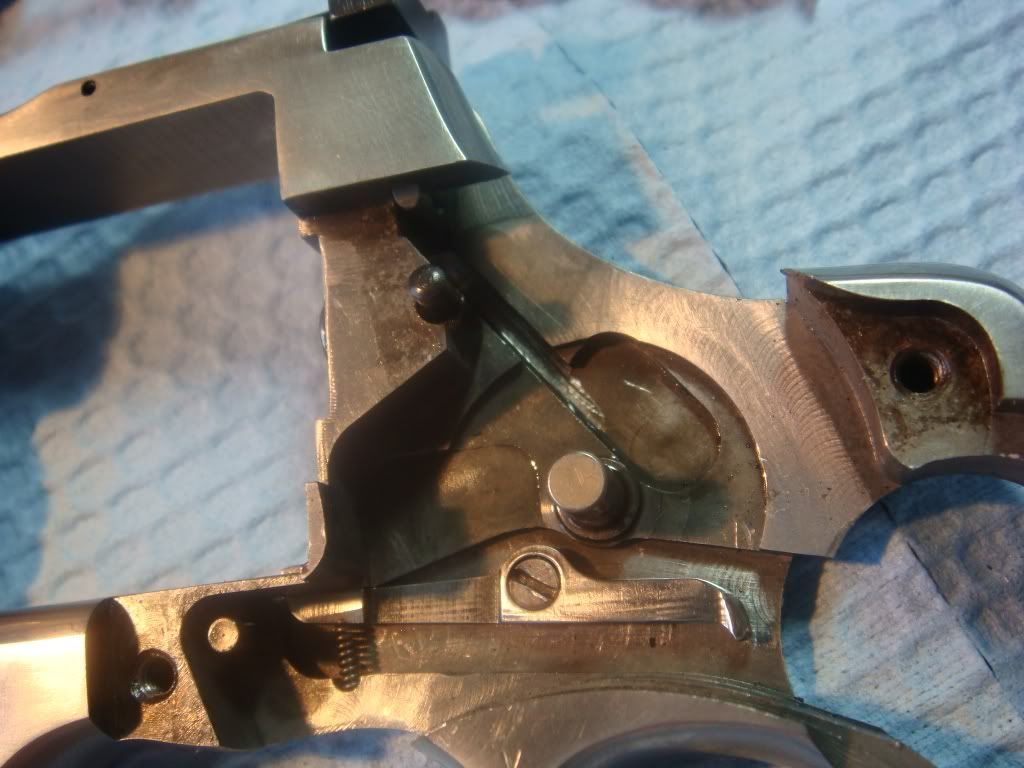
In this case, part of the binding is that the rebound seems too low: bolt pickup is not instant, which means the bolt drags on the cylinder when it rotates, increasing, well, drag.
Here's an easy test to do to your colt: open the cylinder, start moving the hammer back. Bolt should start moving down instantly. In this case, it's pretty poor --- you can see how far back the hammer has to go before there is any movement:
With that said, we need to cut them a bit of slack --- part of the reason the closed cylinder DA is heavier is that they did surgery to eliminate endshake, leaving the colt with essentially 0 play. Without getting broken in it's going to be pretty stiff: no play means it must be forced through any point of resistance rather than working its way around.
Measuring endshake. To get the max barrel / cylinder gap we push the cylinder back and slide in the largest feeler gauge that will go in w/o excessive resistance:
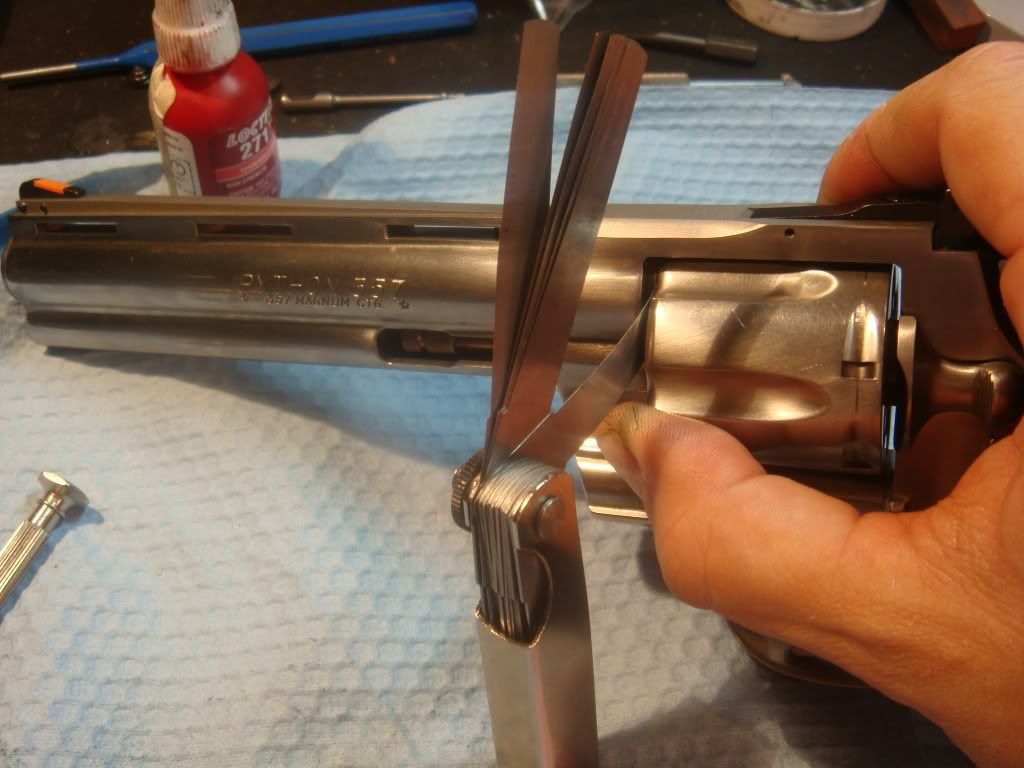
Now push forward and do the same:
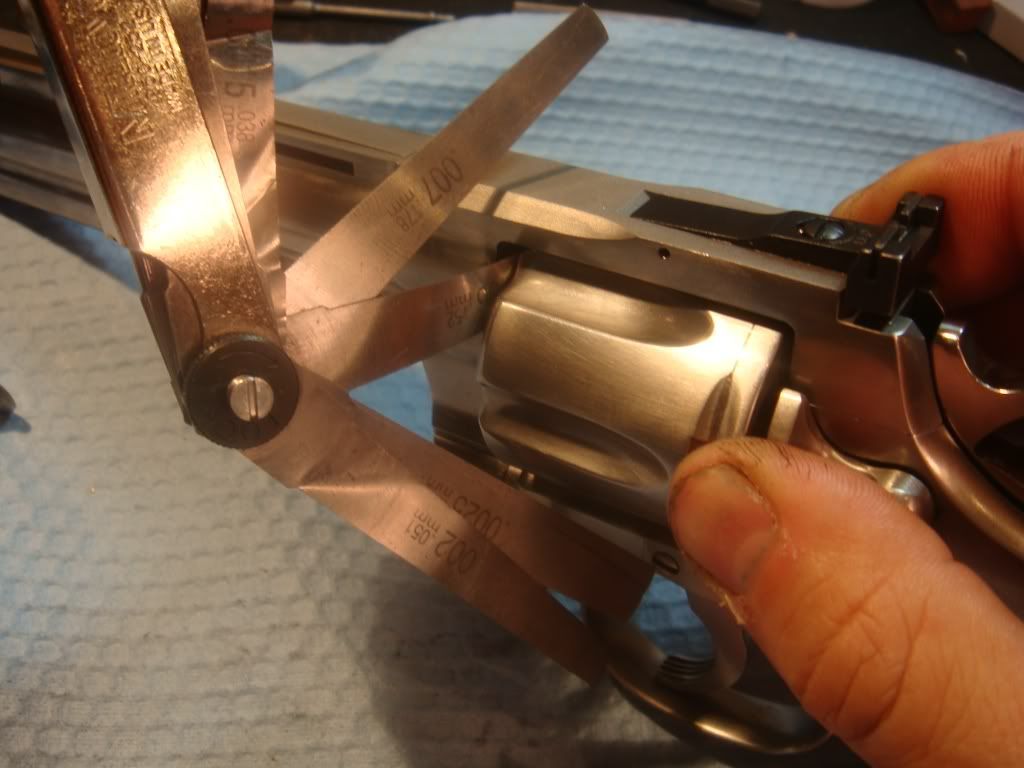
Max (.006) more or less is the same as min, which means there is less than
.001 play.
Looking at the cylinder it does not seem that they put in a bushing (as in http://coltpython.blogspot.com/2009/07/fixing-endshake-on-41-magnum-python.html or http://coltpython.blogspot.com/2009/06/trip-report-frank-glenn-gunsmithing.html). Seems like they stretched it (which you get to do once):

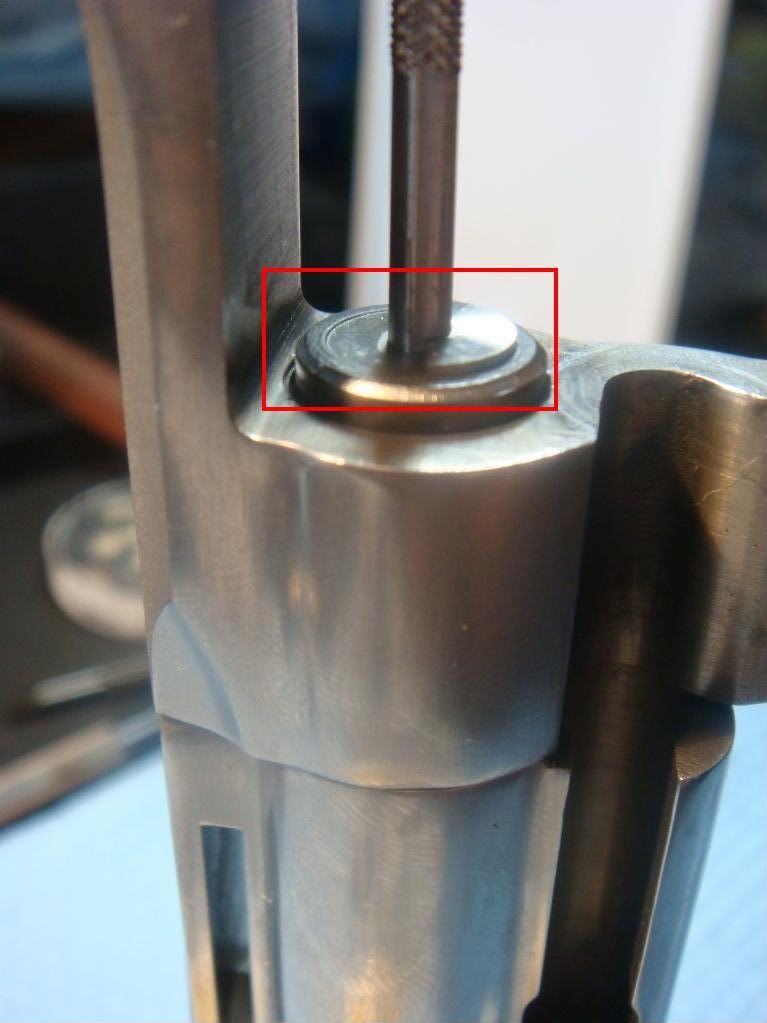
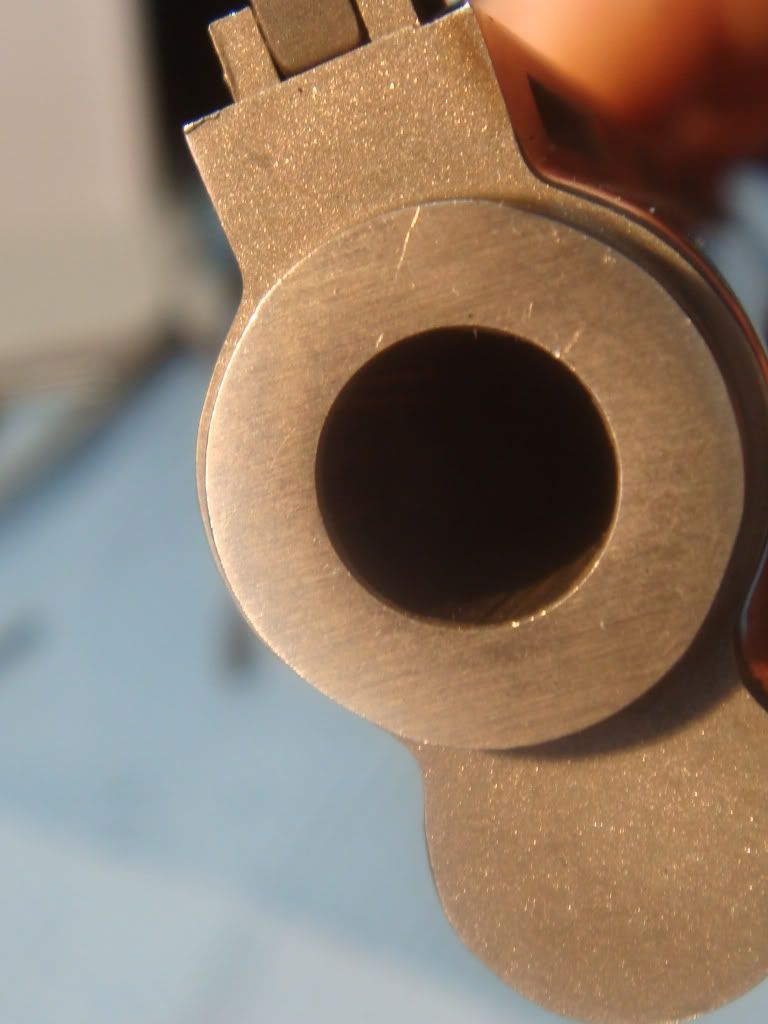
They claimed to have recut the forcing cone, so I checked it w/ two plug guages just to see what they left it as.
Seems to be towards the low end when we use a 9 1/2 degree cone plug guage --- the lip of the barrel should be somewhere between the high and low point of the guage:
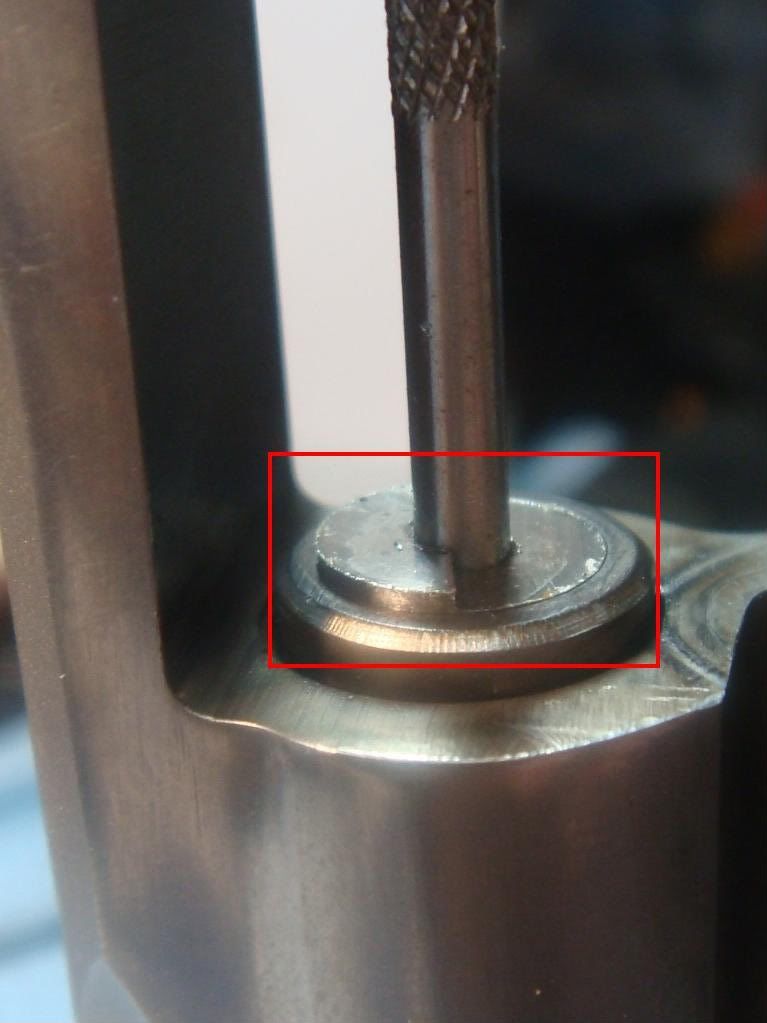
And using a 18 degree plug guage --- this doesn't seem to be the angle they are
using since the low part sits above the lip.
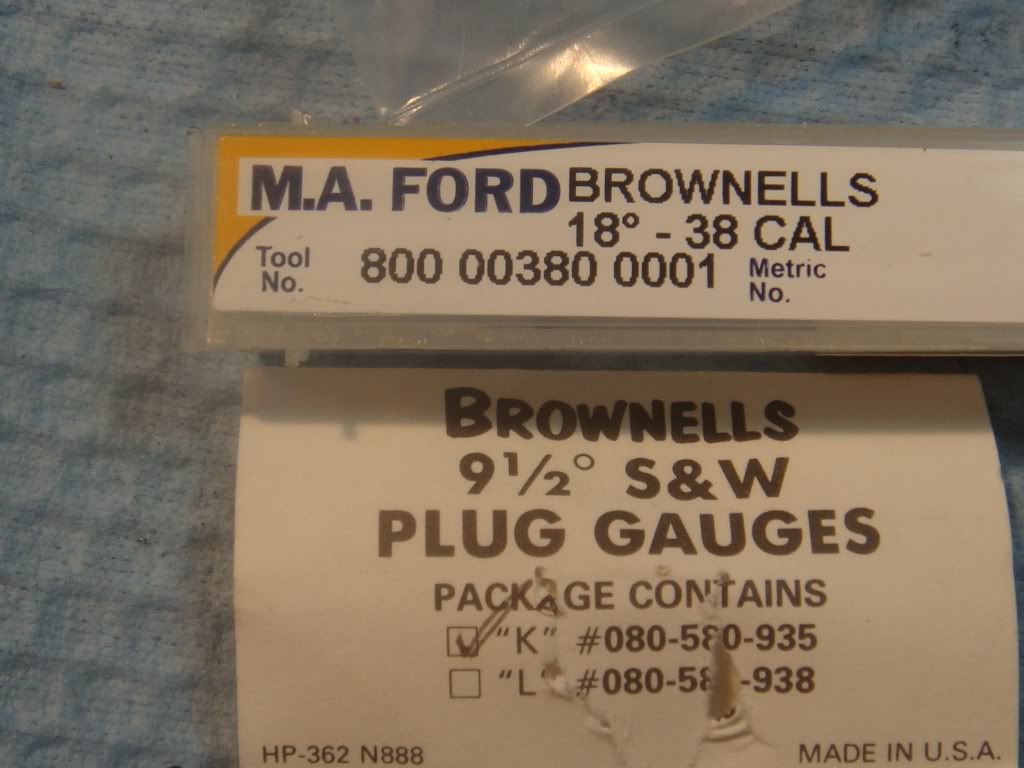
The two types we used:
Rebound lever
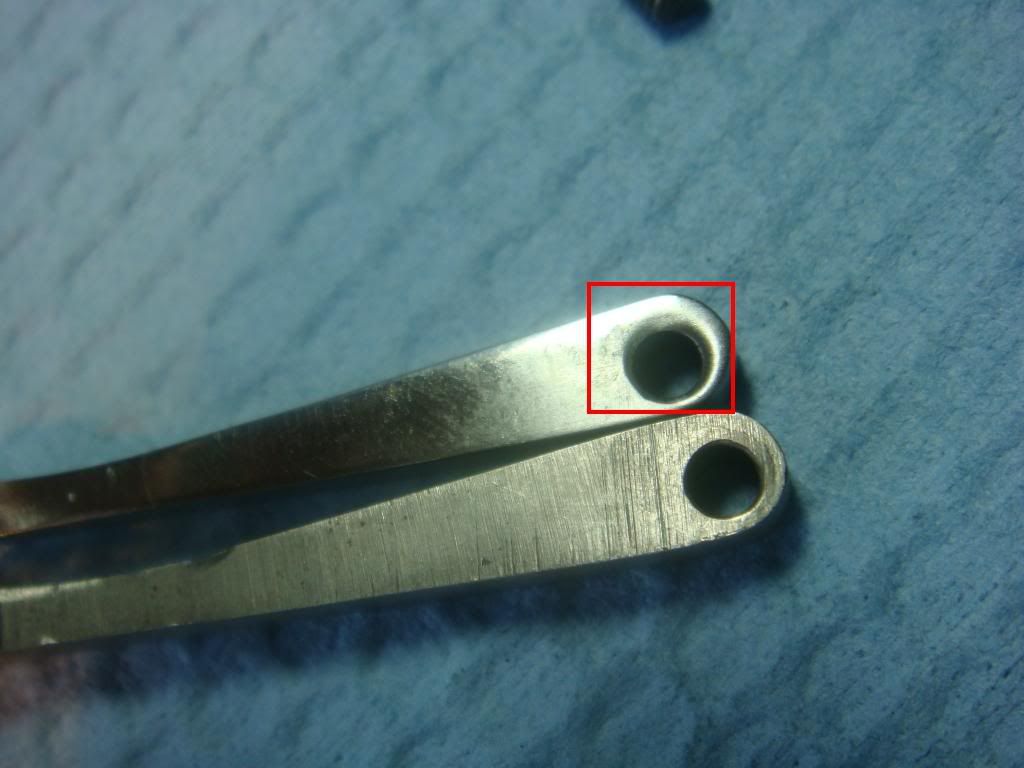
Unlike a bunch of other smiths, they polished the hell out of the rebound lever. The *entire* rebound lever. Here's some photos with theirs on top, a stock on bottom.
From the side:
The bottom:
It looks like they polished (and counter bored?) the rebound lever pin hole --- you can see it goes down slightly on both sides:
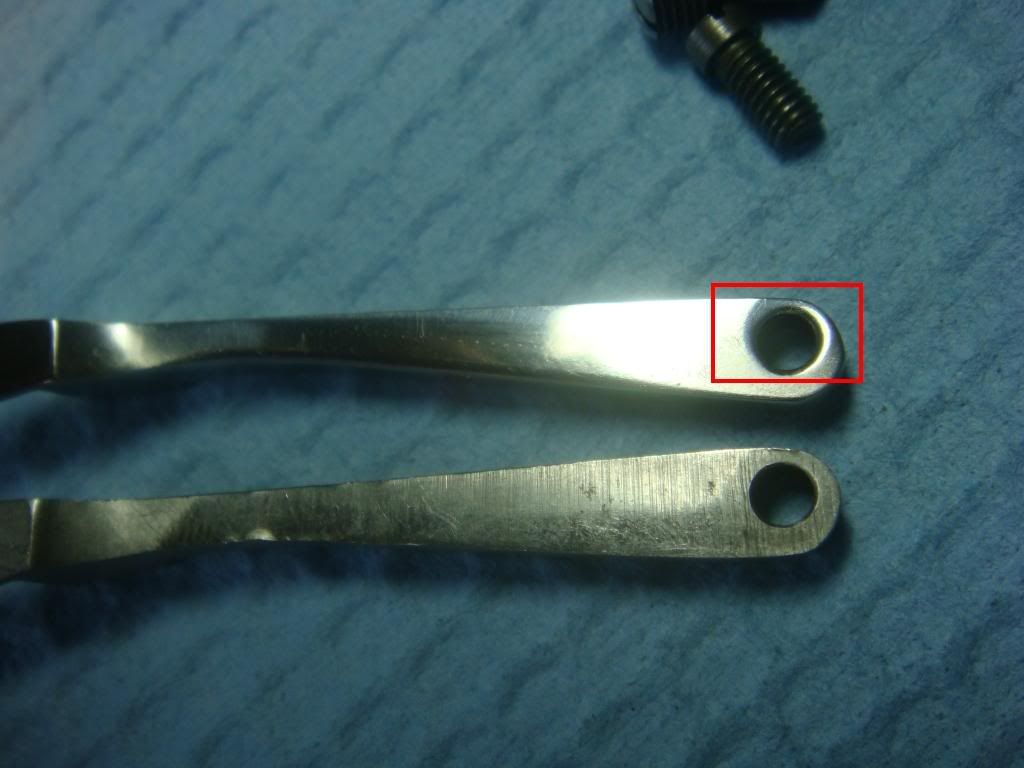
A nicely cut rebound cam: right angle to the rebound, not sloping down:
Things they didn't do.
Unfortunately, this colt had been smoothed some before sending to C&S so it's hard to tell if any of the polishing was from what they did. However it is easy to tell what they didn't do.
Not much on the crown. Looks stock other than a small nick. No target crown or such things:
They don't slather gobs of grease on. Seems to be a light coat of a translucent grease:
Another thing they didn't do was anything fancy w/ the firing pin. Despite them selling longer firing pins for S&Ws the measurement on this one was on the low side.
Here's our firing pin guage: it uses displacement to measure how far the pin sticks out, in this case it's in the initial state:

Pull trigger, push hammer forward and push the gauge against the protruding pin:
It now sticks out:
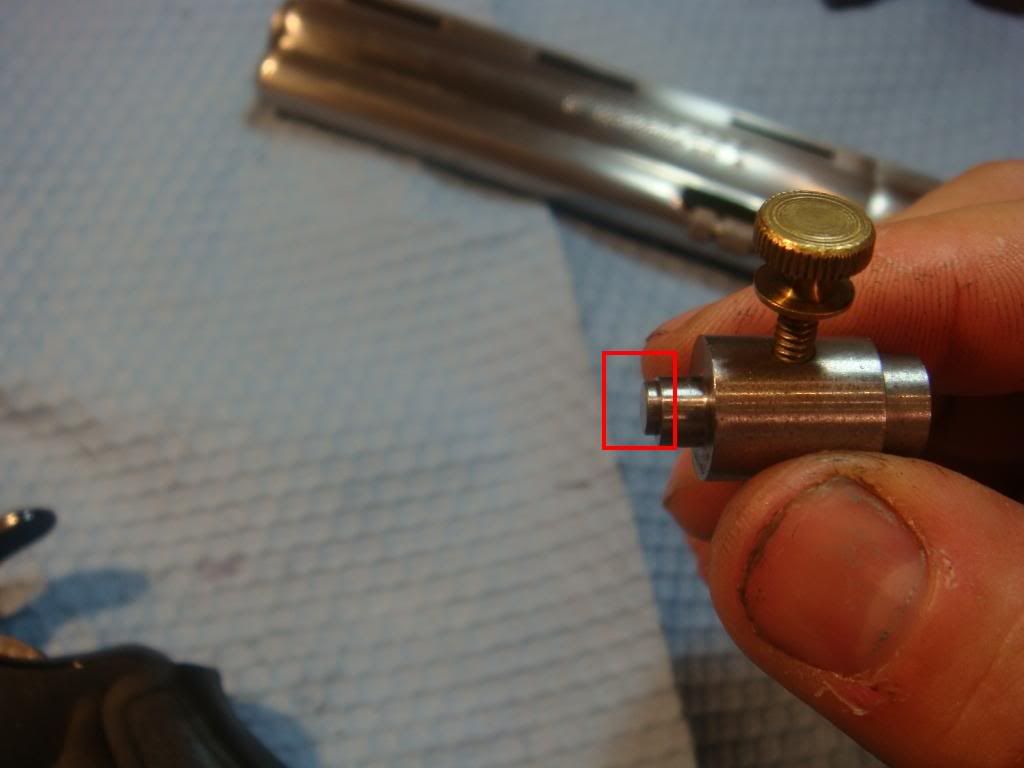
And you can measure it:

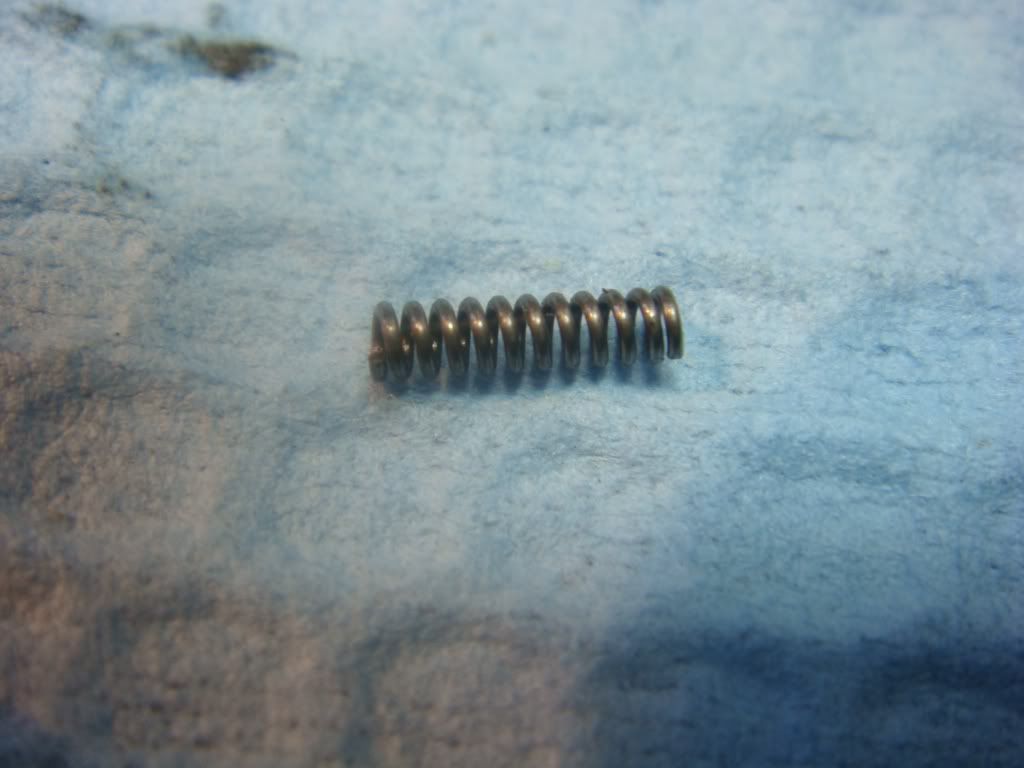
Unlike Sherman, Huntington and other people, they seem to have left the bolt spring stock, but may have clipped it slightly shorter (there's enough variance in these things that it's hard to tell):
Summary
To summarize. Interesting things I hadn't seen before:
- They sheared the side of the hammer off in an interesting way, I assume to eliminate rubbing between the hammer and frame.
- They did a very cool trick to eliminate all spring binding on the cylinder.
- They did a weird treatment to the mainspring: I'm not sure what this means.
- Rather than curve the trigger sear they did a version of the Behlert method! It certainly it wasn't expected on the highest priced C&S tune up package.
- I don't recall seeing such an extensive polish of a rebound before (other than when I've done it, but that means nothing).
I plan on trying the first, and would like to figure out how they did the second. I am very surprised they didn't curve the trigger sear.
For the future, I'm hoping to swap their mainspring in and out with an equivalent pull one and see if there is any difference in ignition.
In the end, it was a interesting python, but I'm still irritated at paying so much money for an action job that is worse than what I can do myself.

FWIW: Kuhnhausen's book shows thinned Python hammers in several illustrations.
ReplyDeleteWow, missed that, despite my version of the book being completely covered with grease and bent pages. He never talks about this explicitly, though, correct?
ReplyDeleteDid they achieve true DA mechanical timing? Cylinder locks before hammer release? Seems like the Behlert trigger method might let the trigger and hand rise more before sear release. I've had trouble getting true mechanical DA timing while still being able to cock in SA. I'm starting to wonder if factory new Colts actually achieved that like Kuhnhausen says, "...cylinder must lock before hammer releases." I'm thinking I need to cheat out the sear let-out a little. Any thoughts? I'd love to see you post on the subject. Mostly, I've read about timing checks that only talk about SA cocking tests.
ReplyDeletebetmatik
ReplyDeletekralbet
betpark
tipobet
slot siteleri
kibris bahis siteleri
poker siteleri
bonus veren siteler
mobil ödeme bahis
601JU
Good post. I'm inspired to read your blog and find some helpful information there. We appreciate you sharing this special post for our vision.
ReplyDeleteDevOps Training Institute In Hyderabad
dfgfhfdhdhjgfjhgjkm
ReplyDeleteصيانة افران بمكه
ertretgrthtjhtjujk
ReplyDeleteصيانة افران بمكه
شركة تسليك مجاري flWCBuPDHh
ReplyDeleteشركة تنظيف بالقطيف ddMDqTMxvs
ReplyDeleteشركة تسليك مجاري Kmc5nAzyNk
ReplyDeleteشركة تسليك مجاري بعنك
ReplyDeletektJqoCyRvu
I find their cylinder rework technique very interesting.
ReplyDelete