While pythons have a cult following, for unreason the m357 has been passed over (fortunately for those of us on a budget). Over-simplified: colt made the python by, essentially, adding an underlug to the m357 and doing more polish of the inside and out. Both are I-frames. The parts are identical otherwise. Since most m357s were made in the 50s when the factory standards were very (very (very)) high, it's common for the action on one to be appreciably better than a later model python and often equivalent to a 50s python. I've generally found them somewhat heavier, but very tight and smooth. And heavy is easy to fix. If you see a good condition one for $500 buy it. If not email me so I can!
When I got it, the trigger was kind of sticky, but I figured that was just b/c it needed a good lube and we'd be all set.
Of course, it wasn't like that. It turns out that the person who reblued it didn't know what he was doing. Neither, it seems, did the last person to work on it.
This is my short story about fixing their mess and then putting in curved trigger to remove stacking. Needless to say: don't try this at home! (And if you spot something I did wrong, or not optimally, please point it out!)
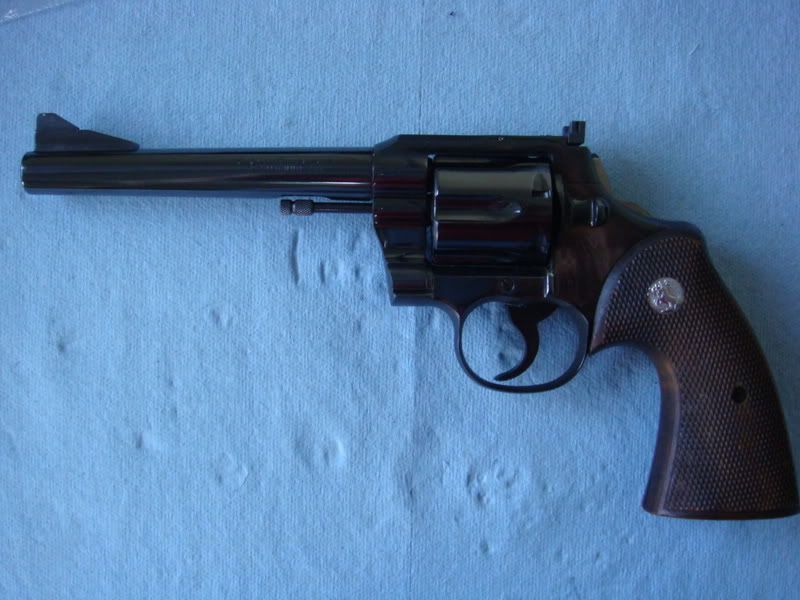
So, first up: the revolver; I love fully checkered stocks:
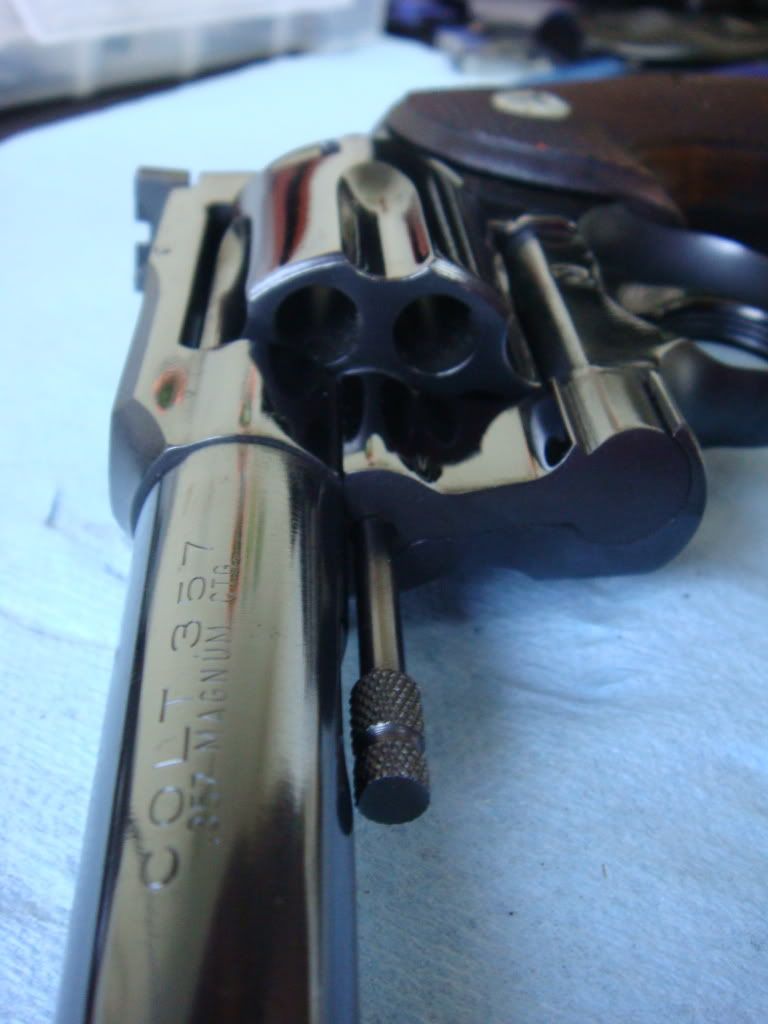
Lettering still fairly sharp despite reblue:
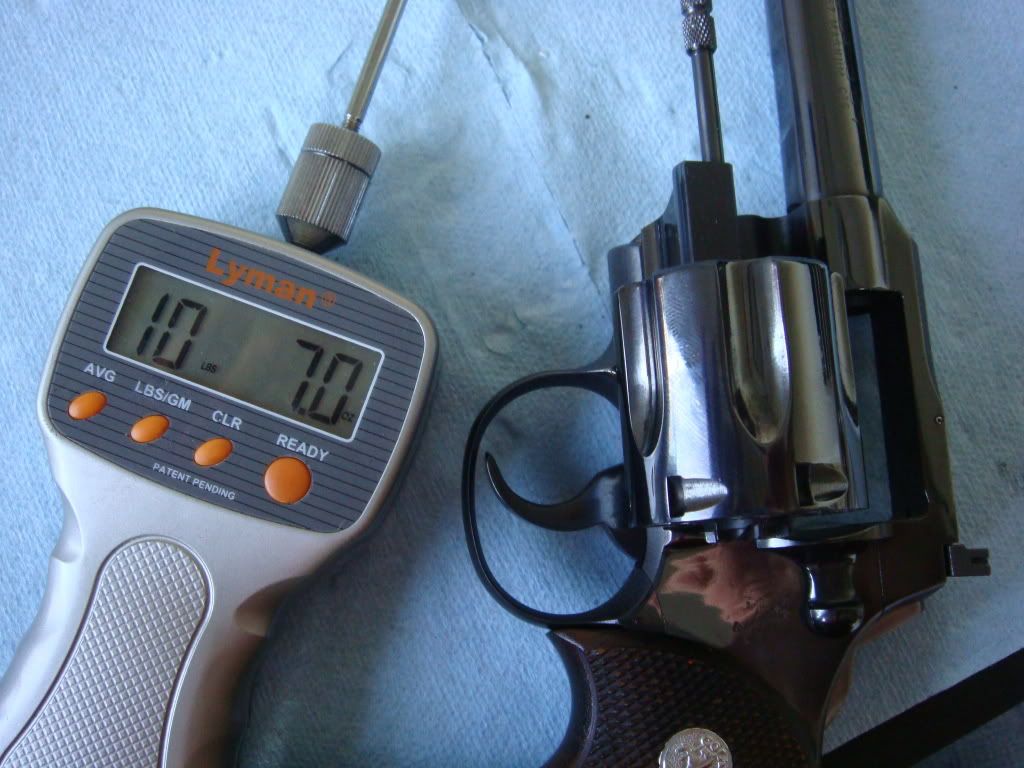
Average DA pull was around 10.5 with variance b/c I'm not using weights to measure. Not the greatest DA pull, but well within the norm for a python or 357. Remember this number b/c it's going to get sharply lower towards the end:
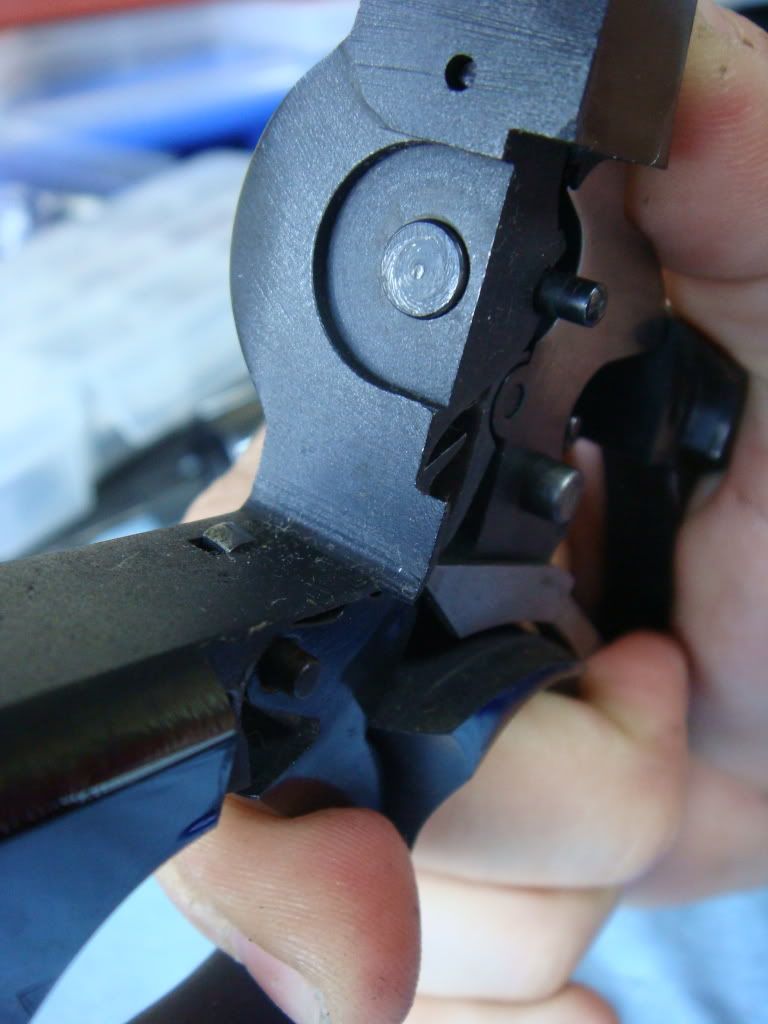
OK. So good so far. Only trouble seems to be a kind of sticky trigger. Taking the sideplate off we see it's b/c the hammer strut isn't resetting that well (the hammer strut is the part that is being pushed backwards by the end of the trigger (the sear)normally it would be sitting above the sear) :

One check for hammer / rebound fit is pulling the trigger back and pushing the hammer forward to see if the rebound moves (it shouldn't). After doing this a bunch you get used to the firing pin sticking out when you push the hammer forward. It doesnt' this time though:
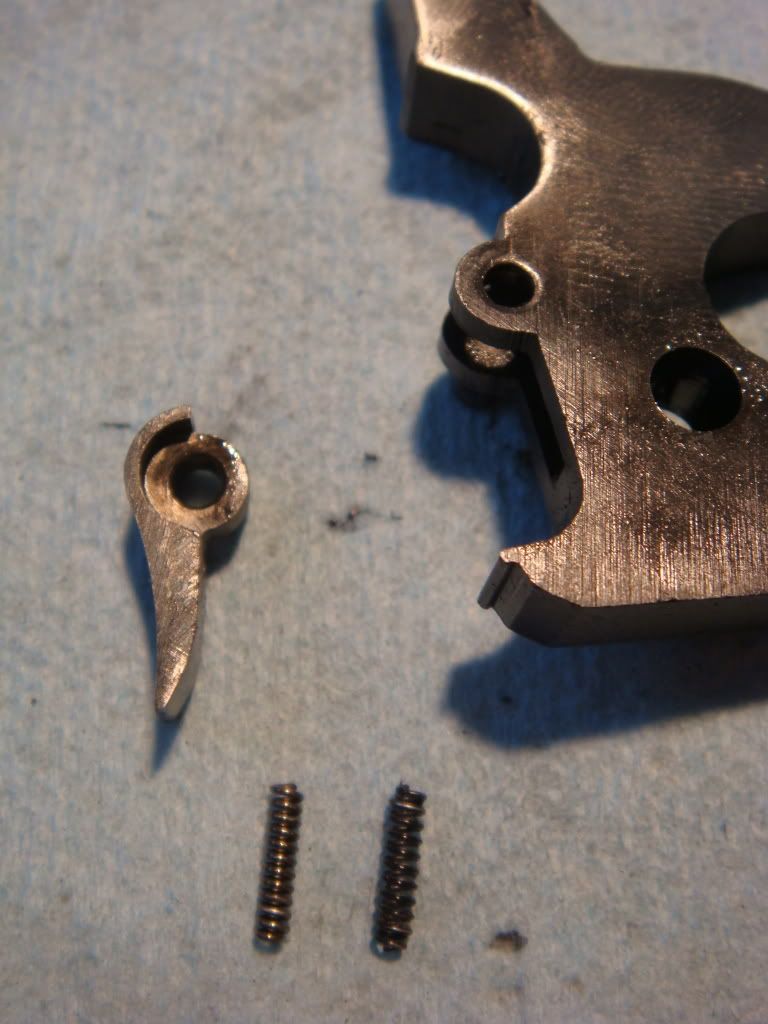
Looking a bit closer, one realizes the firing pin can't poke out since the firing pin broke, leaving just a jagged mess! Since this is an easy problem to fix and (rarely for the v-spring design) doesn't interfere with anything else, we do it first. First removing the rear sight, then pulling out the firing pin. The broken pin is obvious next to a working one:
Now, for the sticky trigger. As usual, there are a bunch of different possible causes. A few are that the rebound extension sides and edge are rough, as is the trigger or the surface of the hand cam. The solution is to polish them; since that would get done anyway to smooth the action, it gets done first. For good measure the hammer strut gets polished too just in case there is something making it catch.
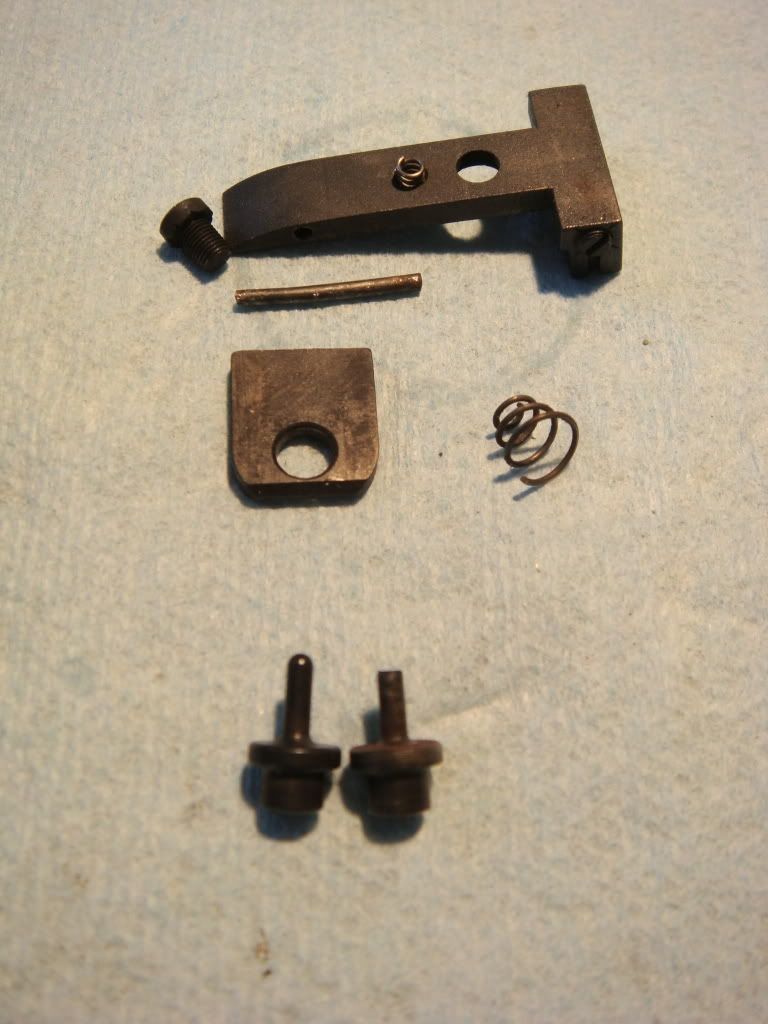
During this polishing, it became clear that the hammer strut spring was unusually vigorous in it's job of pushing the strut out. Now, why would that be? Oh, wait, there was a reblue. "I wonder if the guy made a mistake with springs?"
Well, yes of course he did. A bit hard to tell, but the correct spring is the larger one on the right (counter-intuitively it's weaker). The smaller, stronger one on the left was what the guy had stuck in the hammer. It resisted more so stopped the hammer from returning:
This got replaced with the right part. No sticky trigger. Good grief. At least that that easy.
After rechecking all the other parts, the first thing that usually gets done finally gets done: check if the bolt has the right tension against the frame. As part of this, the bolt spring gets removed. Guess where the original hammer strut spring was? Both springs are similar, so most likely the reblue guy swapped them. Though, I have no idea why he removed the hammer strut spring for a reblue --- possibly he also bobbed the hammer?
No pictures so you'll have to trust me that everything got put together, function checked, and almost passed. Unfortunately, someone modified the hammer by filing off the metal ledge right below where the hammer hits the firing pin (normal hammer on left, modifed on right):
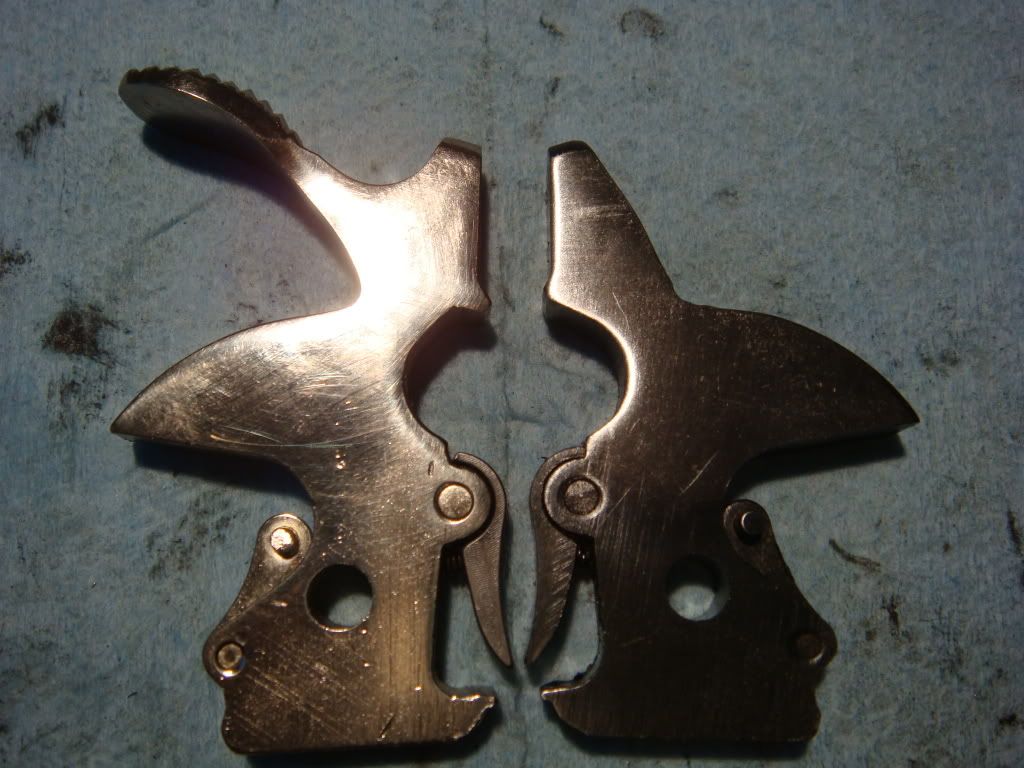
One guess is that this was bubba trying to "fix" the fact that the firing pin was broken --- "Pin too short? Hell, I'll just file me down this metal that's blocking the hammer!"
I'm not proud of it, but given my shortage of parts, I didn't replace the hammer since firing pin portrusion measured within spec (though a bit low rather than high as I would have expected).
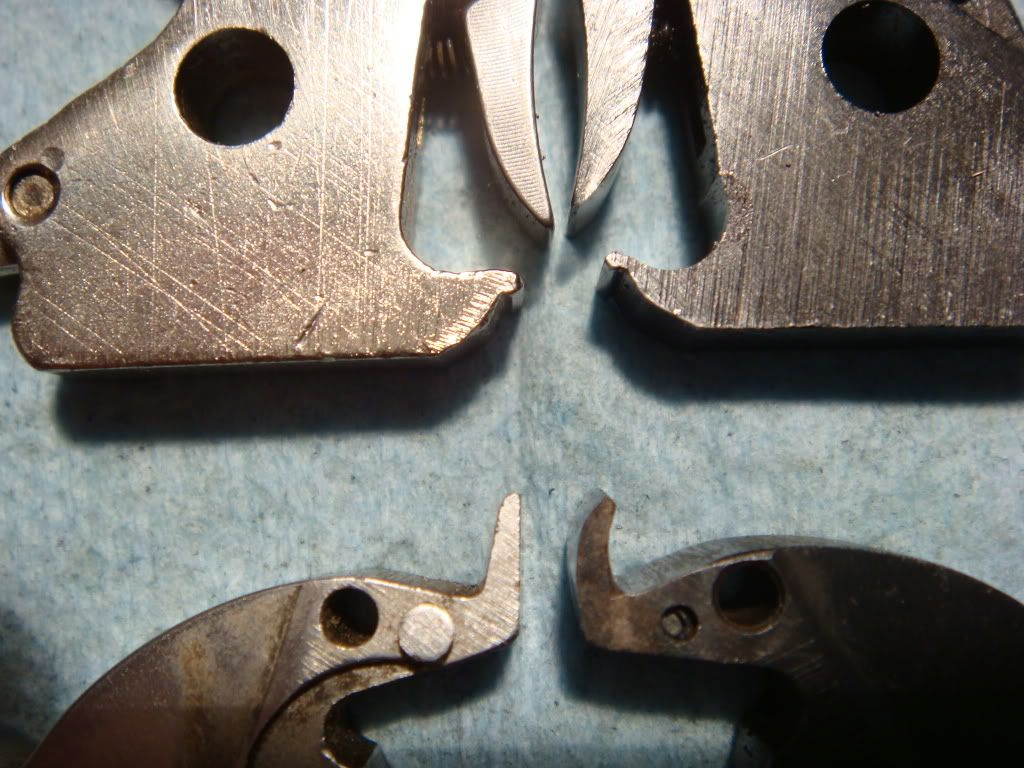
Now the fun part! Putting in a trigger with a curved sear! I just got the trigger back today; Frank Glenn curved it using a torch (great gunsmith and person to talk to: he explained how to do this to me). Colts stack b/c the normal sear is straight --- as a result pressure builds up the further back you pull it. Curving the sear brings the needed force closer to constant and is a classic colt action job fundamental. Often retaining SA is kind of a pain when doing these things, but since we are DOA only it should be a lot easier.
First step is filing a groove in the hammer toe so the strut does not get stuck. After doing this awhile we get this: normal trigger / hammer on the left, curved sear and hammer w/ groove on right:
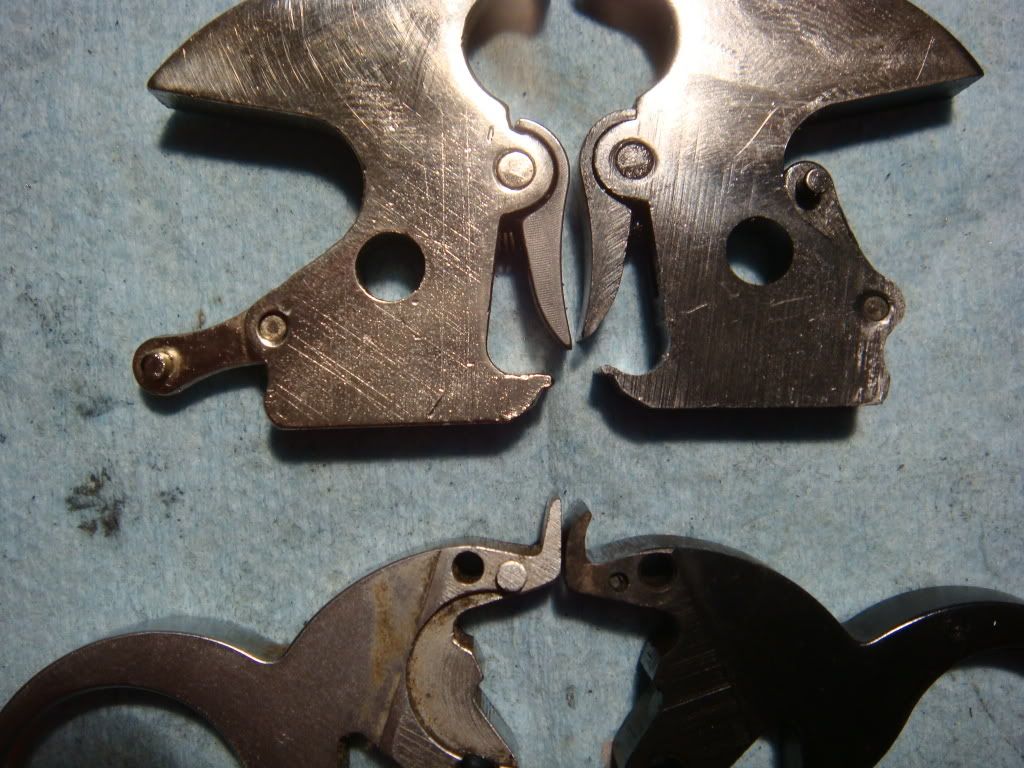
Closer:
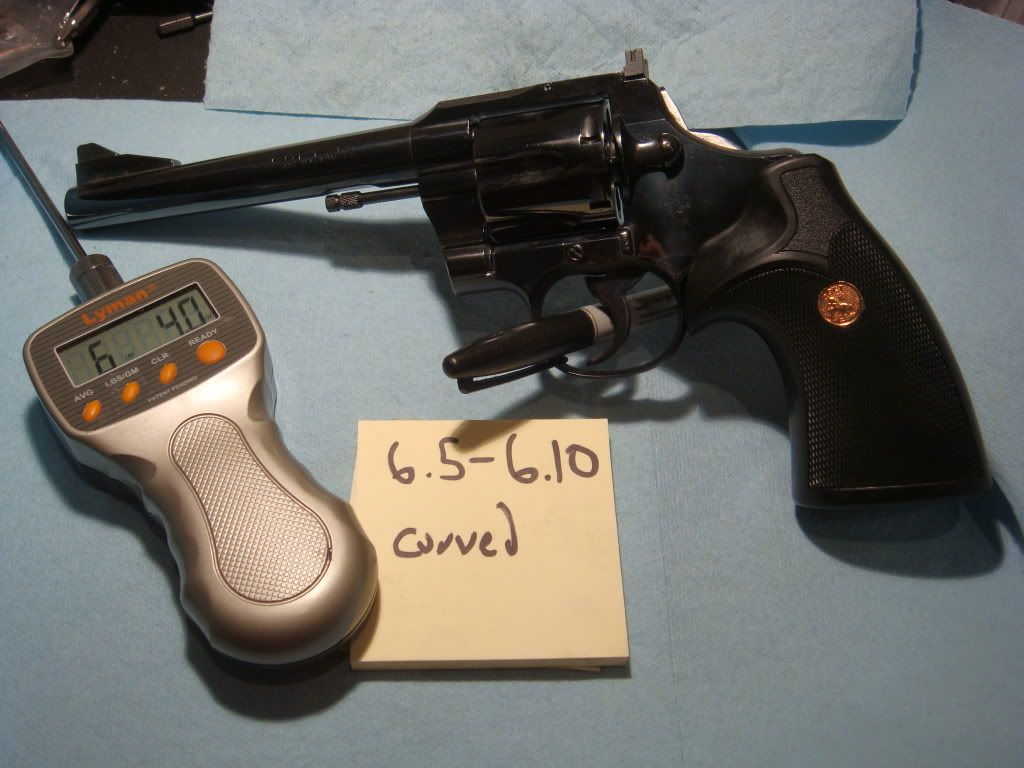
At this point the story is kind of long so put everything back together, check timing & etc (the hand, as usual is now long so this gets filed down), clean all the internals, moly-lube them, put on different grips to save the checkered ones and remeasure the DA pull.
This is the cool bit:the mainspring was not touched (and from the pictures you can see it's likely in it's factory-original state), but the DA pull drops to between 6.5-6.10lbs! And it is *smoooth*.
And there you have it.

No comments:
Post a Comment